
You've got the song. You've got the lyrics. You might even have a thumbnail idea for YouTube or a set list for a party. Then you hit the same wall almost everyone hits. The only file you can find is the original mix with the lead vocal baked in.
That's where a vocal voice remover stops being a novelty and starts being part of the actual workflow. The problem isn't just stripping a singer out of a track. The job is getting from a commercial song to something usable for karaoke, a cover performance, a lyric video, or a social clip without spending your whole evening wrestling with artifacts, timing, and exports.
Most guides stop too early. They show how to get a music-only file, then leave you alone with a folder full of stems and no clear path to a finished karaoke video. That gap is where most time gets lost.
Why You Need a Vocal Voice Remover
The common scenario is simple. You want to sing a song at an event, upload a cover, or build a karaoke video for your channel, but there's no clean backing track available anywhere. Maybe there is one, but it's low quality, in the wrong key, or loaded with backing vocals you don't want.
A vocal voice remover fixes that by separating the original mix into usable parts. In practice, that usually means one music-only stem and one isolated vocal stem. For karaoke creators, the music-only track is the prize. For remixers, cover artists, and editors, both stems can be useful.

The demand is real
This isn't some tiny audio niche anymore. The global AI Vocal Remover market was valued at USD 180.0 million in 2024 and is projected to reach approximately USD 880.1 million by 2034, growing at a CAGR of 17.2%, according to Market.us coverage of the AI Vocal Remover market. That tells you something practical. A lot of people now need fast vocal separation for music production, content creation, and karaoke work.
The shift makes sense if you've ever tried older methods. Manual vocal removal used to be a specialist task. Engineers would mess with phase cancellation, center-channel tricks, and narrow EQ cuts for hours, often just to get a result that was “good enough.” Modern AI tools can do the first pass in seconds.
Practical rule: You don't use a vocal remover because you expect perfection. You use it because it gets you to a workable starting point fast.
Where it helps most
The sweet spot for vocal removal usually falls into a few jobs:
- Karaoke production: You need a singable backing track without the lead taking over the mix.
- Lyric videos: You want clean music tracks so the text feels like the focus.
- Cover content: You need a version of the song that won't fight your own voice.
- Remix prep: Pulling stems from a full mix gives you material to rearrange.
The biggest misunderstanding is thinking the extraction step is the finish line. It isn't. It's the handoff point between audio prep and actual content production.
If you only need a quick practice track, a rough backing track may be enough. If you're publishing a karaoke video, every flaw becomes obvious once lyrics are on screen and the track plays front and center.
Choosing Your Vocal Removal Method
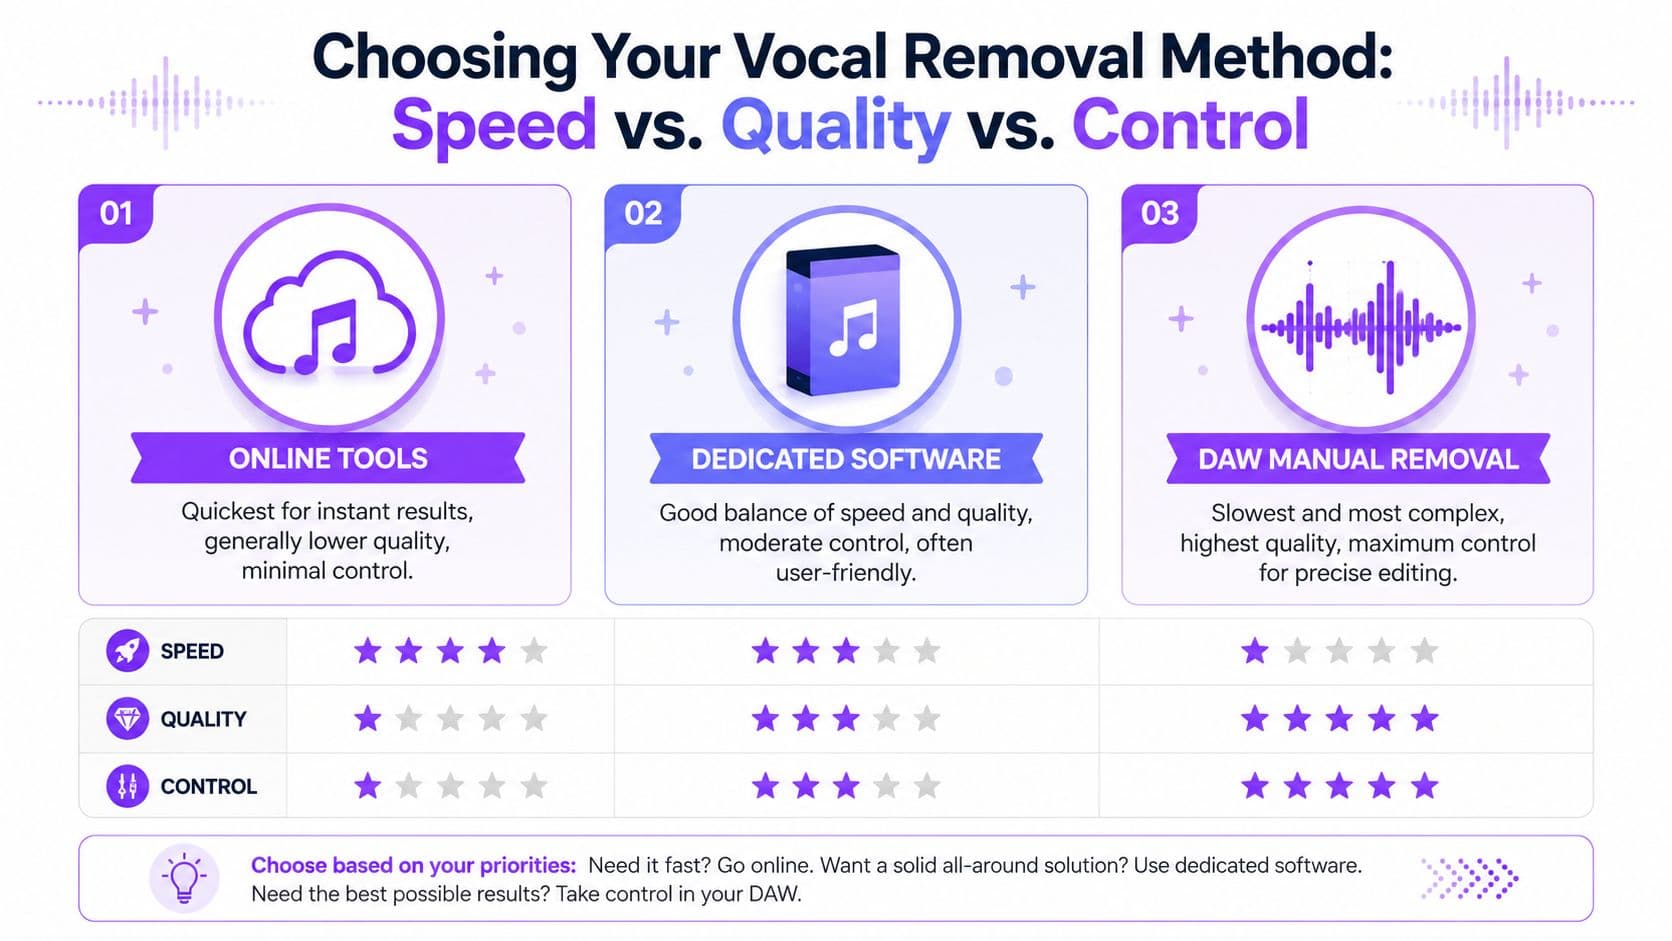
There isn't one right method. The right choice depends on what you care about most: speed, quality, or control. Users often start with the fastest option, then move to more hands-on tools when they hear the limits.
A practical comparison
| Method | Best for | Strengths | Weak points |
|---|---|---|---|
| Online AI tools | Fast karaoke prep, casual creators, quick tests | Fast, simple, no install | Limited control, artifacts can stay |
| Dedicated desktop software | Repeat creators who want more settings | Better balance of speed and tuning | More setup, quality still depends on source |
| DAW manual removal | Producers, editors, channel builders | Precise control, deeper cleanup options | Slower, more technical, easier to overprocess |
The mistake I see most often is choosing based on marketing language instead of workflow. If you're making one karaoke track for a birthday party, don't open a DAW and lose half a day. If you're building a channel library, don't rely on one-click exports for every song and hope the results always hold up.
What each path really feels like
Online AI tools are the fastest way to get from full song to a vocal-free track. You upload, wait, download, and move on. They're ideal when convenience matters more than surgical cleanup.
Dedicated software usually gives you a better middle ground. You may get model choices, de-reverb options, or stem-specific controls without going fully manual. For repeat use, that extra flexibility matters.
DAW-based work is where you go when the track is stubborn. Dense harmonies, heavy reverb, and center-panned instruments can all confuse automatic tools. In a DAW, you can target the problem instead of rerunning the same file and hoping for a miracle.
A good method isn't the one with the most buttons. It's the one that gets your specific song to a usable state with the least damage.
A quick way to decide
Use this if you're stuck:
- Pick online AI if you need results today and can accept minor leftovers.
- Pick dedicated software if you make karaoke or lyric content often and want more consistency.
- Pick a DAW if the song matters enough to justify manual cleanup.
A lot of creators end up using more than one. Fast AI for the first pass. DAW for repair. Video tool for final sync. That layered workflow is normal.
Instant Results with Online AI Vocal Removers
Online AI removers exist for one reason. They cut friction. You don't install anything, you don't route plugins, and you don't need to understand phase inversion before getting a result.
Most of them follow the same basic pattern. You upload a track, the service analyzes the frequency content and stereo placement, then it returns separated stems. Usually you'll get a vocal-only file and a music-only file.
The fast workflow
Here's the simplest way to use them well:
- Start with the cleanest file you have. If you can choose between a compressed rip and a cleaner master, use the cleaner file.
- Upload the full song. Let the tool process the whole mix rather than trimming aggressively at the start.
- Download both stems. Even if you only need the music track, keep the vocal stem for checking bleed.
- Listen on headphones first. Small artifacts show up faster there than on laptop speakers.
- Test the chorus before committing. The chorus usually reveals the worst separation issues because the arrangement is busiest.
If you want to try a browser-based option, MyKaraoke Video's free AI vocal remover shows the standard online flow clearly: upload, separate, preview, and export.
What online tools do well
The main advantage is speed. If your source is straightforward, meaning a fairly centered lead vocal and a clean stereo mix, these tools can produce a very usable karaoke track with almost no effort.
They also make experimentation cheap in time. If one song works and another doesn't, you've only spent minutes finding out. That's useful when you're prepping a batch of songs and deciding which ones are worth polishing further.
Short jobs where online tools make sense:
- Practice tracks for rehearsals
- Quick event prep for parties or bars
- Social posts where perfect isolation isn't necessary
- Draft karaoke versions before deeper editing
Where they fall short
The trade-off is control. If the model leaves behind vocal haze, sibilance, or a watery smear in the upper mids, you usually can't tell it exactly what to fix. You can rerun the file or try another service, but that's different from shaping the result.
That matters most on songs with stacked harmonies, wide stereo effects, or lots of reverb. Those mixes often confuse the model because the vocal isn't living in one tidy place.
Don't judge an online remover by the intro. Jump straight to the loudest chorus and the last sustained vocal note. That's where weak separation shows itself.
For many creators, online AI is still the right starting point. Just don't confuse “fast export” with “finished track.”
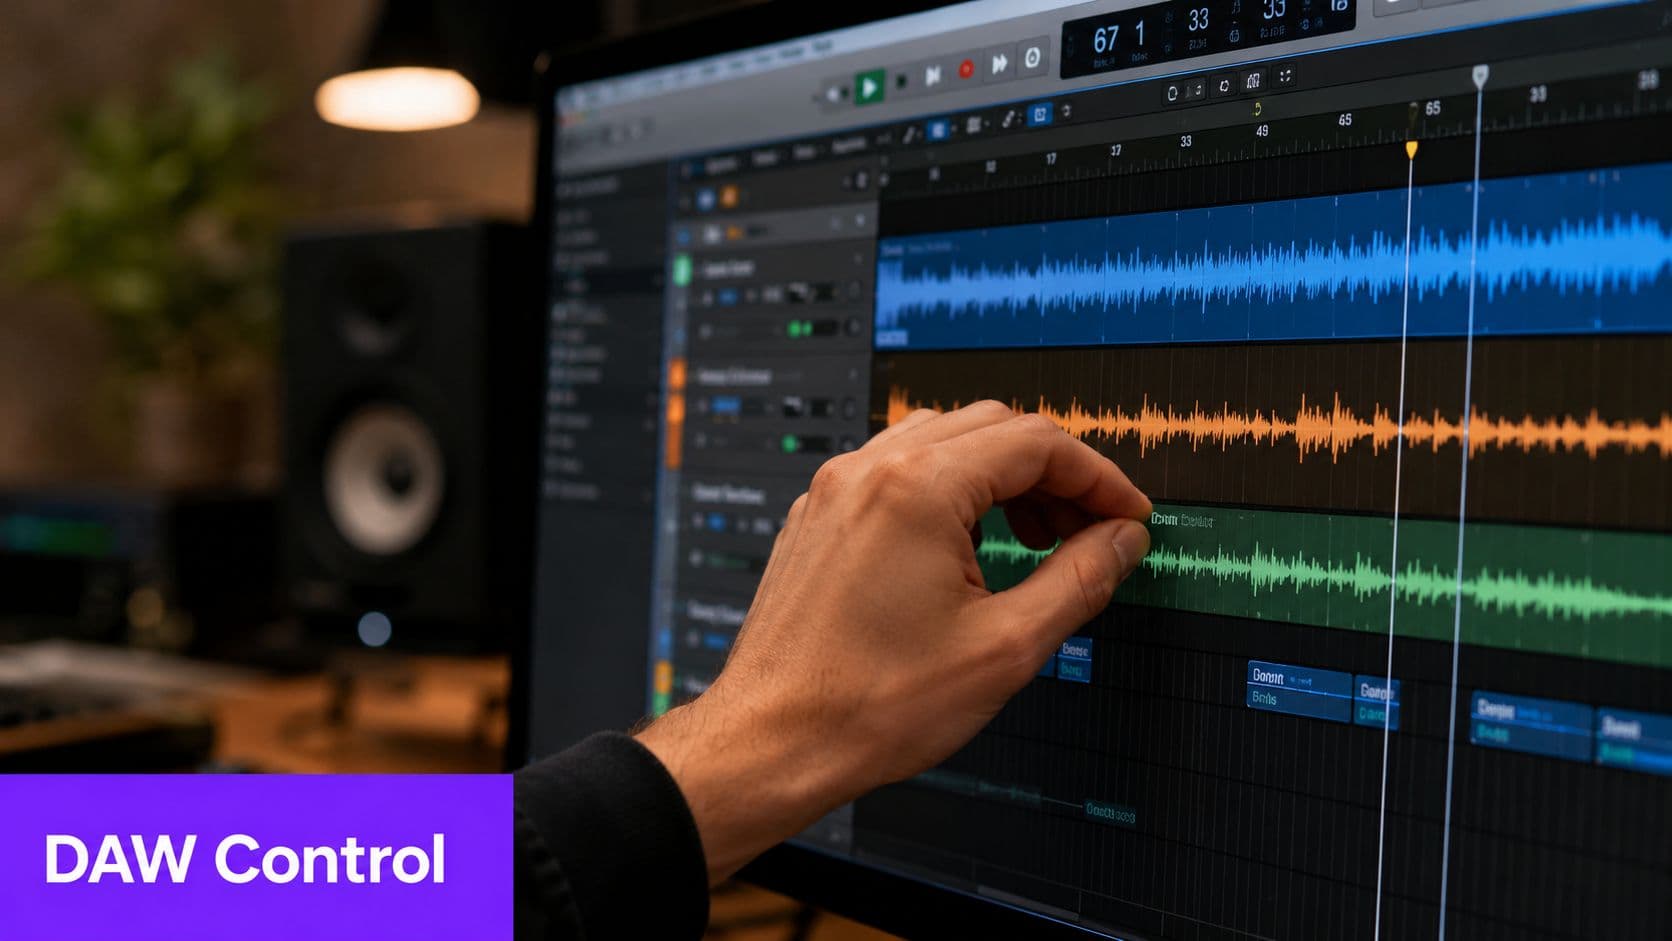
The Professional Approach Using a DAW
When a one-click remover gets you close but not close enough, a DAW is where you rescue the track. Audacity is the most approachable place to start, but the broader logic applies to other editors too. The goal isn't to brute-force the vocal out. The goal is to reduce what's in the center, preserve the instruments, and clean the leftovers in stages.
Why manual control still matters
Classic vocal removal relies on one stubborn fact. In many commercial mixes, the lead vocal sits near the center. So do kick, snare, bass, and some other important elements. That's why old-school phase cancellation often removes more than just the singer. It can hollow out the whole track.
Modern DAW work is better when you treat extraction as a multi-pass cleanup job, not a single aggressive hit. Verified benchmark guidance shows that a high-fidelity workflow using a multi-pass, frequency-targeted approach can achieve success rates exceeding 85% in reducing vocal artifacts, compared with 60 to 70% for single-pass aggressive methods. That comes from the verified benchmark data provided for this article.
A workable DAW chain
This is the sequence that tends to produce the cleanest karaoke backing:
- Split the stereo track into left and right channels. This lets you work more deliberately with center-heavy information.
- Use invert or center-reduction tools carefully. You're trying to weaken the vocal, not gut the mix.
- Apply moderate vocal reduction first. Keep it restrained so the snare and harmonic detail don't collapse.
- Normalize after the first pass. Restoring level helps you hear what remains.
- Use EQ to target leftover vocal presence. Focus on the vocal range without carving out the life of guitars, keys, and snare crack.
- Run a second, lighter reduction pass. This often cleans residue better than one hard pass.
- Check the track in mono and stereo. Some artifacts hide in one but not the other.
What to avoid
The biggest error is getting impatient. Over-aggressive filtering can leave you with a lifeless backing track that technically has less vocal but sounds worse to sing over.
A few common failures:
- Too much reduction early: You remove the lead and also flatten the track.
- Bad source material: Low-quality files make phase and masking problems worse.
- Ignoring loudness after processing: If you don't level-match, you may mistake “quieter” for “cleaner.”
If the instrumental loses punch after vocal removal, back off the reduction amount before touching more EQ. The first pass is often where the damage happens.
For studio-grade karaoke prep, this route gives you the most advantage. It's slower, but when a song is worth keeping in your catalog, manual control usually pays off.
From Audio File to Finished Karaoke Video
Here's the part most vocal remover articles skip. You've got the music track. Maybe you've even cleaned it up. But a karaoke video still doesn't exist.
What you have is an audio asset, not a finished piece of content.

The real bottleneck
For karaoke creators, lyric timing is often the slowest part of the job. The verified data for this article notes that 78% of karaoke creators report spending over 3 hours manually aligning audio with lyrics after using a vocal remover, described in the Google Play listing for unMix. That matches what a lot of creators already know from experience. Extraction is quick. Sync is where the clock disappears.
This is the Karaoke Video Workflow Gap. Most tools stop at “download your stems.” They don't help with lyric timing, line breaks, highlighting, background visuals, or export formatting.
If you're pulling songs from existing video sources before the vocal-removal stage, it helps to understand the prep side first. This guide on how to get audio from video files covers that front-end step.
What the full workflow should look like
A practical karaoke pipeline looks like this:
- Get the source audio from the cleanest file available
- Remove or reduce the lead vocal
- Check timing and trim silence
- Paste or import lyrics
- Sync each line to the music track
- Style the video for readability
- Export in a format that works for YouTube or playback screens
That's why integrated tools matter. Instead of bouncing between an audio remover, a text editor, a timeline editor, and a video exporter, some creators use a single browser workflow that handles separation and lyric sync in one place. One example is MyKaraoke Video, which combines vocal removal with lyric timing and karaoke video export.
A quick walkthrough helps more than a feature list, so this demo is worth watching:
What changes when the workflow is connected
The biggest improvement isn't just convenience. It's continuity. You stop losing momentum between stages.
When the music track, lyrics, sync editor, and video output live in the same process, you make better decisions faster. You hear a late lyric line and fix it immediately. You notice a section needs a longer gap before the chorus and adjust it on the spot. That's much harder when every step happens in a different tool.
For karaoke channels, that difference adds up. It turns vocal removal from a one-off trick into part of a repeatable production system.
Tips for Cleaner Audio and Fewer Artifacts
The fastest way to get disappointed by a vocal voice remover is to expect a perfectly empty center channel from every song. Dense pop choruses, live recordings, reverbs, doubled vocals, and stereo effects all make separation harder. If your remaining audio sounds robotic, watery, or phasey, that doesn't always mean the tool failed. It often means the song is difficult.
Verified data for this article notes that a 2025 MIT Audio Lab study found 65% of vocal extraction artifacts stem from AI models being overfitted to clean studio vocals, which creates problems on real-world material with reverb and dense harmonies, as referenced in the UVR 5 ensemble mode video URL used in the provided data.
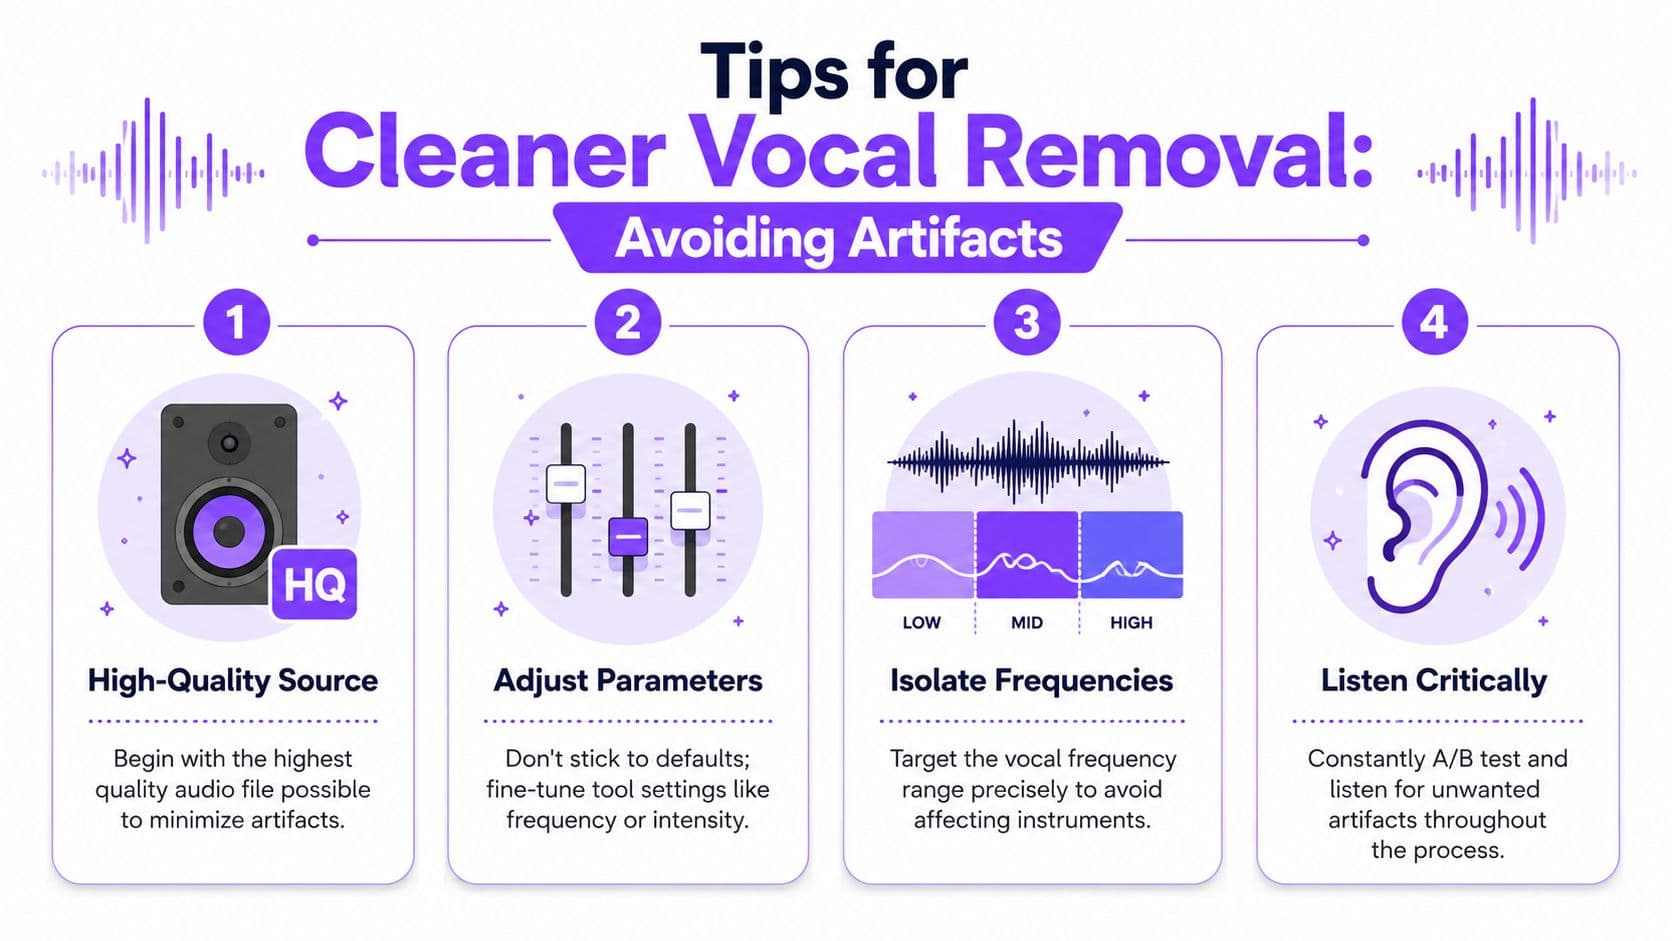
Start with the file, not the settings
Bad source audio makes every later step worse. If you feed an AI remover a rough MP3, the model has to separate a vocal from compression smear, stereo blur, and already-damaged transients.
A better rule is simple:
- Use the highest-quality source you can get
- Avoid clipping and distorted masters
- Keep a copy of the untouched original
- Compare exports against the source at matched volume
If your file also has hiss, room sound, or extra junk in the background, clean that first when possible. This guide on removing background noise from audio is useful before or after stem separation, depending on the material.
The fixes that actually help
Some cleanup moves work consistently. Others just make the damage more obvious.
What usually helps:
- Gentle second passes: Two restrained passes often sound better than one harsh one.
- Targeted EQ: Cut leftover vocal presence carefully instead of scooping the whole midrange.
- Critical listening on headphones: Artifacts hide on speakers and jump out on headphones.
- Model switching when available: Some songs respond better to a different separation model.
What usually hurts:
- Maxing out intensity controls
- Trying to erase every trace of the vocal
- Stacking random processors without level matching
- Judging quality from the intro alone
Cleaner karaoke tracks come from smarter compromises, not stronger settings.
Accept the trade-off
A usable karaoke backing track doesn't have to be clinically perfect. It has to feel natural enough that your singer, audience, or viewer focuses on the performance and lyrics instead of the leftover vocal shimmer in the background.
That's the practical standard. Preserve groove first. Protect harmonic detail second. Remove the vocal as far as the mix will allow without wrecking the song.
If you want a browser-based path from song file to karaoke video, MyKaraoke Video handles vocal removal, lyric syncing, and video export in one workflow, which is useful when you'd rather finish the video than juggle separate tools.