You shoot a great clip. The light is right, the movement feels spontaneous, and the moment is exactly what you wanted for a lyric or karaoke video. Then you play it back and the frame wobbles just enough to make the whole thing feel amateur.
That's where most creators get stuck. They search for how to stabilize video, find a tutorial that says “apply Warp Stabilizer,” and then discover the drawbacks later. The shot is smoother, but the frame is cropped, the corners wobble, or the motion looks oddly artificial.
A better approach is simpler. First, reduce shake while you shoot. Second, stabilize in post only as much as the clip can handle. If your final destination is a karaoke or lyric video, that balance matters even more because any crop or drift affects where your text sits on screen.
Why Your Best Shots Are Sometimes Shaky
You get the take right on the first try. The performer hits the moment, the light looks good, and the camera move feels natural while you shoot. Then you open the clip on a larger screen, add text, and the frame has just enough wobble to make the whole shot feel unstable.
That happens because cameras record the corrections your body makes without you noticing them. A phone picks up tiny shifts in your grip. A small mirrorless body does the same, especially when you shoot handheld for more than a few seconds. If you also plan to add lyrics or titles later, shake stands out even more because the viewer is trying to read while the background keeps drifting.

Three problems cause most of the footage creators try to rescue in post:
- Micro-jitter: Tiny tremors that make a locked-off shot feel restless.
- Walking bounce: Up-and-down movement from footsteps, common in performance, travel, and behind-the-scenes clips.
- Overcorrection: Small steering fixes while tracking a subject that show up as visible bumps.
I see one mistake all the time. Creators judge shakiness on the camera screen, where everything looks smaller and more forgiving. Once that same clip is used for a lyric video, or dropped into a project with text overlays like the ones many people build in music video projects shot on iPhone, small movement problems get exposed fast.
If you film weddings, live events, or performances, the problem usually is not lack of effort. It is speed. You are reacting, reframing, and trying not to miss the moment. A practical guide on creating stunning wedding films is useful here because it reflects the kind of fast shooting conditions where otherwise solid footage starts to wobble.
Practical rule: If a shot feels slightly shaky before editing, it will usually feel more shaky after you add lyrics, titles, or other graphic elements.
The hard part is that stabilization is never free. Smoother footage often costs you some frame area, changes the motion feel, or creates odd warping around the edges. Good editors do not treat stabilization as a magic fix. They treat it as a trade.
Preventing Shake Before You Hit Record
The cheapest stabilization tool is your body position. Before buying a gimbal or trying to rescue bad footage later, fix the parts of handheld shooting that create shake in the first place.
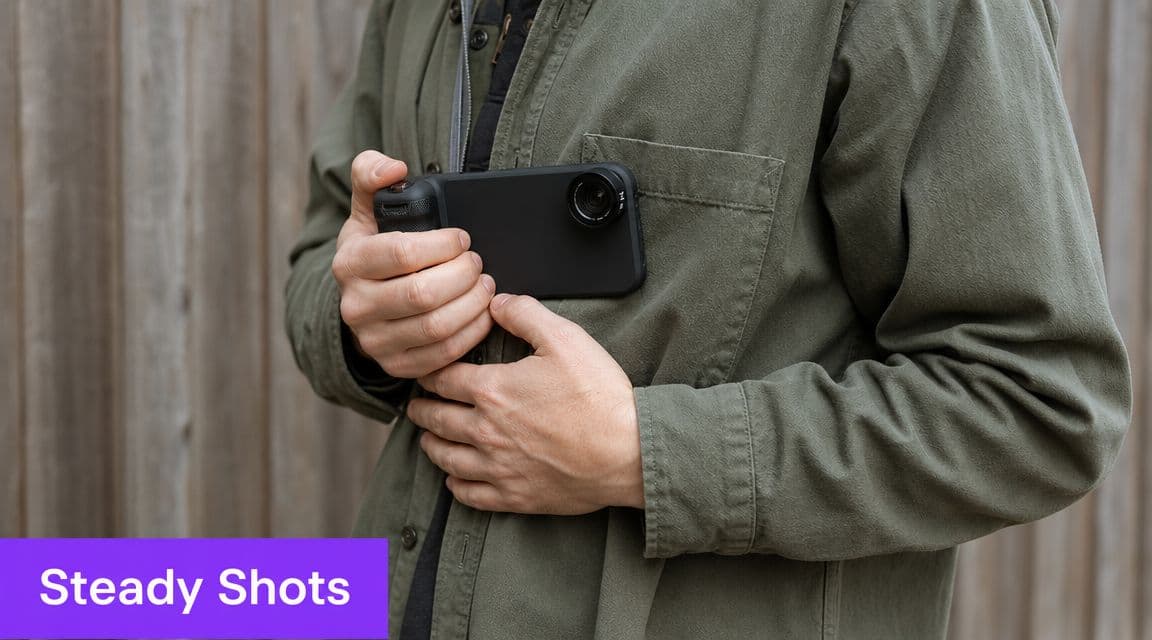
Use your body like support gear
Most beginners hold the camera away from their body and trust stabilization to do the rest. That's the fastest way to introduce wobble.
Do this instead:
- Hold with both hands: Keep your elbows tucked in so your torso carries some of the load.
- Brace against something solid: A wall, a doorway, a table edge, or a railing can turn a weak handheld shot into a usable one.
- Control your breathing: Press record, exhale, then make the move.
- Walk differently: Bend your knees slightly and absorb each step. Many creators call this the “ninja walk,” and it works because it softens vertical bounce.
If you shoot events or people in motion, small discipline changes matter more than most gear upgrades. That's one reason guides like SendPhoto's wedding video insights are worth reading. They reflect the kind of fast, uncontrolled environments where stable capture depends on technique.
Frame wider than you think you need
One of the smartest capture habits is leaving extra room around the subject. Wider framing gives stabilization software more image area to work with later.
That extra space protects you twice. First, it reduces the visual intensity of small shakes. Second, it gives you margin when the software crops the frame during correction.
If you're shooting social content or phone footage, it also helps to study workflows built specifically for mobile shooting. This guide to making a music video on iPhone pairs well with stabilization planning because phone footage often needs cleaner framing from the start.
Capture choices that help later
Educational material on stabilization describes a workflow that starts long before the edit. Clips are imported, shaky segments are identified, and stabilization is applied in software. Some editors also recommend higher frame rates and wider shots to preserve usable image area after correction, especially for 1080p delivery.
That advice matters because post-production can only work with what you captured. If the frame is already tight and blurry, the software has less room to hide the shake.
Later in the process, many creators add gyro-based tools to the mix.
When gyro stabilization makes more sense
Some footage shouldn't be perfectly locked off. It should feel handheld, just not distracting.
Recent tutorials on Gyroflow highlight workflows that use gyro metadata, lens profiles, horizon lock, and lower stabilization strength to preserve some handheld character instead of smoothing everything into a floating look, shown in this Gyroflow workflow overview. That's useful for action shots, casual performance footage, and mobile-first content where a little movement still feels alive.
Slight camera motion can feel intentional. Random shake never does.
How Software Video Stabilization Actually Works
Software stabilization works by trading part of the image for a steadier frame. The result can look much better, but the software gets there by cropping, shifting, and sometimes warping the shot.
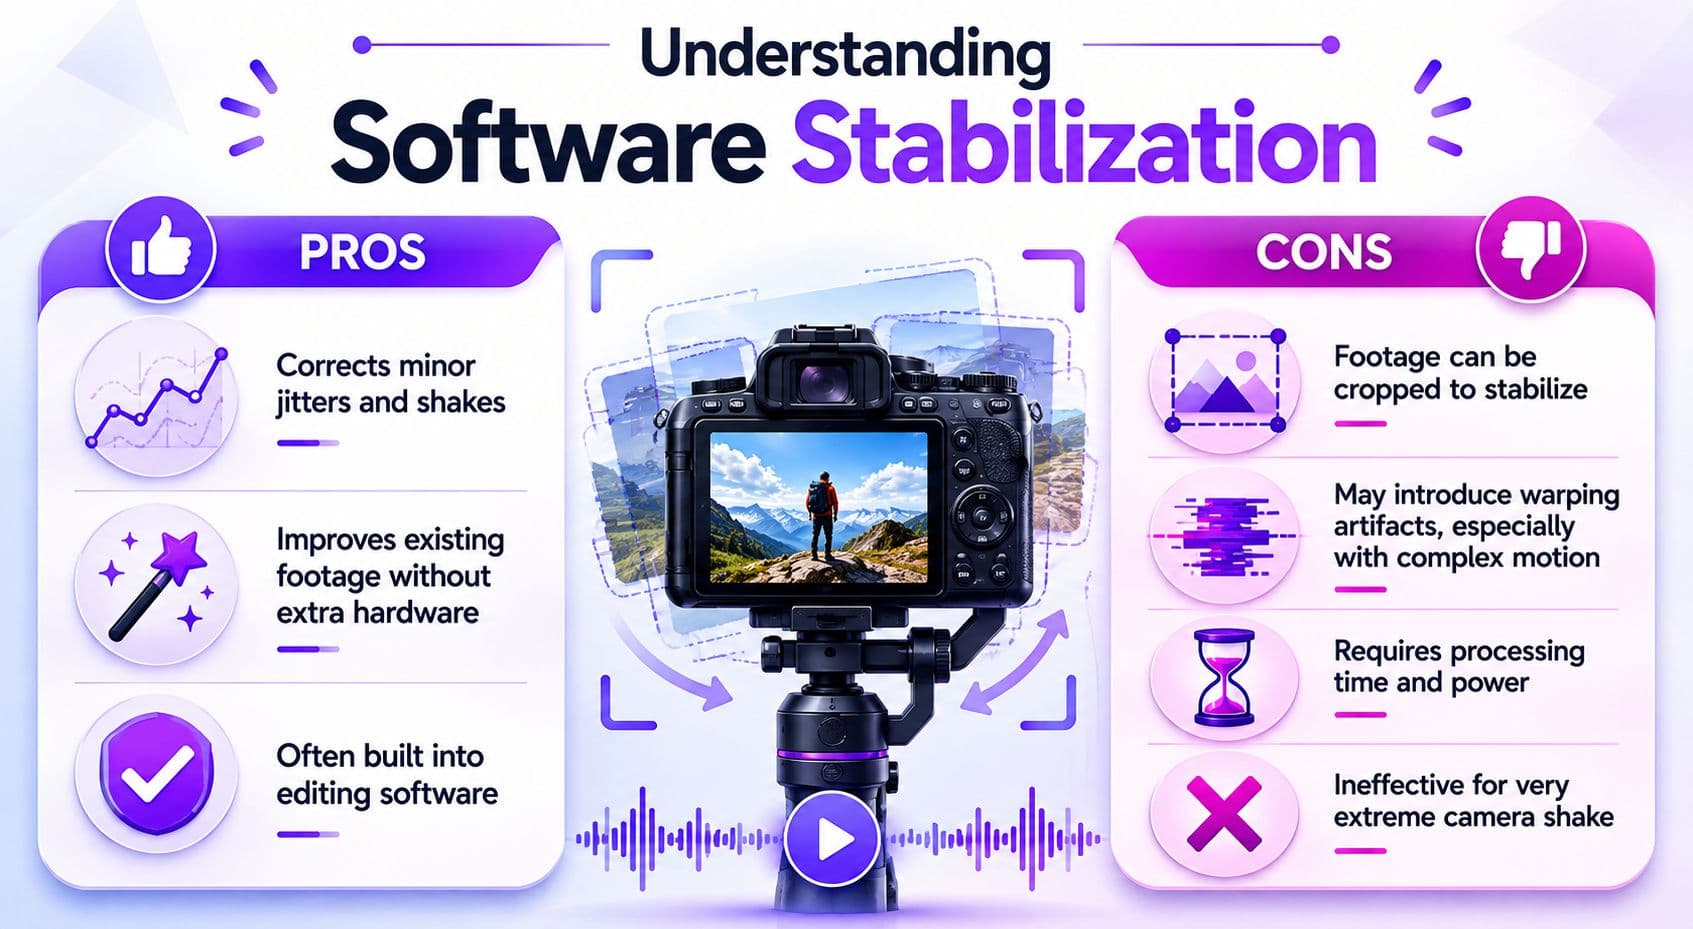
What the software is actually doing
The editor analyzes how the frame moves from one moment to the next, then offsets that motion so the subject appears more stable. To hide those corrections, it crops the outer edges and repositions the remaining image inside the frame.
That crop is the part many beginners underestimate.
If the shot was framed too tightly, stabilization has very little room to work. Push it too hard and you start seeing the usual side effects: softening from extra scaling, warped edges, or that rubbery wobble that makes faces and straight lines look strange.
What the software is balancing
Here's the practical version of what you're adjusting:
| Setting pressure | What you gain | What you risk |
|---|---|---|
| Lower smoothing | More natural motion | Some shake remains |
| Higher smoothing | Calmer frame | More crop, more artifacts |
| Strong correction on bad footage | Better stability on paper | Wobble, distortion, unnatural motion |
Different apps expose these controls in different ways. Some give you one simple strength slider. Others let you choose how much crop, smoothing, and edge correction to allow. If you are deciding which editor fits your workflow, this video editing software comparison is a useful place to check how those controls differ.
For karaoke videos and other edits with fixed text overlays, this trade-off matters even more. A heavily stabilized clip can change framing enough that titles, lyrics, or lower-thirds feel cramped against the edges after the crop. A slightly shakier shot with more image area often fits MyKaraoke Video overlays better than an over-smoothed shot that has lost too much frame.
Good stabilization removes distraction while keeping enough frame area for everything else the edit needs.
A Practical Post-Production Stabilization Workflow
A shaky clip usually looks fixable right up until the stabilizer starts cropping into someone's hands, bending a doorway, or making the camera drift in a way that was never there in the first place. That is why I treat stabilization like repair work, not a default effect. The goal is to save the shot without creating a new problem.
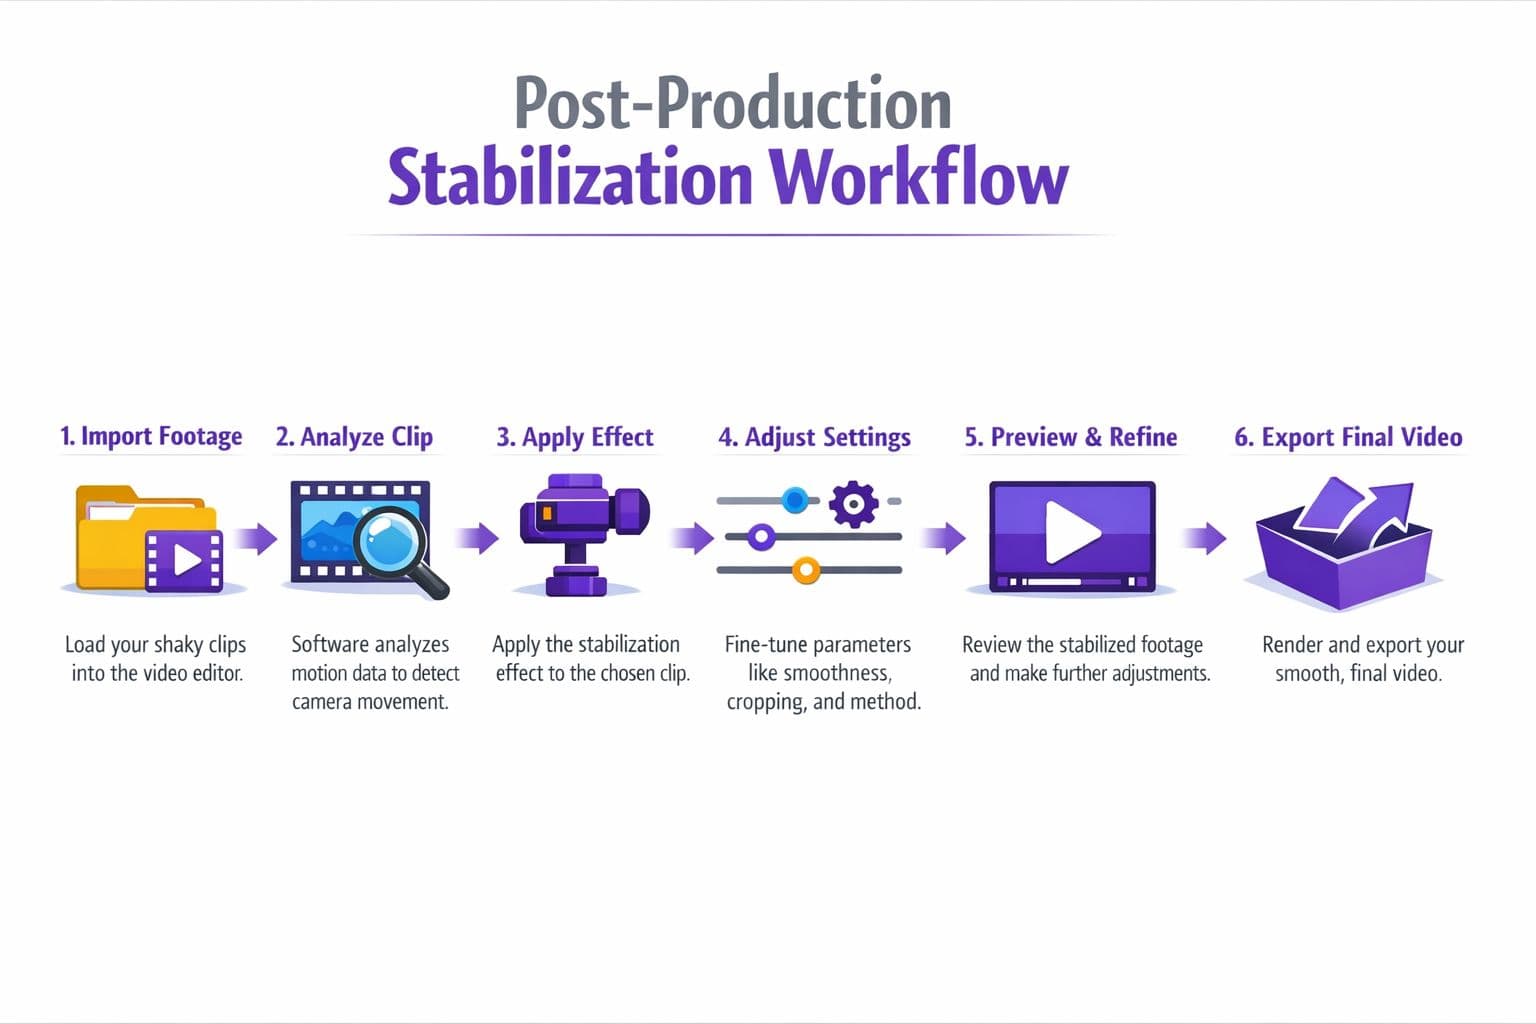
Step 1 and Step 2
Watch the clip once before touching any settings. Identify the motion you are fixing. Small handheld tremor needs a different approach than walking bounce or one hard bump halfway through the take.
Then trim to the section that needs correction. Stabilizers usually behave better on a short problem segment than on a long clip with mixed movement. If the shot is already inside a larger timeline, keep your versions organized. A clean process for editing an MP4 video helps here, especially if you are testing duplicates, nested clips, or alternate exports.
Step 3
Apply the stabilizer and let the analysis finish before judging anything. Until that pass is done, the preview can look worse or just misleading.
I usually duplicate the clip first and keep one untouched copy underneath. It makes A/B checks faster, and it gives you an easy fallback if the processed version starts to look synthetic.
Step 4
Start with low smoothing. Raise it in small increments.
This is the step beginners rush, and it is where shots get overcooked. A stronger setting can calm the frame, but it also asks the software to crop more aggressively and stretch the remaining image harder. That trade-off shows up fast on tight framing, wide-angle edges, and clips with people near the border of the frame.
Use a simple review pass:
- Check the corners first: Edge warping usually shows there before it shows anywhere else.
- Watch how people move through the frame: If they seem to glide or float, the correction is too aggressive.
- Scan for cropped details: Hands, microphone stands, signs, and headroom disappear quickly once the stabilizer starts pushing in.
- Pause on a few different moments: One section may look clean while another bends straight lines or shifts framing too much.
Capture conditions still matter in post. Motion blur, low light, and fast shutter changes give the software less reliable detail to track, so even a good stabilizer can struggle.
Step 5 and Step 6
Review the result full-screen and inside the edit, not just in the effect panel. A shot can look fine by itself and still feel wrong once it sits next to steadier clips.
For karaoke and lyric videos, do one more check before approving it. Turn on your text overlays or title-safe guides and make sure the new crop still leaves enough breathing room. This gets missed all the time. A stabilized clip that looks cleaner on its own can become a poor background for MyKaraoke Video if the crop pushes faces, bright lights, or important details too close to where the lyrics need to sit.
Export a short sample before committing to the whole sequence. Rendering makes wobble, soft edges, and drifting motion easier to spot than a quick timeline preview.
What usually works
- Minor handheld jitter: Usually worth fixing.
- Slow pans with slight wobble: Often responds well to moderate settings.
- Centered performance shots: Good candidates if the subject stays clear of the frame edges.
What often fails
- Walking footage in low light: Blur reduces tracking accuracy.
- Very tight shots: There is not enough extra frame area to crop.
- Fast whip-like movement: The correction can look stranger than the original shake.
If stabilization makes the shot look rubbery, overly cropped, or oddly floaty, keep the original motion or replace the clip.
Mastering the Stabilization Trade-Offs
A clip can look impressively smooth in the effect controls and still be the wrong choice in the edit. The usual problem is overcorrection. You remove the shake, but you also lose too much frame, bend straight lines near the edges, or give the shot that floating, disconnected feel.
Every stabilizer asks for the same compromise: more correction usually means more crop and more image manipulation. Tutorials often stop at “increase smoothness until it looks good.” In practice, that is how creators end up with shots that feel processed instead of controlled.
Keep enough movement to match the shot
Some footage should still feel handheld. Performance clips, rehearsal footage, backstage moments, and casual walking shots often benefit from a bit of natural movement. If you iron all of that out, the result can feel less real than the original shake.
I usually accept a small amount of motion if the subject stays readable and the frame does not pull attention away from the action. Viewers forgive mild handheld energy fast. They notice warping and aggressive cropping much faster.
Stabilize harder when the background has a job to do
If the clip is going to sit under lyrics or other on-screen text, the standard changes. A drifting background can make fixed text feel less stable, especially when bright details or faces keep sliding behind the words.
That is why I treat karaoke and lyric backgrounds differently from ordinary b-roll. I would rather apply a firmer correction to keep the frame calm, then back off only if the crop gets too tight or the edges start to wobble. For MyKaraoke Video, this trade-off matters more than it seems. A slightly looser shot often works better than a heavily stabilized one if it preserves clean space where the text needs to sit.
Use this filter before approving the shot
Ask these questions after stabilization, not before:
| Question | If yes | If no |
|---|---|---|
| Does the remaining shake still pull attention from the subject? | Increase stabilization slightly | Leave it as is |
| Does the crop cut into faces, hands, stage elements, or useful negative space? | Reduce the strength | Keep the current setting |
| Do edges stretch, wobble, or look rubbery during motion? | Try a different method or replace the clip | Approve the shot |
| Will this frame still support lyrics without crowding them? | Keep checking placement | Choose a wider or less-cropped version |
Some shaky clips clean up well. Others get worse the more you push them. Knowing where to stop is the part that saves your footage.
Using Stabilized Clips in MyKaraoke Video
When a stabilized clip is headed into a karaoke workflow, the final check isn't just “is it smooth?” The key question is whether it still leaves reliable space for lyrics.
Keep the export settings consistent with the rest of your project. If you stabilized at one frame rate and then export or convert carelessly, you can introduce timing issues or visual inconsistency. It also helps to review the final clip at the exact resolution you plan to use so the crop feels predictable on delivery.
The main practical issue is title-safe space. Stabilization often zooms the image slightly, so anything near the edges may end up closer to your lyric area than you expected. When you stabilize, leave visual breathing room above and below the region where text will appear. That way, the lyrics don't feel crowded against faces, horizons, stage lights, or moving background details.
For creators assembling lyric content in a browser-based workflow, MyKaraoke Video can fit after the stabilization stage because it lets you work with synced lyrics and exported video without needing a separate desktop karaoke tool. The key is to send it footage that has already been checked for crop, framing consistency, and readable background contrast.
A quick final checklist helps:
- Review the full frame: Make sure no important subject matter drifts into the lyric area after stabilization.
- Stay consistent: Match resolution and frame rate across clips so transitions feel clean.
- Watch readability: Busy motion behind text can still hurt legibility even if the shake is gone.
- Test a sample section: Drop in a verse and chorus before finishing the full video.
If you want a simpler way to turn stabilized footage and a song into a finished lyric or karaoke video, MyKaraoke Video gives you a browser-based workflow for syncing lyrics, customizing visuals, and exporting a polished video without installing traditional editing software.