
So, you want to make a music video with just your iPhone? Honestly, it's never been easier. Forget all the noise about needing a Hollywood-sized budget or a truckload of gear. The most powerful tool you need is probably in your pocket right now.
This isn't just a gimmick; it's a legitimate creative movement. We're going to walk through the entire process, from that first spark of an idea to the final, polished video that you can share with the world. Think of this as your personal roadmap, packed with real-world advice for turning your song into a visual story.
This shift towards DIY video production isn't just for struggling artists anymore, either. It’s a smart business move. One study revealed that 50% of companies are now bringing their video production in-house. Why? It's all about creating awesome content without breaking the bank. In fact, 40% of creators are aiming to keep their project costs under £500. Your iPhone is the key to unlocking that kind of professional, budget-friendly magic.
The best camera is the one you have with you. For millions of us, that's our iPhone. It's a killer combination of a fantastic camera, easy-to-use apps, and pure convenience that has totally leveled the playing field for creators.
Your iPhone Music Video Production Blueprint
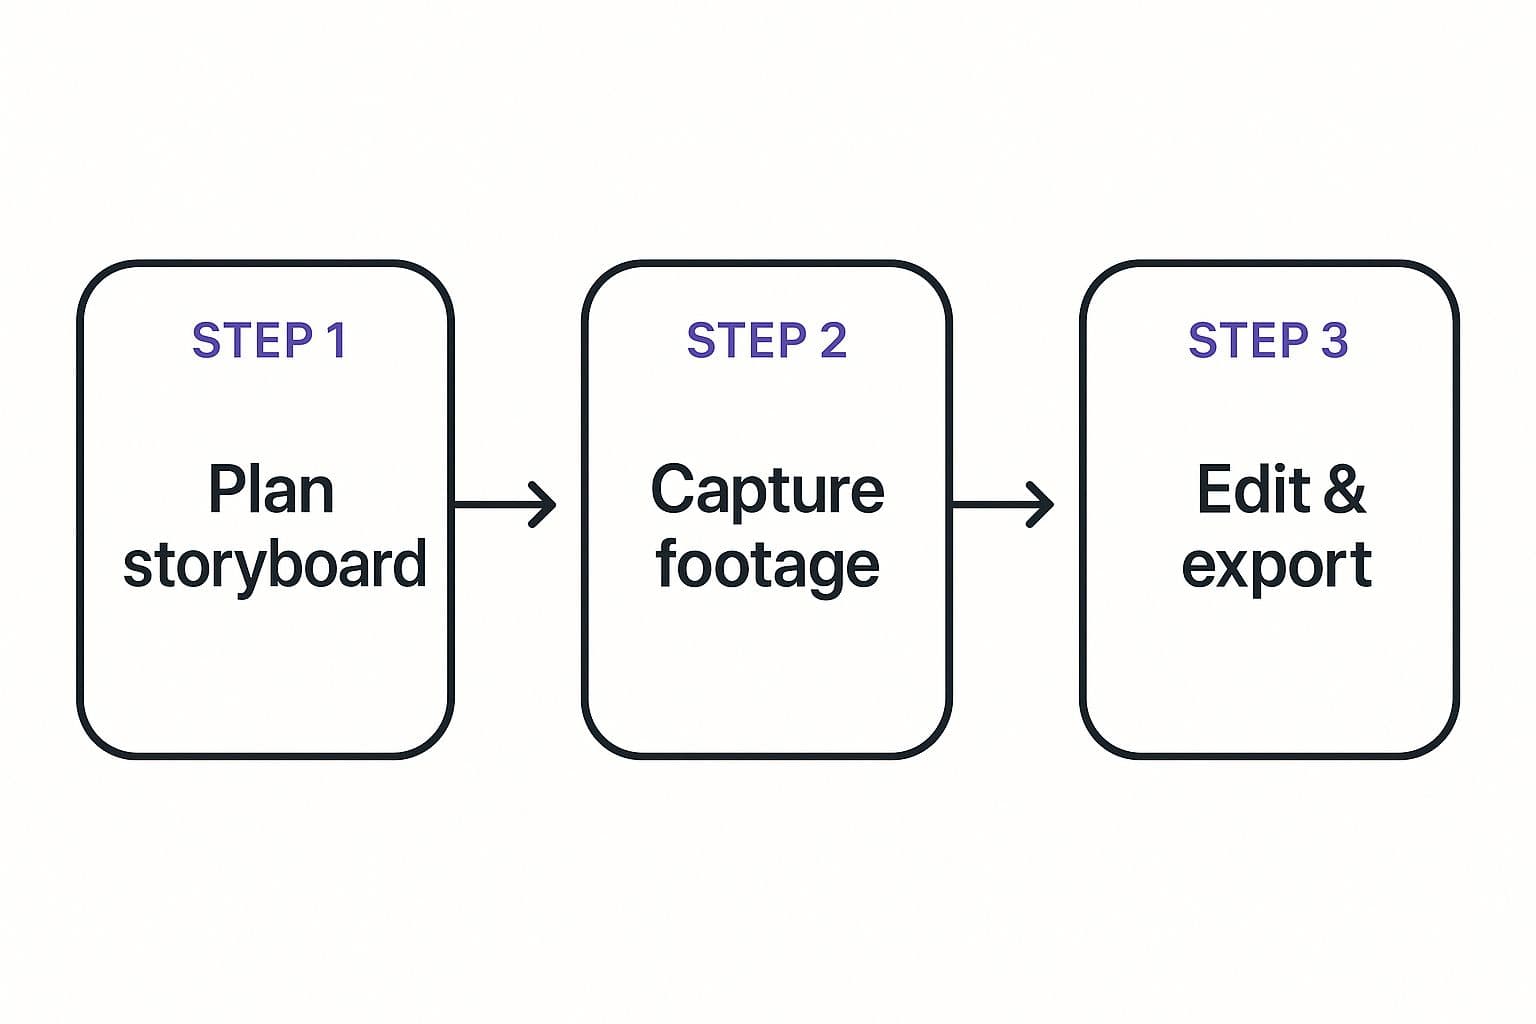
So, how do you actually pull this off? It really comes down to four core phases. Getting these right is the secret sauce to a video you'll be proud of.
Here's a quick look at the four core phases for creating your music video, which we'll explore in detail.
| Phase | Key Objective | What You'll Achieve |
|---|---|---|
| 1. The Big Idea | Nail down your concept and story. | A clear vision that guides every decision. |
| 2. Lights, Camera, iPhone! | Capture all the footage you need. | A library of high-quality clips ready for editing. |
| 3. The Edit Bay | Assemble your video and add effects. | A compelling narrative with professional polish. |
| 4. Showtime! | Export and share your masterpiece. | A final video file optimized for your audience. |
Having a simple plan like this makes the whole process feel less overwhelming and a lot more fun.
This whole workflow—from planning to shooting to editing—is the secret to making something great. Let's break it down.
See? It's not rocket science. The real magic starts long before you even hit the record button. A little bit of planning makes filming a breeze, which in turn makes editing a genuinely creative and enjoyable process instead of a total headache.
Why Your iPhone Is a Creative Powerhouse
Using your iPhone is about more than just saving a few bucks. It’s about creative freedom and speed. You can grab shots on the fly, try out weird ideas, and experiment without the pressure of a full film crew breathing down your neck.
Here’s why it just works:
- It's an all-in-one studio. You can literally shoot, edit, and upload your entire project from one device. It’s wild.
- It's incredibly cost-effective. No need to spend thousands on cameras and lenses. You can put that money back into your music.
- The quality is legit. Modern iPhones are packed with insane features like Cinematic Mode and Action Mode that can give you shots that look like they came from a much more expensive camera.
Ready to dive in? We’ll guide you every step of the way, with practical tips and the best apps to use. If you want an even deeper dive, check out our complete guide on how to make a music video.
Let's get that vision out of your head and onto the screen.
Crafting Your Vision Before You Film
Let's be real: the difference between a forgettable clip and a killer music video isn't the camera—it's the plan. Winging it sounds fun, but it almost always ends in a jumble of random shots that don't quite fit together. This is where you lay the foundation. It’s the unglamorous but absolutely essential work that makes your shoot day a creative blast instead of a chaotic mess.
And yes, your iPhone is more than up for the task. It's no surprise that iPhones are everywhere in the creative world. They pull in a staggering 51% of Apple's total revenue, which means Apple is constantly pouring money into making that little camera in your pocket better and better. This is fantastic news for independent artists like us.
From Vague Idea to Concrete Plan
Okay, so you have a song. Great. But a music video needs more than just a performance. What’s the story? What’s the vibe? Are you going for heartbreak and rainy windows, or a high-energy party scene? Don't just think "a video for my song." Think narrative. Think mood.
To really get the gears turning, it’s worth digging into some classic visual storytelling techniques. You'll find tons of inspiration for building a narrative that hooks people in and complements your music perfectly. The goal is to make something that tells a story, not just shows you singing.
Once that lightbulb goes off and you have your core concept, it’s time to nail down the specifics.
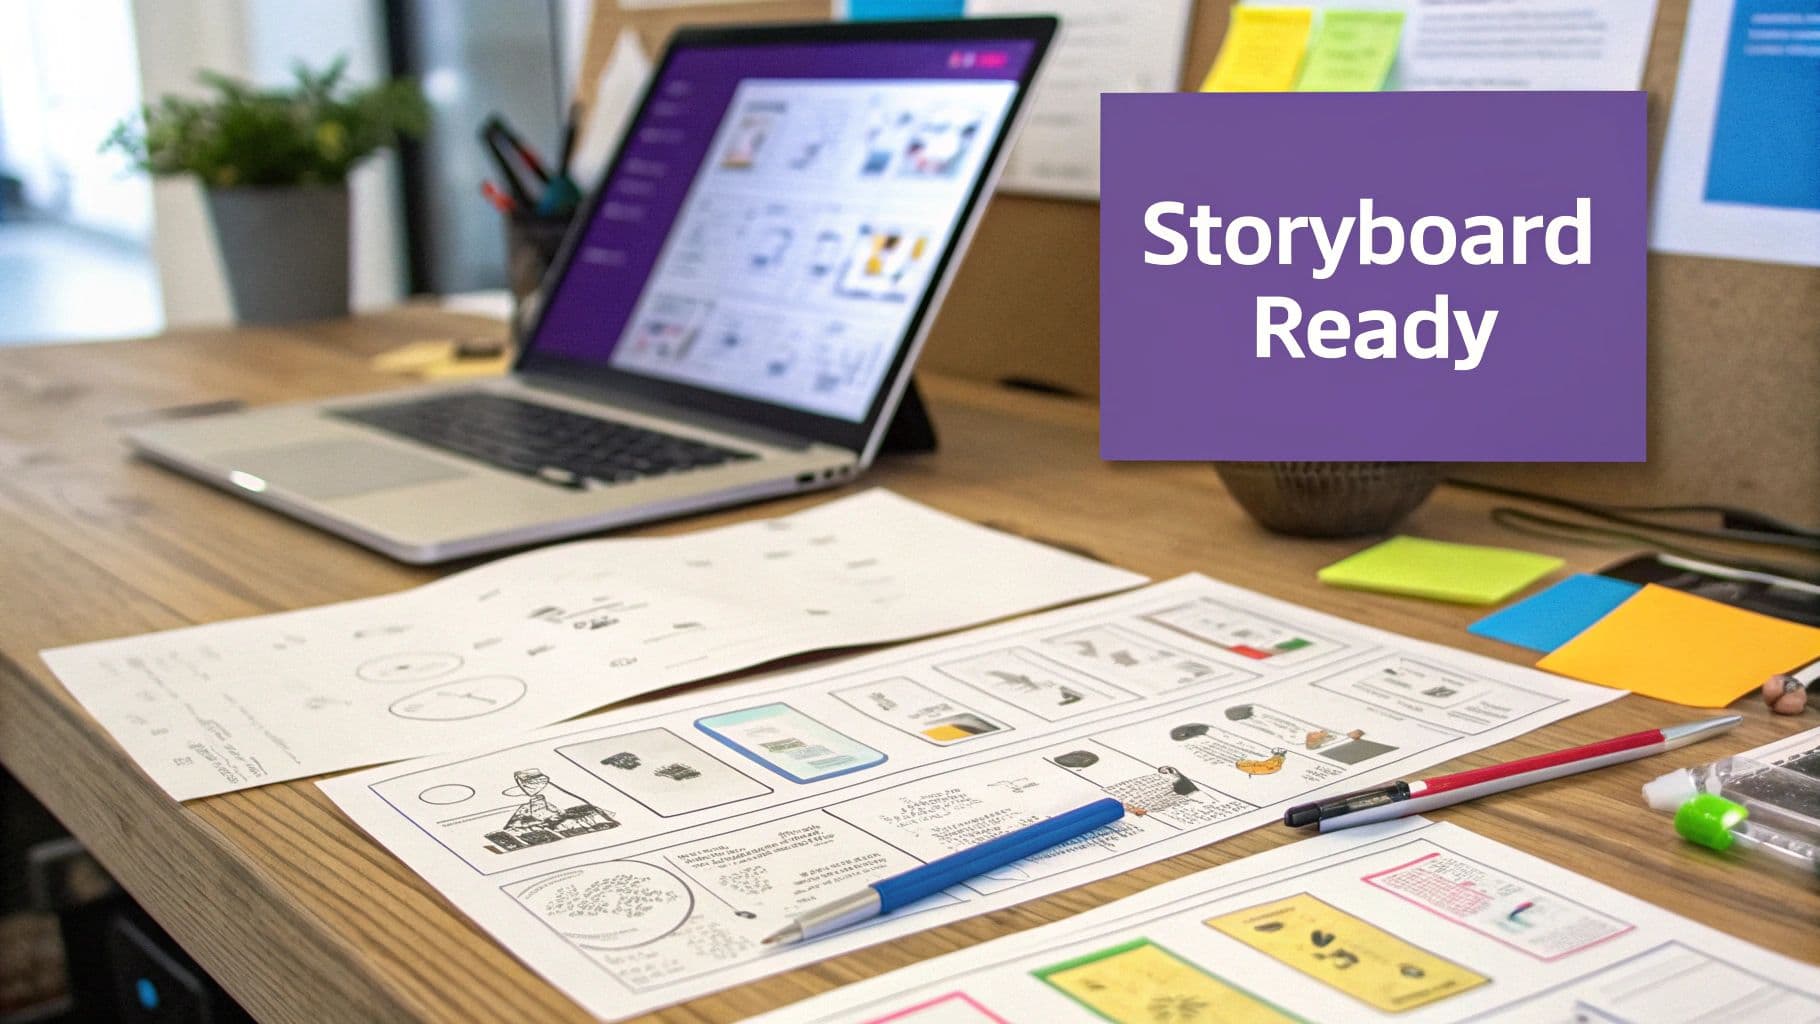
Storyboarding and Shot Listing Your Scenes
This part sounds intimidating, but it’s actually a ton of fun. A storyboard is basically a comic-book version of your music video. You absolutely do not need to be a professional artist—stick figures are your best friend here! Just sketch out each key moment to see how the video will flow from one scene to the next.
Your shot list is the practical, nitty-gritty checklist that brings your storyboard to life. Think of it as your battle plan for the day of the shoot. It guarantees you won't get home, start editing, and realize you forgot that one crucial close-up.
A good shot list has a few key columns:
- Shot #: Just to keep things in order.
- Description: What's happening? (e.g., "Singer sips coffee, looking out a rain-streaked window").
- Shot Type: Get specific! Is it a wide shot, a close-up on their face, an over-the-shoulder?
- Location: Where are you filming this?
- Notes: Anything else? Camera movement? A specific prop? Weird lighting? Put it here.
I cannot stress this enough: Planning your shots beforehand is the single best way to save yourself a massive headache on shoot day. It’s what turns chaos into focused, creative energy.
Scouting Locations and Essential Gear
With your shot list ready, you can start hunting for the perfect spots. When you're filming with an iPhone, light is everything. Look for places with amazing natural light; it’s free and it makes your footage look incredible. Also, listen. That cool, bustling street might look great, but if the background noise is a nightmare, it could wreck any audio you plan on using from the clip.
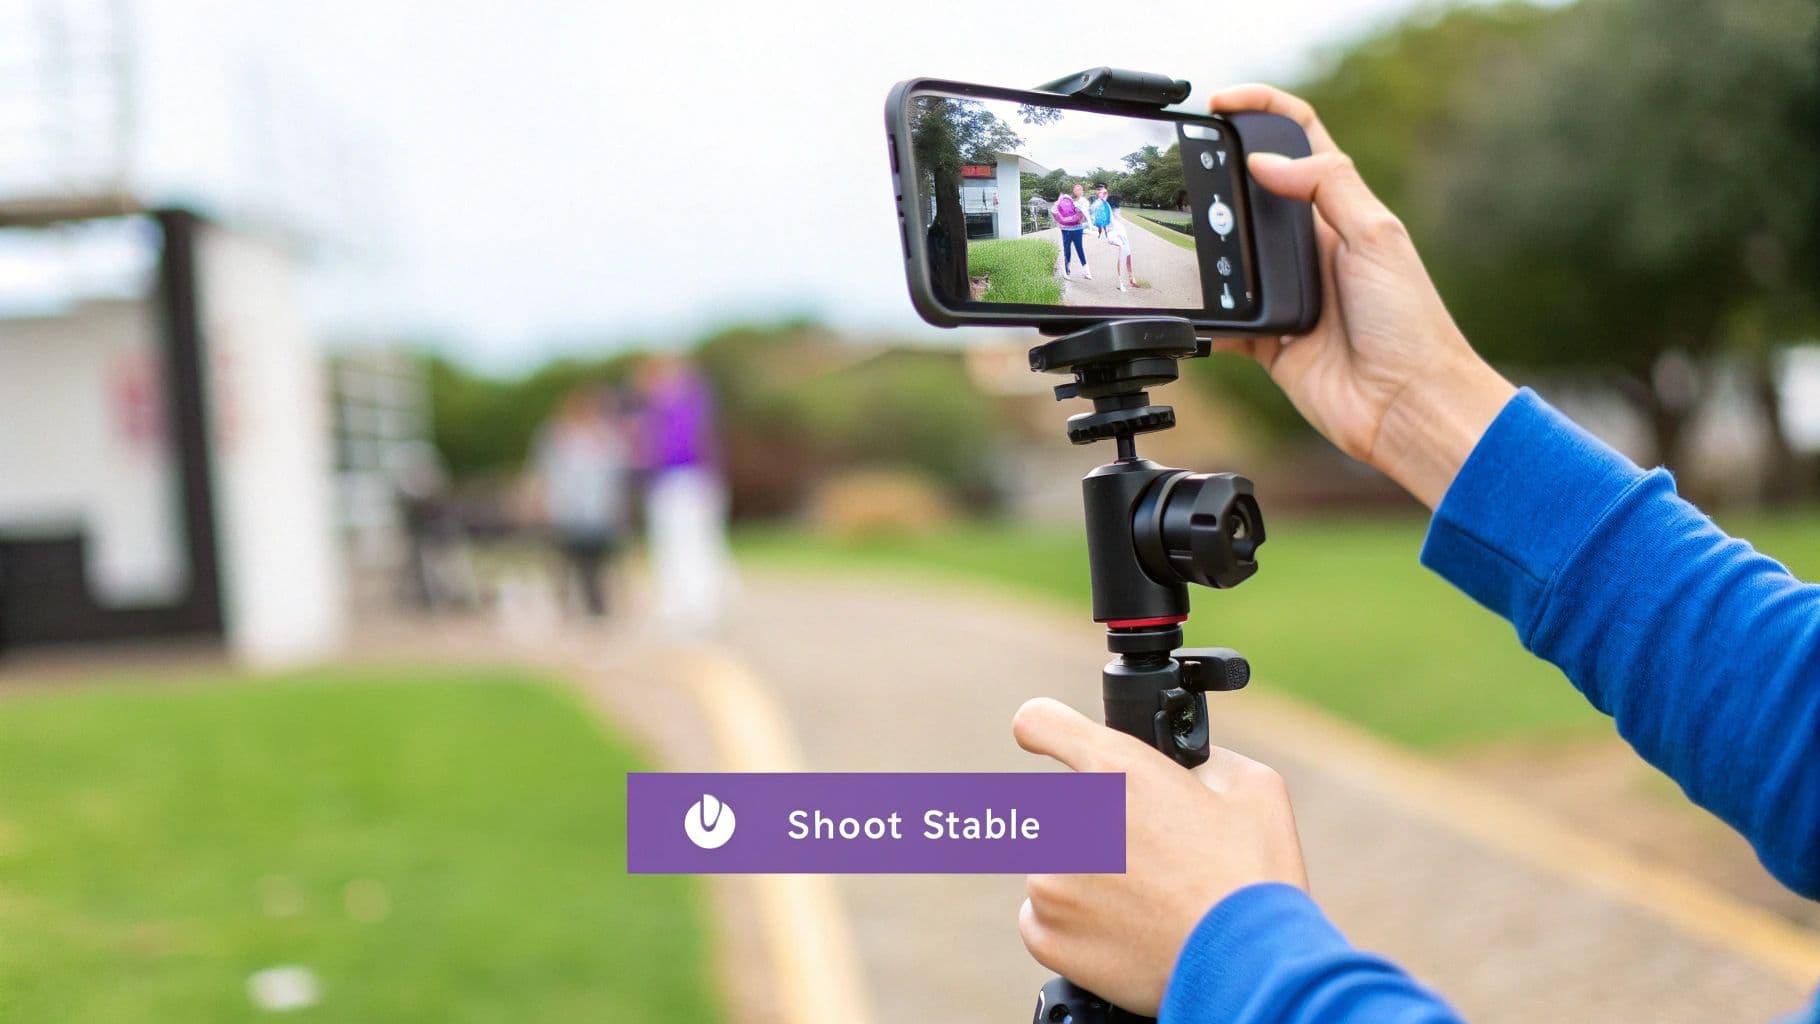
You don't need to rent a Hollywood production truck. A simple, cheap tripod will do more for your video's quality than almost anything else—no more shaky, amateur-hour footage. If you're shooting inside or at night, a small portable LED light is a lifesaver. It smooths out harsh shadows and gives you that clean, professional glow. Seriously, that's it. A tripod and a small light are all you need to take your iPhone video from "pretty good" to "wow, you shot that on your phone?"
Pro Filming Techniques for Your iPhone
Alright, your shot list is locked and loaded, and the vision is crystal clear in your head. It’s showtime! This is the fun part—bringing that creative plan to life with the powerhouse camera sitting right in your pocket. Forget about getting lost in complicated settings. A few simple tricks are all it takes to make your footage look less like a random home video and more like something with real cinematic flair.
Before you hit record, do the single most important thing you’ll do all day: grab a microfiber cloth and wipe your iPhone's lenses. I know, it sounds almost too simple to be true, but smudges and fingerprints are the number one killer of crisp, professional-looking video. This two-second step makes a world of difference.
Next, get friendly with the AE/AF Lock. You know how when you tap your subject in the Camera app, the iPhone smartly adjusts the focus and exposure? Well, the moment you or your subject moves, the camera can start "hunting" for focus again. This creates those annoying, amateur-looking shifts in brightness and clarity mid-shot. To stop this, just tap and hold on your subject until you see that yellow "AE/AF LOCK" box pop up. Now, everything is locked in for a beautifully stable and consistent take.
Tapping Into Your iPhone’s Best Features
Modern iPhones are sneaky little beasts, packed with features that used to cost thousands in dedicated cinema gear. Knowing what to use and when is how you'll make a music video that really pops.
- Cinematic Mode: This is your shortcut to that gorgeous, blurry background—what the pros call a shallow depth of field. It automatically finds faces and creates that professional "pop" that separates your subject from the background. It’s absolutely perfect for performance close-ups where all eyes need to be on the artist.
- Action Mode: Planning a scene with running, dancing, or any kind of fast movement? Switch on Action Mode. The built-in digital stabilization is mind-blowingly good, making your handheld shots look as smooth as if they were filmed on a pricey gimbal.
Here's a piece of advice I live by: always, always shoot more footage than you think you need. Extra takes, wild angles, and tons of B-roll (those extra shots of hands on a guitar, the scenery, bits of the location) are your best friends when you get to editing. Trust me, your future self will thank you.
Mastering Movement and Light
A static, motionless shot can be powerful, but a little camera movement injects energy and emotion into a video. You don't need a Hollywood dolly rig; just a few intentional moves can work wonders. If you want to take your shots from good to great, an accessory like the DJI Osmo Mobile 6 can be a game-changer. A gimbal like this makes it easy to pull off buttery-smooth pans, tilts, and tracking shots that look incredibly polished.
Finally, let's talk about the real MVP of any video shoot: light. Good lighting isn't just a suggestion; it’s everything.
Your best (and cheapest) light source is the sun. If you can, try to film during the "golden hour"—that magical window of time about an hour after sunrise or an hour before sunset. The light is soft, warm, and makes everyone look fantastic. Shooting indoors or after dark? A small, affordable LED light can be your best friend, helping you kill harsh shadows and shape the exact mood you’re going for.
Editing Your Video and Telling a Story

Alright, this is the fun part. You’ve got a phone full of amazing clips—every angle, every performance take, every gorgeous B-roll shot. Now, it's time to stitch them all together and turn that raw footage into a story that pops.
Don't let the idea of "editing" intimidate you. The days of needing a souped-up computer and a degree in filmmaking are long gone. The editing suite is literally in your pocket. This incredible accessibility is why so many artists are taking control of their own visuals. The proof is in the numbers: music apps on iOS boast an insane 47.1% conversion rate, according to stats on Business ofApps.com. That means people want to get creative on their phones, and app developers are racing to give us more powerful tools.
Choosing Your iPhone Video Editing App
Before we dive into the creative side, you’ve got to pick your weapon of choice. Your iPhone is loaded with potential, but the app you use will define what you can achieve. Luckily, there’s a perfect app for every budget and ambition.
Let's break down some of the heavy hitters. I've used all of these for different projects, and each one has its own personality.
Choosing Your iPhone Video Editing App
A quick comparison of top editing apps to find the perfect fit for your music video project.
| App | Best For | Key Features | Price |
|---|---|---|---|
| iMovie | Beginners & Quick Edits | Super intuitive, classic timeline, decent filters, seamless Apple integration. | Free |
| CapCut | Social Media & Trendy Effects | Auto-captions, keyframing, massive library of viral sounds and effects. | Freemium |
| LumaFusion | Pro-Level Control | Multi-track editing, advanced color grading, professional audio mixing. | $29.99 |
Ultimately, the "best" app is the one that feels right for you. If you want to dig deeper into even more options, check out our full guide to the best video editing software for music videos.
The Editing Workflow: A Visual Symphony
Got your app? Great. The actual process of building your video is pretty similar no matter which one you chose. It’s all about finding the rhythm and matching the visuals to the vibe of your song.
First things first: import your song into a new project. Drop that audio track onto the main timeline. This is your foundation, your roadmap for everything that follows. Listen to it. Then listen again. Feel the emotional shifts, pinpoint the beat drops, and identify where the energy builds and falls. These are your natural edit points.
Now, start pulling in your clips. Drag your best performance takes onto the timeline, lining them up with the verses and choruses. See that B-roll footage you shot? Weave it into the intros, outros, and instrumental breaks to add texture and tell more of the story. Don't be afraid to make quick cuts—trim the awkward silence before you yelled "action!" and the moment of relief after you yelled "cut!"
Pro Tip: Your most powerful editing tool is the simple "cut." Seriously. A cut that lands perfectly on a snare hit or a powerful lyric has more impact than the flashiest, swooshiest transition you can find. Use your cuts to drive the energy.
Once everything is assembled, it’s time for the final coat of paint: color grading. This is what separates a bunch of random clips from a cohesive, professional-looking video. You don’t need to be a Hollywood colorist. Most apps come with built-in filters (sometimes called "LUTs") that can instantly give your footage a cinematic, moody, or vibrant feel. Pick one that matches your song's tone and apply it consistently across all your clips.
This final polish is what makes the magic happen, turning your hard work into a real music video you can be proud of.
Adding Polish and Sharing Your Masterpiece
You’re on the home stretch! All the puzzle pieces are in place, your story is flowing, and the video is looking seriously good. But hold on—don't slam that "Upload" button just yet. A few final touches can take your project from just another video to something truly unforgettable.
This is the polishing stage. It's where you meticulously check every detail to ensure all your hard work pays off. Skipping this step is the difference between a video that feels homemade and one that looks and sounds professional.
That Final Sound Check
First things first, let's talk audio. Grab a good pair of headphones—not just your phone's speaker—and listen to the entire video from start to finish. Is your song the star of the show, loud and clear? You also need to make sure any ambient sounds you kept from your original clips, like city noise or a snippet of dialogue, are perfectly balanced. They should add atmosphere, not distract from the music.
Exporting Like a Pro
Once the sound is dialed in, it’s time to export your masterpiece. This isn't a "one-size-fits-all" deal. Different social media platforms have their own rules and preferences for video, and getting this right is crucial for making your video look sharp everywhere it lands.
Here's a quick cheat sheet for the most common spots:
- YouTube: This is the land of widescreen. Stick to a 16:9 aspect ratio and export at the highest resolution your phone can handle, ideally 1080p or even 4K. Giving YouTube a high-quality file means it will look amazing on everything from phones to big-screen TVs.
- Instagram & TikTok: These are all about vertical video. To fill the entire screen and stop scrollers in their tracks, you'll want to export in a 9:16 aspect ratio.
After you’ve got the perfect export, you'll have a pretty hefty file on your hands. Knowing how to share large video files easily is a lifesaver, whether you're sending it to collaborators for feedback or just backing it up.
A killer thumbnail is non-negotiable. Think of it as the movie poster for your music video. Don't just let the platform pick a random, blurry frame. Spend a few minutes finding or creating a high-energy, intriguing image that screams "Click Me!"
Launching Your Video to the World
Alright, the upload is done. Now what? You have to become your own biggest fan and promoter. It's time to put on your marketing hat.
Start by writing a compelling description. Don't just put the song title. Tell the story behind the track or share a fun anecdote from the video shoot. Give people a reason to feel connected.
Next, master your tags. Think like someone who has no idea who you are. What would they type into the search bar to find music like yours? Use a mix of broad tags (like "indie pop music video") and super-specific ones (like your artist name, song title, and even the "iPhone music video" tag). This is how new fans will discover you.
Finally, shout it from the rooftops! Share clips on your Instagram Stories, post the full link on X (formerly Twitter), and send it to your friends and family. You poured your creativity into this, and it deserves to be seen. Don't be shy—get the word out
Common Questions About iPhone Music Videos
So you're ready to shoot your first music video on an iPhone? Awesome. But I bet you've got a few questions buzzing around your head. It’s totally normal. Let’s unpack some of the most common worries I hear from artists so you can get rolling with confidence.
First up, the big one: audio. How on earth do you get great sound when an iPhone mic is… well, an iPhone mic? It’s fine for a quick Instagram story, but for a music video where the track is everything, it just won’t cut it.
Here’s the pro secret, and it’s surprisingly simple: don't record your audio and video at the same time. During the shoot, just blast your mastered track from a separate speaker and lip-sync along. This trick instantly separates your pristine, studio-quality audio from the on-set recording, giving you the best of both worlds.
Making Your Footage Look Cinematic
"Okay, but how do I make it not look like I just shot it on my phone?" This question comes up all the time. Getting that slick, cinematic vibe really boils down to three simple things: stability, lighting, and a sense of depth.
- Stability is Key: Nobody enjoys watching shaky-cam chaos. A cheap tripod is honestly the single best piece of gear you can buy. It’s an instant game-changer.
- Master the Light: Think like a photographer. The "golden hour"—that magical hour right after sunrise or before sunset—gives you gorgeous, soft light for free. Steer clear of that harsh midday sun; it creates nasty, unflattering shadows.
- Create Depth: If your iPhone has Cinematic Mode, use it! It beautifully blurs the background and makes your subject pop, just like a pro camera. No Cinematic Mode? No problem. Just create physical distance between your subject and whatever is behind them. The effect is surprisingly similar.
Don't overthink it. Seriously. The most beautiful videos are often built on the basics. A stable shot with beautiful natural light will beat a shaky, poorly lit shot loaded with gimmicky effects every single time.
What About Battery Life and Storage?
Ah yes, the practical stuff. Shooting video, especially in glorious 4K, absolutely demolishes your iPhone's battery and eats up storage like a black hole. Showing up with a fully charged phone is the bare minimum. For any shoot longer than an hour, a portable power bank isn't just a good idea—it's essential. You don’t want to be the person who missed the perfect take because their phone died.
And before you even think about hitting record, do a major spring clean of your phone's storage. A recent look at the iPhone 16 Pro Max mentioned its wild 33 hours of video playback, but that number plummets when you're actively filming. Offload old photos, delete apps you never use, or back things up to the cloud. Trust me, there is no feeling worse than the "Storage Almost Full" pop-up appearing mid-shot.
Once you’ve nailed the shoot and your masterpiece is edited, the real work begins: getting people to see it. For a ton of great advice on that, check out our guide on how to promote music on YouTube.
Ready to add that final professional touch? With MyKaraoke Video, you can whip up incredible lyric or karaoke videos in just a few minutes, all from your web browser. Give your fans a visual experience they won't forget. Start creating today at https://www.mykaraoke.video.