You finish a karaoke video, export it, and everything looks right. The lyric timing lands. The background motion feels smooth. The text is sharp. Then you look at the MP4 and realize it's way too big to upload comfortably, archive cleanly, or reuse for short-form edits.
That moment usually sends creators into the same loop. Try random export presets, crush the bitrate, make the video blurry, export again, and lose another hour. For karaoke and lyric videos, that trial-and-error hurts more because compression mistakes show up fast in the places viewers notice first: text edges, glow effects, gradients, and motion backgrounds behind subtitles.
The good news is that learning how to compress MP4 videos isn't about memorizing every encoding term. It's about knowing which settings matter, which ones you can ignore, and how to protect lyric readability while cutting the file size down to something practical.
Why Your MP4 File Size Matters
A big MP4 isn't just a storage problem. It slows down the process of getting your karaoke video in front of people.
Large exports take longer to upload to YouTube, longer to send to collaborators, and longer to move between drives when you're building a library of backing tracks, lyric variants, and alternate aspect ratios. If you publish often, those delays stack up quickly. If you're juggling multiple channels, they become part of the workflow whether you like it or not.
For karaoke creators, file size also affects how easily you can repurpose content. A single full-length lyric video may need to become a teaser, a vertical short, or a branded version for a client. Smaller, well-compressed masters are easier to archive and easier to reuse without turning your storage into a mess.
It affects delivery, not just editing
A lot of creators think compression is something you do only when a file is too large to keep. In practice, it's the last editing step before distribution.
If you upload to YouTube, file size isn't the only concern, but it still matters because oversized exports slow your publishing process and can make routine uploads frustrating. If you need a practical refresher on platform constraints, Understanding YouTube file size is worth checking before you settle on export settings.
Practical rule: Compress for the destination, not for your ego. Your viewer cares that the lyrics are crisp and the playback is smooth. They don't care that the original export was enormous.
Karaoke videos have a different weak point
Generic compression advice often focuses on cinematic footage. Karaoke videos fail differently. You can get away with a little softness in a background clip. You usually can't get away with fuzzy lyric text, ringing around letters, or blocky gradients behind subtitles.
That changes the goal. You're not chasing the smallest possible file. You're chasing the smallest file that still keeps text clean, glow effects controlled, and timing overlays readable on phones, TVs, and laptops.
Once you approach compression that way, the settings get simpler. You stop guessing and start making predictable trade-offs.
Understanding Compression The Quality Triangle
Compression gets easier when you stop treating it like one setting. Three controls shape most of the result: codec, bitrate, and resolution.
Think of resolution as the canvas size, bitrate as how much data you allow onto that canvas, and codec as the method used to pack that data efficiently. When creators struggle with how to compress MP4 videos, it's usually because they're changing the wrong one first.
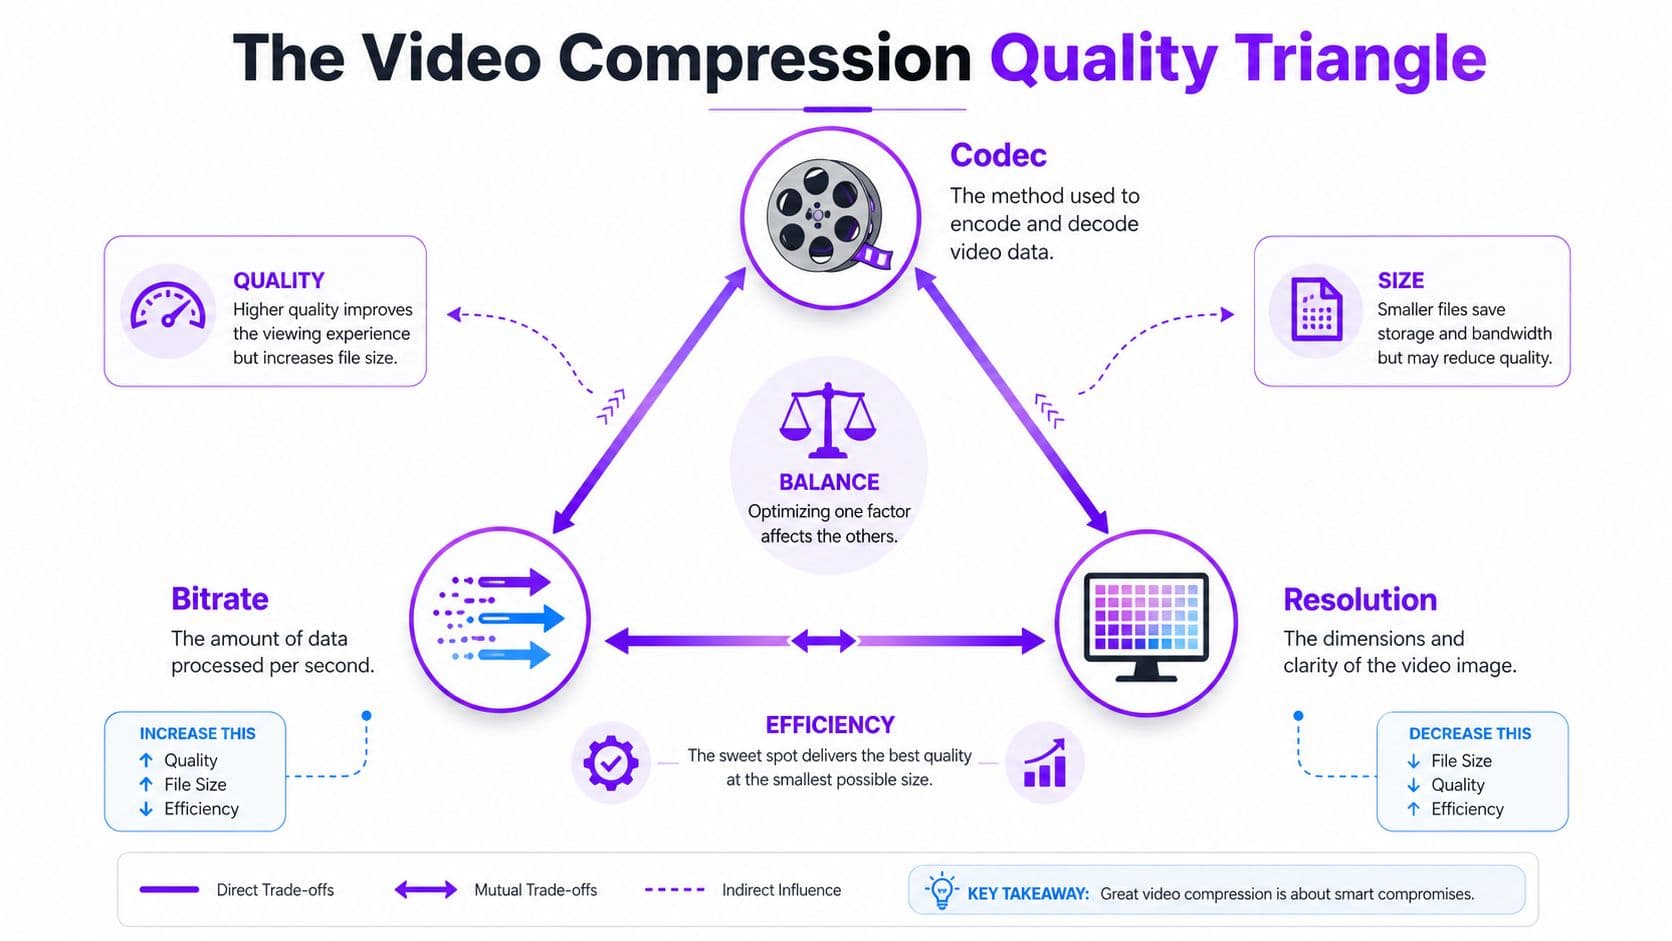
Codec decides how efficiently the video is packed
The codec is the biggest lever when you want a meaningful reduction without making the video look cheap. If your source or export is H.264, moving to H.265 often gives you a major efficiency gain. Re-encoding MP4 videos from H.264 to H.265 yields a median file size reduction of approximately 50% while maintaining equivalent visual quality, according to XConvert's compression guide.
That matters for lyric videos because it lets you hold onto visual quality at lower bitrates, especially for 1080p delivery. If your karaoke backgrounds include motion, particles, or color washes behind text, H.265 usually gives you more room before those elements start breaking apart.
H.264 still matters, though. It remains the safer compatibility choice when you need broad playback support across older devices, editors, and browsers. If you want a plain-English refresher on the container and format itself, this guide on what the MP4 video format is is a useful quick read.
Bitrate controls waste or restraint
Bitrate is the amount of data used over time. Too high, and your file is bloated. Too low, and your lyrics, edges, and backgrounds start falling apart.
For karaoke work, bitrate mistakes often show up in specific places:
- Text outlines: Fine strokes can shimmer or break.
- Glow and shadow effects: Compression can create muddy halos.
- Animated backgrounds: Slow gradients may band, and busy motion can smear.
- Hard lyric cuts: Rapid changes between lines can expose blockiness.
For most creators, variable bitrate is the smarter approach than constant bitrate because the video can spend more data where the image is complex and less where it isn't. That's especially helpful when a karaoke video alternates between static title cards and moving background segments.
If your lyric text looks soft but the background looks fine, the problem often isn't the font. It's the encoding choice.
If you're also refining your capture and presentation workflow, these tips for better video calls are useful in a broader sense because they reinforce the same principle: clarity starts with good source choices before compression ever begins.
Resolution is the blunt instrument
Resolution gives you the biggest visible change, so it should be handled carefully. Lowering it absolutely reduces file size, but it's a crude fix if your main problem is poor codec or wasteful bitrate settings.
For karaoke videos, the question isn't just "Can I downscale?" It's "Will the text still look intentional?" A lyric video at a lower resolution can still work well if the text is large, high contrast, and not overloaded with thin outlines. But if your style relies on delicate typography, small subtitles, or layered text effects, aggressive downscaling can undo the whole design.
A useful rule is simple:
| Control | Best use | Main risk |
|---|---|---|
| Codec | Improve efficiency | Playback compatibility |
| Bitrate | Fine-tune size and quality | Visible artifacts if pushed too low |
| Resolution | Large size reduction | Softer text and weaker detail |
Once you understand those three levers, you stop exporting blind.
Simple Compression with Free Desktop Tools
If you want a reliable desktop workflow without paying for extra software, use HandBrake. It's one of the easiest ways to compress MP4 videos while keeping control over the settings that matter.
The mistake most creators make in HandBrake is trusting a preset without checking the video tab. Presets are fine as a starting point, but karaoke videos need a little more care because lyric text exposes bad compression quickly.
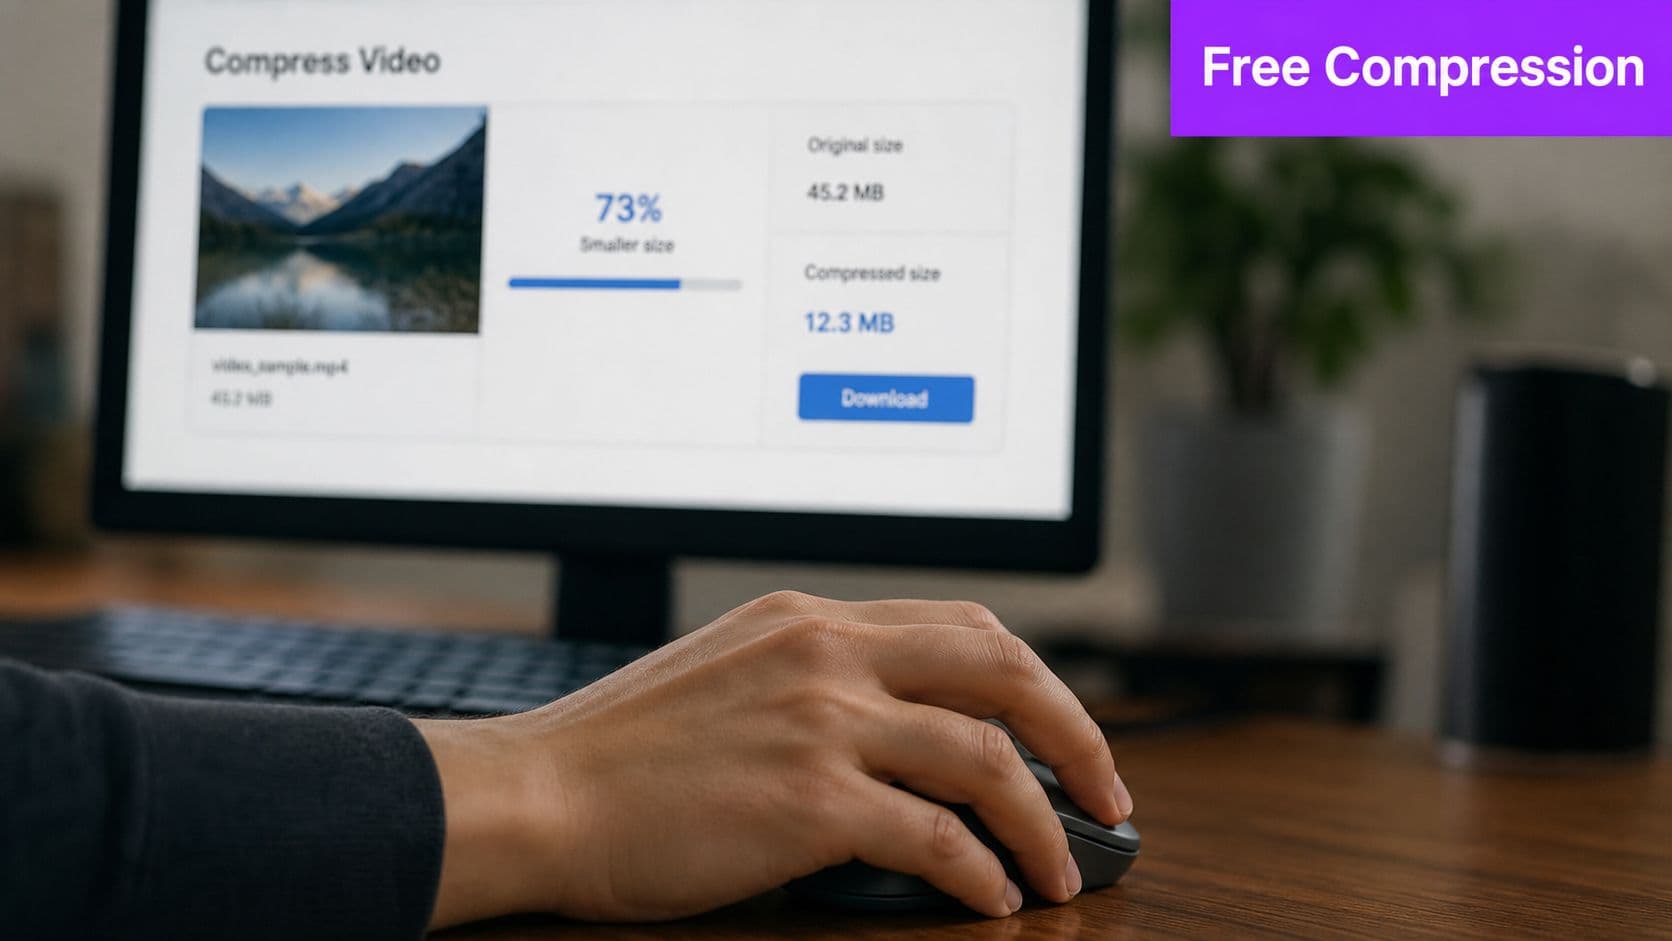
A practical HandBrake workflow
Open your source file, choose an MP4 output, and then focus on only a few controls.
- Set the format firstKeep the container as MP4. For karaoke distribution, that's the safest default.
- Choose your codec intentionallyUse H.264 if compatibility matters most. Use H.265 if you want better compression efficiency and you're fine with a more modern playback target.
- Use constant quality modeThis is usually easier than trying to guess a bitrate. It gives HandBrake room to spend more data where the frame needs it.
- Check the preview before the full encodeLyric text, outlines, and motion backgrounds can fail in ways that aren't obvious from the settings alone.
Good, better, best presets for karaoke creators
Here is the version I recommend in plain terms:
- Good: H.264, moderate quality setting, keep original resolution. Use this when you want broad compatibility and don't want surprises.
- Better: H.265, moderate constant quality, keep 1080p. This is the best balance for most YouTube karaoke uploads.
- Best for space saving: H.265, stronger compression, trimmed audio bitrate, and only downscale if the source is much larger than your final delivery target.
If you work on Apple hardware, this walkthrough on how to compress a video on Mac pairs nicely with a HandBrake workflow and helps if you're comparing desktop options.
Watch for this: Thin fonts and bright outlines can look acceptable in the preview window but break on a TV or full-screen monitor. Always test a short segment at full size.
A short visual walkthrough can help if you're setting this up for the first time:
What to leave alone
HandBrake exposes a lot of switches you probably don't need for routine karaoke exports. Most creators get better results by ignoring the obscure controls and dialing in only the essentials.
Leave the advanced stuff alone unless you know why you're touching it. Focus on:
- Video codec
- Quality mode
- Encoder preset
- Audio bitrate
- Resolution
That last one deserves restraint. If your source is already 1080p and your text layout was designed for 1080p, don't drop the resolution just because the file feels large. In many lyric projects, smarter codec and quality choices beat a blunt downscale.
Unlocking Ultimate Control with FFmpeg
If HandBrake is the workhorse, FFmpeg is the power tool. It looks technical because it's command-line based, but for compression it becomes useful fast. Once you know a few commands, you can batch exports, repeat the same settings every time, and stop hunting through menus.
That matters when you're publishing karaoke videos regularly. A repeatable command beats "I think this preset looked okay last month."
The command most creators should start with
The strongest starting point for efficient compression is this FFmpeg command:
ffmpeg -i in.mp4 -c:v libx265 -crf 28 -preset medium -c:a aac -b:a 128k out.mp4
That exact workflow is cited by Compresto's guide to compressing MP4, which notes that the CRF value of 28 is the key balance point for size and quality with x265. The same source says this approach, using H.265 with CRF 28 and a reduced audio bitrate, is the expert method for achieving a 70 to 80% file size reduction without visible quality loss.
For karaoke and lyric videos, that command is strong because it targets the parts that usually matter most:
- libx265 improves compression efficiency
- crf 28 aims for a practical quality-size balance
- preset medium avoids the quality penalty of very fast presets
- AAC audio at 128k keeps spoken intros and most music tracks in a sensible range for delivery
Why these settings work
CRF stands for Constant Rate Factor. In practical terms, it tells FFmpeg how aggressively to compress while letting the encoder decide where data is needed most.
For lyric videos, that's useful because different parts of the same video have different needs. A static title card doesn't need much data. A moving background with layered text and glow effects needs more. CRF adapts to that better than a rigid one-size-fits-all target.
The preset also matters. The same Compresto source notes that medium is the right balance point here. Faster presets can hurt quality in harder scenes, while slower ones increase encode time for smaller gains.
Use command-line compression when consistency matters more than convenience. If you're publishing series content, repeatability wins.
Copy-and-paste FFmpeg recipes
Here are a few practical variations that fit karaoke workflows.
Standard YouTube-ready lyric video
ffmpeg -i in.mp4 -c:v libx265 -crf 28 -preset medium -c:a aac -b:a 128k out.mp4
Use this when you want a strong default and don't need to hit an exact file size.
Speech-heavy or non-music lyric content
ffmpeg -i in.mp4 -c:v libx265 -crf 28 -preset medium -c:a aac -b:a 96k out.mp4
This follows the same methodology but trims audio more aggressively. It's better for spoken sections, tutorials, or lyric explainers than for full music-focused karaoke tracks.
Silent visual lyric reel
ffmpeg -i in.mp4 -c:v libx265 -crf 28 -preset medium -an out.mp4
The -an flag removes audio completely. That's useful for silent teaser loops, title animations, or social clips where the platform audio will be added separately.
One mistake that ruins text fast
Downscaling can save a lot of space, but it isn't automatic magic. The same Compresto source warns that reducing resolution without adjusting the quality approach can leave the output soft and pixelated.
That warning matters even more for karaoke work. Text doesn't hide compression errors. If you take a detailed source, shrink the frame, and don't reevaluate quality, letters can lose edge definition and small outlines can collapse.
When FFmpeg beats every GUI
FFmpeg becomes the better choice when you need any of these:
- Batch processing: Export many karaoke videos with the same settings.
- Exact repeatability: Keep every upload consistent across a channel.
- Automation: Build a workflow around templates and fixed outputs.
- Fewer surprises: A saved command is easier to trust than a remembered preset.
Once you've got one working command, save it in a text file and reuse it. That habit alone removes a lot of guesswork from how to compress MP4 videos at scale.
Karaoke Video Compression Recipes for 2026
Generic presets don't account for the thing karaoke creators care about most. Text has to stay clean. A moody background can survive a little compression. Lyric readability usually can't.
So instead of one "best" export, it helps to keep a few practical recipes based on where the video is going and what you need from it. Some jobs call for efficient H.265 delivery. Others call for safer compatibility or a predictable final size.
Recommended MP4 Compression Settings for Karaoke Videos
| Platform/Use Case | Resolution | Codec | Quality (CRF) | Audio Bitrate | Notes |
|---|---|---|---|---|---|
| YouTube karaoke upload | 1080p | H.265 | 28 | 128 kbps | Strong default when lyric clarity and smaller files both matter |
| Social media lyric clip | Match platform-friendly export for your edit | H.265 | 28 | 96 kbps for non-music streams, otherwise 128 kbps | Keep text large and avoid delicate outlines |
| Compatibility-first delivery | 1080p | H.264 | Use a quality-focused export in your editor | 128 kbps | Better when playback support matters more than compression efficiency |
| Archival delivery copy | Keep source resolution if needed | H.264 or H.265 depending on your workflow | Avoid going below CRF 18 for web-facing needs | 128 to 192 kbps | For a high-quality stored copy, not necessarily your public upload |
| Exact file-size target | Based on delivery need | H.264 with VBR 2-pass | Use bitrate targeting instead of CRF-only thinking | 128 to 192 kbps | Best when a platform or handoff requires a predictable size |
When to use two-pass VBR
Sometimes you don't just want "smaller." You need a file that lands near a specific size. That's where two-pass VBR becomes useful.
According to Mux's FFmpeg guide, two-pass Variable Bitrate is superior for predictable file sizes, and the target video bitrate can be estimated with the formula (target_size_MB × 8192) / duration_seconds = bitrate_kbps, after subtracting the audio bitrate.
That method is practical when you're delivering files to someone else's system, trying to stay under a platform limit, or building a content library with consistent file sizes.
The trade-off creators feel immediately
Two-pass VBR is better for predictability, but it costs time. The same Mux source notes that two-pass encoding takes approximately 2.5 times longer than single-pass encoding. That's fine for final deliveries. It's annoying for quick revisions.
For karaoke channels, that usually leads to a simple split:
- Use CRF-based exports for most routine uploads.
- Use two-pass VBR only when the file size itself matters.
- Use compatibility-first H.264 when the destination is unknown.
For text-heavy videos, don't choose settings only by file size. Choose them by what happens to letter edges, drop shadows, and gradients after upload.
A few recipe-level rules worth keeping
- Keep 1080p when the text design was built for it. Compression often hurts lyric readability less than unnecessary downscaling.
- Trim audio sensibly. Audio savings help, but karaoke viewers will notice weak music before they praise your storage efficiency.
- Reserve aggressive settings for clips, not masters. A short teaser can tolerate more compromise than a full-length sing-along track.
If you keep those distinctions clear, your exports stay purposeful instead of random.
Frequently Asked Questions about Compression
A few questions come up every time creators start compressing regularly. Most of them come from one problem: a compressed file looked okay once, then fell apart after another export.
Can you compress an MP4 more than once
You can, but it's usually a bad workflow. Every lossy re-encode gives the encoder another chance to damage edges, gradients, and text.
For karaoke creators, repeated compression is especially rough on subtitles and lyric overlays. If you need multiple versions, make them from the best available source rather than from an already compressed upload.
Should you choose H.264 or H.265
Choose H.265 when you want better efficiency and you're exporting for modern platforms and devices. Choose H.264 when compatibility matters more than squeezing down file size.
That trade-off is one of the most important decisions in how to compress MP4 videos. If a file needs to work almost anywhere, H.264 is still the safer bet. If the destination is predictable, H.265 is usually the smarter one.
How much does audio compression matter
It matters, but less than many creators think. In most karaoke videos, the video stream still does the heavy lifting for file size.
Audio settings are still worth cleaning up. If the project is non-music or speech-heavy, a lower audio bitrate can help. If it's a full karaoke track, don't gut the audio just to save a little space. Weak sound is more noticeable than people expect.
Why does compressed lyric text look fuzzy
Usually one of three things happened:
- The resolution was reduced too aggressively
- The compression settings were too harsh for fine text edges
- The video was uploaded after already being heavily compressed
Fonts with thin strokes, glows, and outlines are less forgiving than plain bold text. If your lyric styling is delicate, preview at full screen before finalizing.
Is there a simple tool if you don't want to tweak everything
Yes. For many creators, a desktop app like HandBrake is enough. If you want broader tool suggestions, this roundup of the best video compressor options is a practical place to compare workflows.
What's the safest habit to keep quality high
Keep the original export. Always.
Once you've compressed a file for upload, treat that as a delivery version, not your new master. If you need another resize, another platform cut, or another compression pass later, you'll be glad you kept the cleaner source.
If you want to spend less time wrestling with exports and more time making polished lyric videos, MyKaraoke Video gives you a faster way to create karaoke and lyric content in the browser, with built-in tools for syncing, styling, and exporting clean 1080p MP4 videos.
