Let's be honest—in the age of TikTok and Reels, a silent video is a skipped video. If you've ever wondered how to add music to a video on Android, you're in the right place. It's surprisingly straightforward, whether you're looking for a quick fix using your phone's built-in tools or need more creative firepower from a dedicated app.
Good Audio Isn't Just an Extra—It's Everything
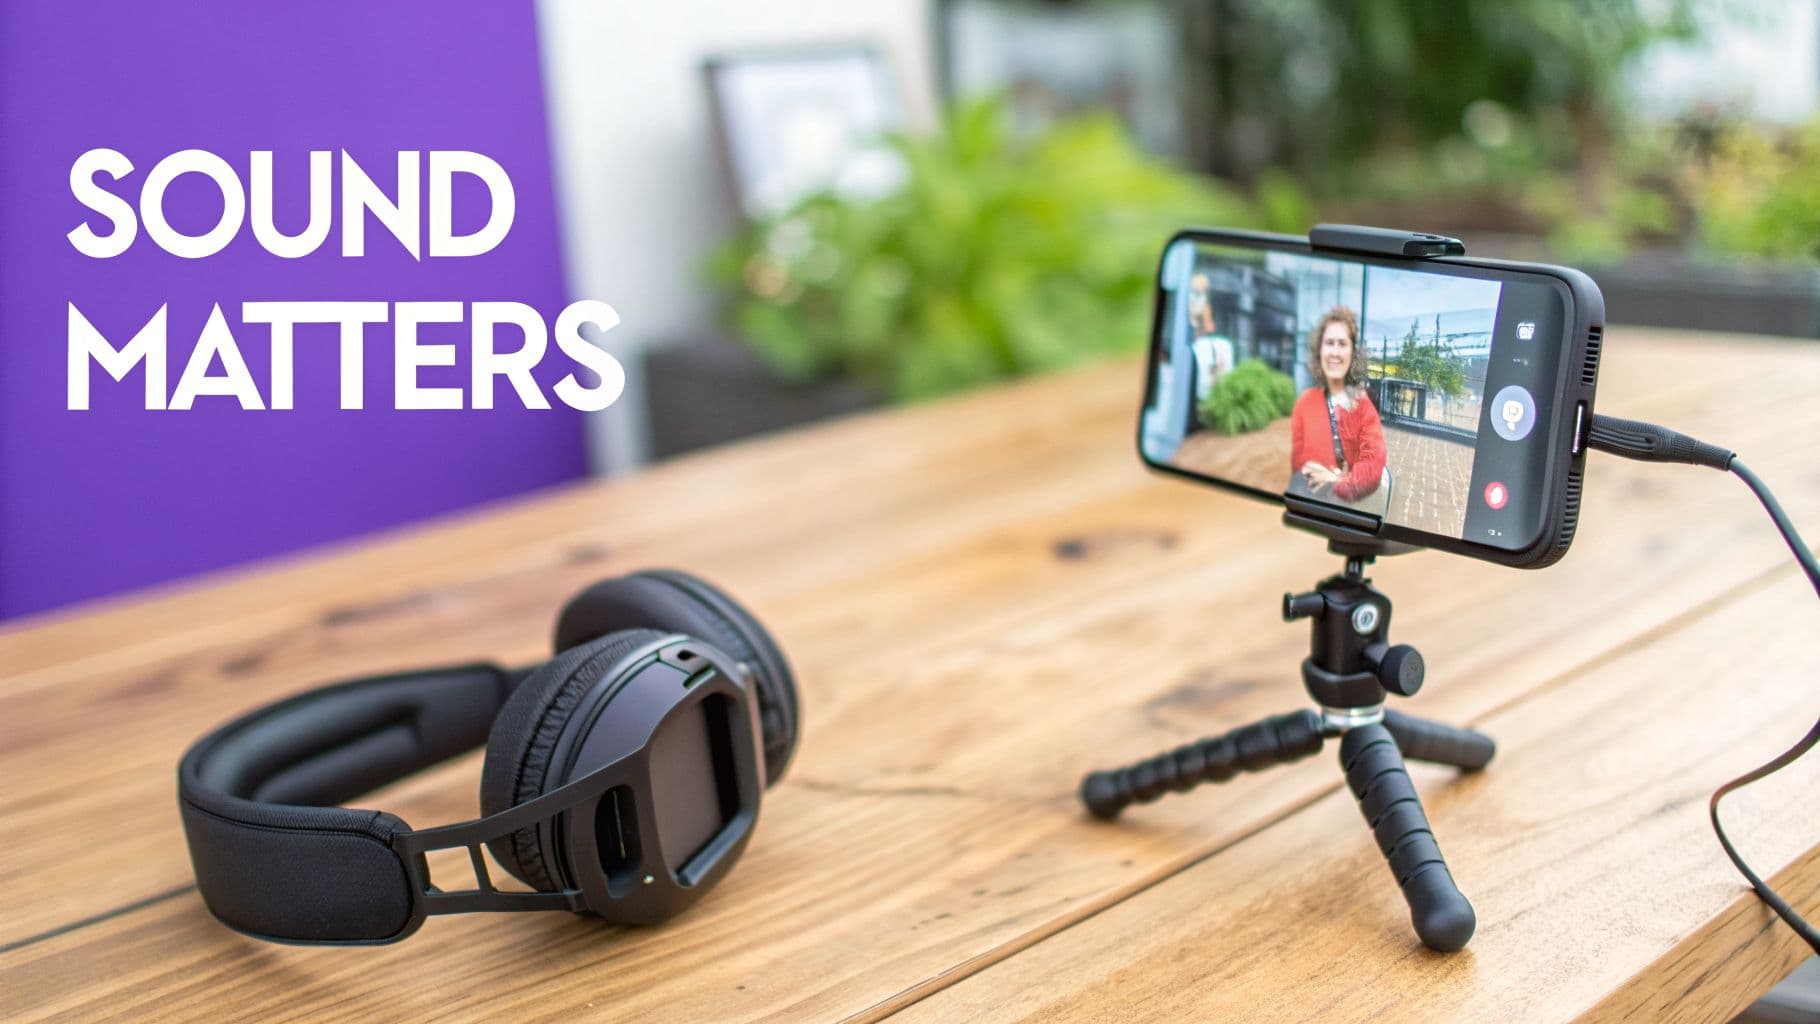
Think about the videos that stop your scroll. It’s the audio that pulls you in, right? The perfect song can completely change the mood, drive a story forward, or just give your clip the energy it needs to get noticed. Thankfully, you no longer need a beefy desktop computer to get this done.
And it’s not just a feeling; the numbers back it up. The market for smartphone music production software was valued at $104.8 million** in 2026 and is expected to hit **$229.4 million by 2034. The most telling stat? Everyday creators and hobbyists make up a huge 46.85% of that market, which just goes to show that pro-level tools are now in everyone's hands.
What We'll Cover in This Guide
I want to give you a practical look at the best tools for the job, from my own experience. We’re going to walk through:
- The simple, no-fuss editor that's probably already on your phone.
- Powerhouse apps like InShot and CapCut for when you need more control.
- A unique browser-based tool perfect for creating lyric or karaoke videos.
I’ll share my personal take on when to use each method so you can save time and get the best possible result. These are the kinds of practical tips I wish someone had given me when I first started out.
Beyond just dropping a track onto your timeline, we'll also touch on the finer points. Getting your audio perfectly in sync with the action on screen is what separates the good from the great. It often comes down to understanding and fixing audio latency, a small technical detail that makes a massive difference in the final cut.
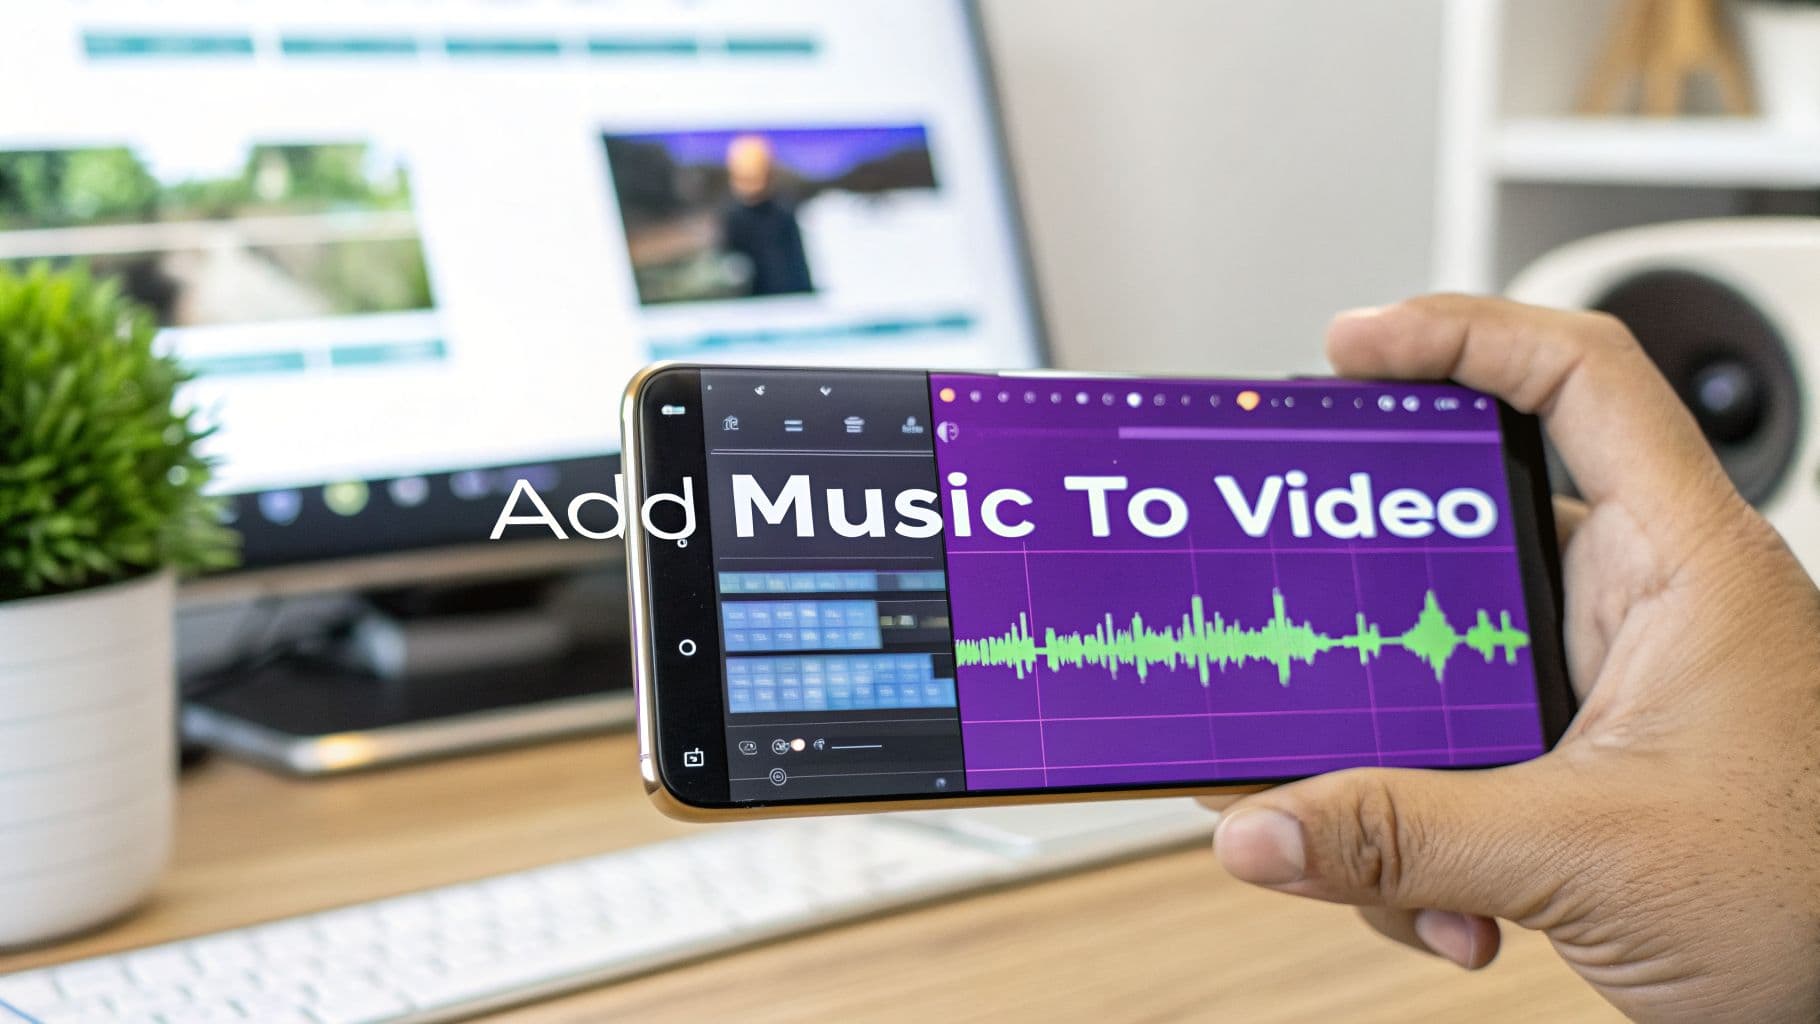
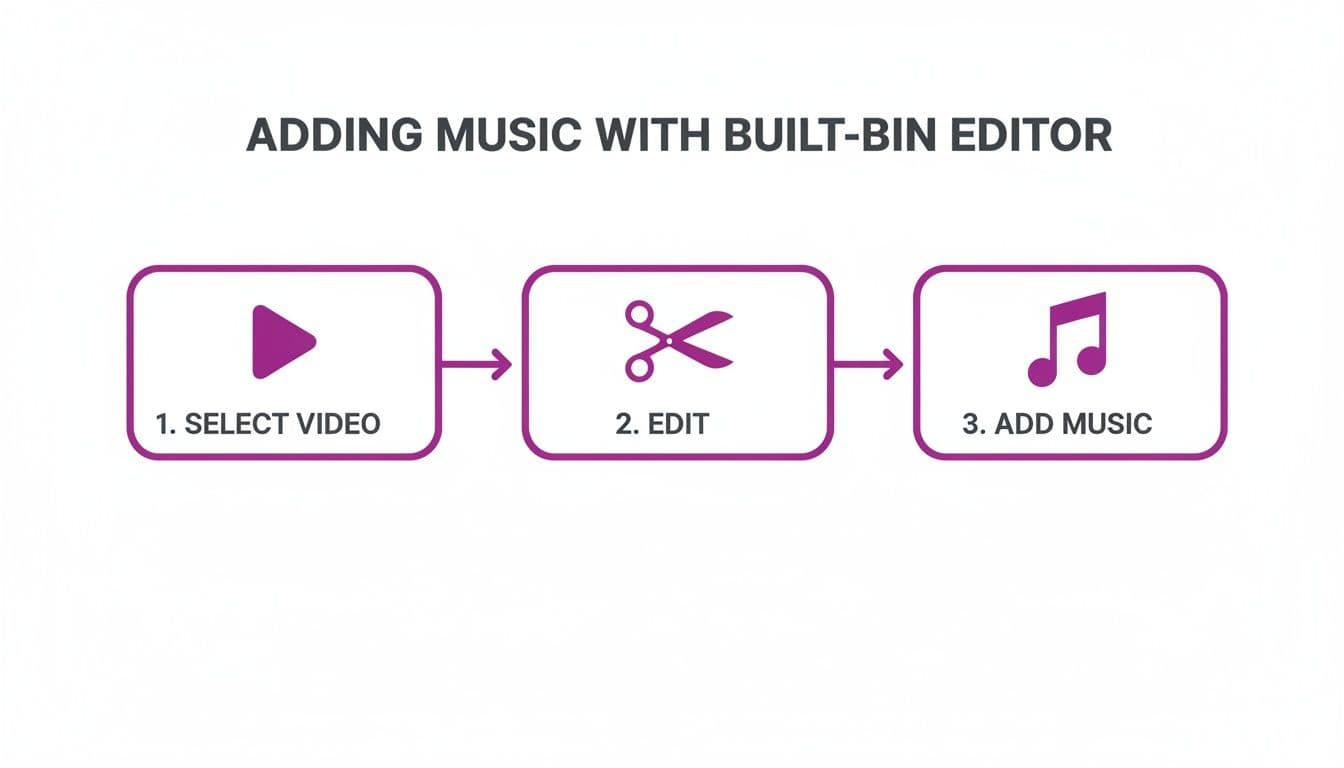
You don't always need to hunt for a new app just to add a bit of music to a video. In fact, your Android phone likely has a capable little editor hiding in plain sight: the one built into Google Photos. Honestly, this is my secret weapon for quick-and-dirty edits.
Think of those times you just need to throw a background track on a short clip for your Instagram story or a family video. For those jobs, where speed trumps a fancy feature set, Google Photos is perfect.
Firing Up The Editor
Getting started couldn't be simpler. Just open Google Photos, pull up the video you want to work on, and tap the "Edit" button you see at the bottom. This brings up a basic editing timeline where you can trim your clip and make other quick tweaks.
To get your music in, just slide the toolbar at the bottom until you find the "Audio" tab. From there, you'll see a clear option to "Add audio." Give that a tap, and you can start digging through your phone's local files to find the perfect song.
The beauty of this method is its sheer simplicity. You pick a track, and it’s on your video. There are no confusing timelines or audio layers to worry about, making it an excellent starting point if you're new to video editing.
Of course, that simplicity comes with a trade-off. This is a one-and-done tool. You won't find controls for fading your audio in or out, fine-tuning the volume, or mixing multiple sounds together. If the song already fits perfectly and you just need it to play from start to finish, you're golden. For anything more creative, you’ll want to reach for a more specialized app.
Mastering Popular Editing Apps Like InShot and CapCut
When your phone's built-in editor just can't keep up with your creative vision, it's time to bring in the pros. Dedicated apps like InShot and CapCut are absolute game-changers for adding music to your videos on Android, offering a level of control that goes way beyond simply dropping in a background track.
It's no surprise these apps are so popular. With Android projected to hold over 70% of the mobile market by 2026, the demand for powerful, easy-to-use video tools has skyrocketed. And when you look at what people want most, music and audio features are always at the top of the list. That’s why InShot and CapCut are constantly topping the download charts—creators know that great audio is what separates a good video from a truly memorable one.
Fine-Tuning Audio in InShot
For really precise audio adjustments, I almost always turn to InShot. Its strength is a clean, visual timeline that makes complex edits feel surprisingly straightforward. Once you import a song, you aren’t just stuck with it; you can actually shape how it interacts with your video.
The most powerful tool for this is the volume envelope. This lets you add keyframes directly onto the audio clip in your timeline. I use this all the time to create a smooth fade-in at the start of a video or to gently dip the music's volume whenever someone is speaking. You just lower the volume during the dialogue, then raise it back up right after, ensuring the voice is always the star of the show.
It’s a far more advanced take on the basic editing workflow.
While the core process is simple, that "Add Music" step is where apps like InShot and CapCut open up a world of creative possibilities.
Syncing Beats Effortlessly with CapCut
CapCut, on the other hand, has a killer feature called ‘Match Cut’ (sometimes just called 'Beats'). This is a lifesaver. The app automatically scans your song and places little markers on the timeline for every major beat.
Imagine you're cutting together a fast-paced travel montage. Instead of manually scrubbing the timeline to find each beat drop, CapCut does it for you. You can then instantly sync every video clip change to a beat, giving your video a professional, rhythmic pulse that feels perfectly timed.
Both apps also make layering audio incredibly easy. You can have your main background music, toss in a whoosh sound effect for a cool transition, and record a voiceover on top of it all.
Once you find an app you like, it helps to learn the little tricks for the platforms you post on, like how to best add music to TikTok videos. And if you're just getting your feet wet with editing, our guide on the best video editing software for beginners can help you explore even more great options.
Creating Lyric and Karaoke Videos Without an App
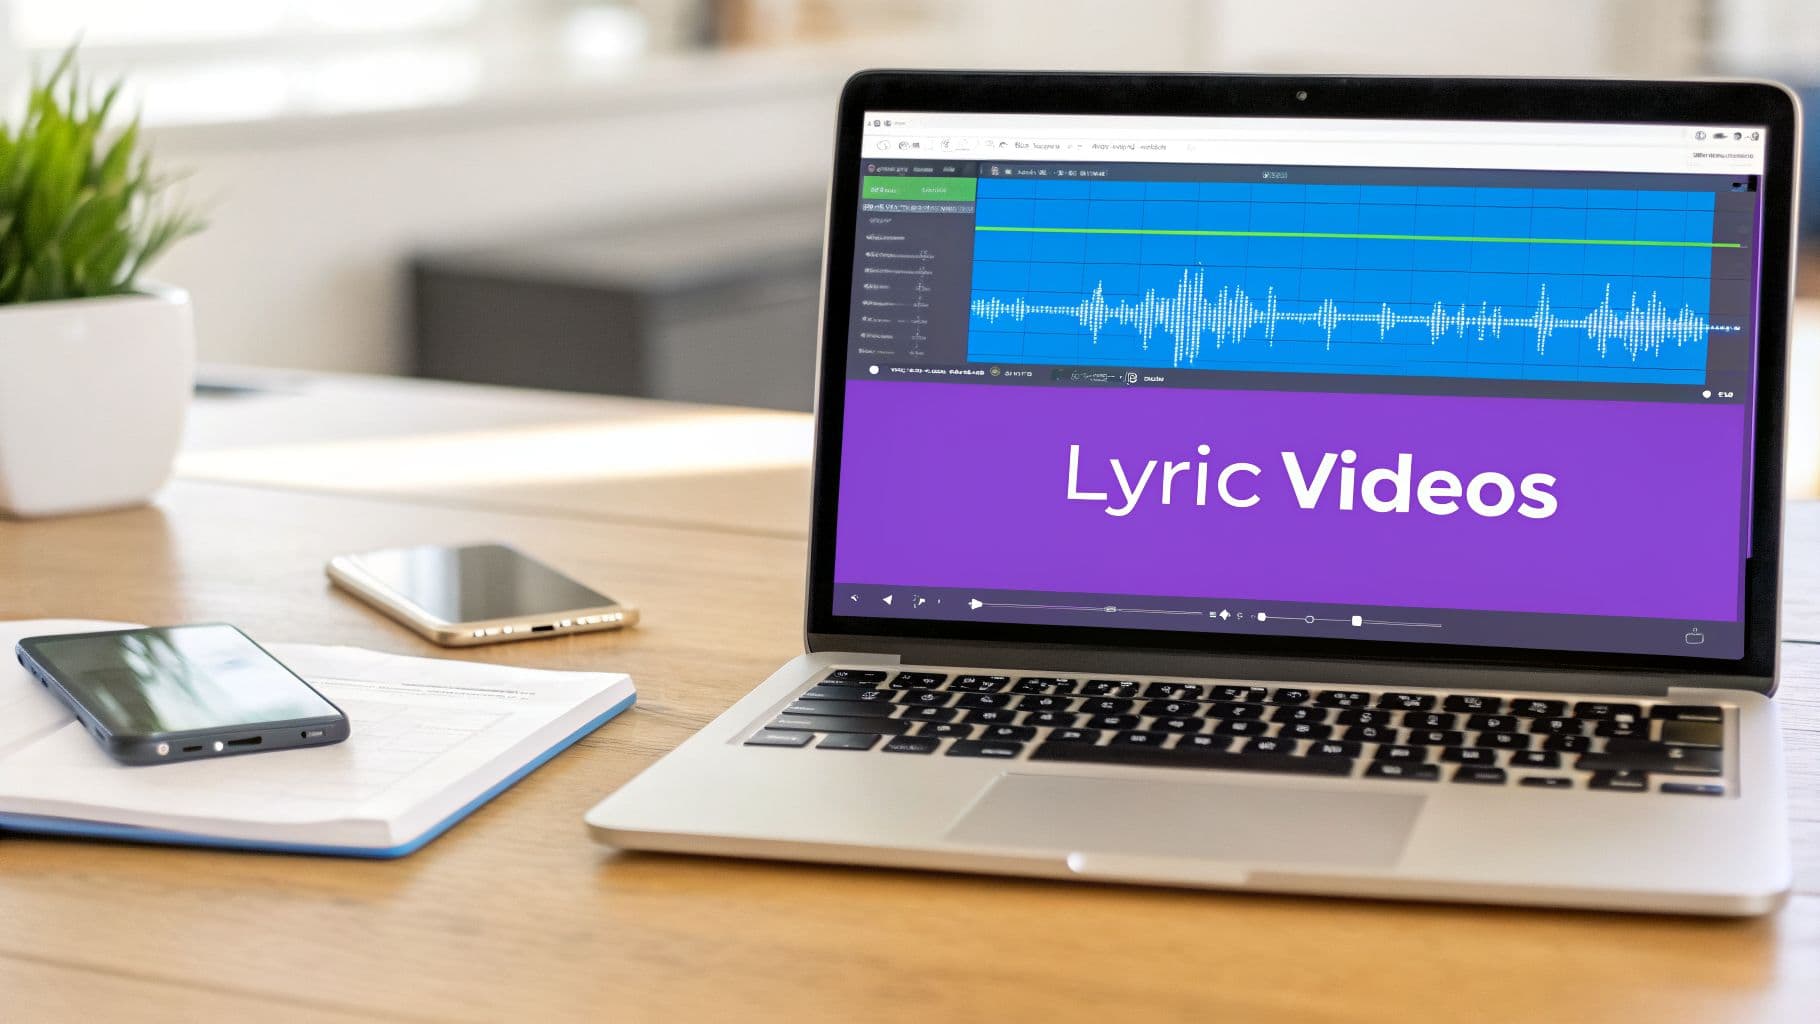
If you've ever tried to sync lyrics by hand in a normal video editor, you know the pain. It’s an incredibly tedious process of nudging text clips back and forth, trying to get each word to land perfectly. Honestly, it's enough to make you want to scrap the whole project. This is exactly why a specialized tool is a game-changer, even if it’s not an app you install.
Instead of hunting for another app to download, have you considered a browser-based tool? My personal go-to for this is MyKaraoke Video, which I run right from the Chrome browser on my Android phone. It was built from the ground up for one thing: making lyric and karaoke videos. That means it was designed to solve all those annoying problems, like painstaking manual syncing and apps that crash mid-project.
The AI-Powered Syncing Process
The process here is nothing like what you’d find in a general-purpose editor. It’s a much smarter, more efficient approach.
First, you just upload your audio file, like an MP3. Then, you paste the full lyrics into a text box. From there, you just let the AI work its magic. It analyzes the song and the text, creating a surprisingly accurate sync in just a few moments.
This AI-assisted first draft is what saves you hours. Instead of starting with a blank timeline, you begin with a video that's already about 90% done and just needs a few final tweaks.
This completely flips the script on creating lyric videos. You're no longer a technician meticulously lining up text frame by frame. Instead, you get to be the director, fine-tuning an already great-looking draft. It’s a huge time-saver for anyone regularly making content for YouTube or social media.
Fine-Tuning and Customization
Once the AI has done the heavy lifting, you’re taken to a powerful sync editor. This is where you put on the finishing touches. You can easily drag and adjust the timing for individual words or even entire lines to get them perfectly in sync. It's all visual and very intuitive.
But it’s not just about timing. You also get full creative control over the visuals. You can tweak everything—fonts, colors, animated backgrounds—and see your changes in a real-time preview.
When you're happy with how it looks and sounds, you can export a high-quality 1080p MP4 video file straight to your phone’s downloads. For me, it's the fastest way to produce polished, professional lyric videos without installing a single extra app.
Pro Tips for Perfect Audio and High-Quality Exports
Dropping a song into your video is easy, but making it sound right is what truly elevates your project. The final polish you put on the audio and your export settings can make the difference between a video that feels homemade and one that looks and sounds professional.
One of the most common mistakes I see is uneven volume. You know the type of video—the music is blasting one second, and the next you can barely hear what someone is saying. The fix for this is a feature called audio normalization. Apps like InShot have this built-in, and it automatically balances the loudness across all your audio clips for a much smoother listening experience.
Mastering Your Sound and Sync
While an automatic tool like CapCut’s ‘Match Cut’ is fantastic for syncing to the beat, sometimes you need more precise control. Imagine you want a sound effect to hit at the exact moment a door slams shut on screen. To do this, you'll need to sync it manually.
The trick is to zoom way, way in on your editing timeline. You should be able to see the individual peaks and valleys of the audio waveform. From there, you just drag the audio clip until its peak aligns perfectly with the visual action in your video.
And don't let a noisy original recording spoil your new soundtrack. If your video has a distracting air conditioner hum or wind noise, it will clash with the music you've added. It’s always worth taking a moment to learn how to remove background noise from your audio before you go any further.
Once your audio is dialed in, the final hurdle is exporting. Don't just hit "export" with the default settings! Getting this part right is a core skill for anyone learning how to add music to video on android for sharing online.
Decoding Export Settings and Licensing
Here’s a quick rundown of what you actually need to pay attention to:
- Bitrate: Think of this as the audio-visual quality of your file. A higher bitrate looks and sounds better but creates a larger file. For a 1080p video heading to YouTube or Instagram, a video bitrate between 10-15 Mbps is the sweet spot.
- Resolution & Frame Rate: For maximum compatibility, stick with the standards. 1080p resolution and 30fps (frames per second) will look great on just about any social media platform or device.
- Codec: This is non-negotiable. Always choose H.264 for video and AAC for audio. They’re the universal standards that ensure your video plays everywhere.
Finally, a quick but important word on music rights. You can’t just grab any popular song and use it in your video. Platforms like YouTube have systems that automatically flag copyrighted material, which can get your video muted or even taken down. To avoid any issues, stick to tracks from royalty-free sources like the YouTube Audio Library or consider a subscription service like Epidemic Sound.
A Few Common Questions About Music on Android
Once you dive into adding music to your videos, a few hurdles almost always come up. Getting ahead of these common questions will save you a ton of frustration and let you focus on being creative.
Can I Use My Spotify or Apple Music Songs?
This is the big one, and the straightforward answer is no, you can't. Music from streaming services like Spotify is locked down with Digital Rights Management (DRM). This tech prevents you from simply downloading the audio file and dropping it into another app like a video editor.
To keep your videos from getting muted or taken down, you have to use music you have the rights to. That usually means finding your tracks from one of two places:
- Royalty-free music libraries: This is the go-to for most creators. Sites like the YouTube Audio Library, Epidemic Sound, and Artlist are packed with music made specifically for video projects.
- Your own music: If you're a musician and create your own tracks, you're all set!
Getting a handle on the basics of music for editing videos is a non-negotiable skill if you plan on publishing your work online.
How Do I Fix Audio That's Out of Sync?
Ah, the classic sync issue. It's annoying, but totally fixable. The key is to use an app with a proper timeline view, like CapCut or InShot. You need to be able to zoom right in on your audio and video tracks.
Once you’re in the timeline, pinch to zoom until you can clearly see the audio waveform—those little peaks and valleys. From there, you just tap and hold the audio clip and drag it slightly to the left or right. Find a sharp, clear visual moment in your video, like a hand clap or a door slam, and line up the highest peak of the waveform with that exact spot.
My own workflow is to make a quick, rough alignment first. Then, I zoom in as far as the timeline will let me and make those final, tiny adjustments to get it perfect down to the frame.
What’s the Best Export Format for Social Media?
When you’re ready to export, your settings really matter for platforms like TikTok and Instagram. The gold standard is an MP4 file using the H.264 video codec and AAC for the audio.
For any vertical video (like for Reels or Shorts), you'll want a resolution of 1080x1920 pixels, which gives you that clean 9:16 aspect ratio. The good news is you don't have to memorize all this. Most modern video editors have built-in export presets for "TikTok" or "Instagram Reels" that automatically apply these exact settings for you.
Ready to create stunning lyric or karaoke videos without the hassle of manual syncing? MyKaraoke Video uses AI to do the heavy lifting, turning your songs into pro-quality videos in minutes, right from your browser. Try it for free today!