
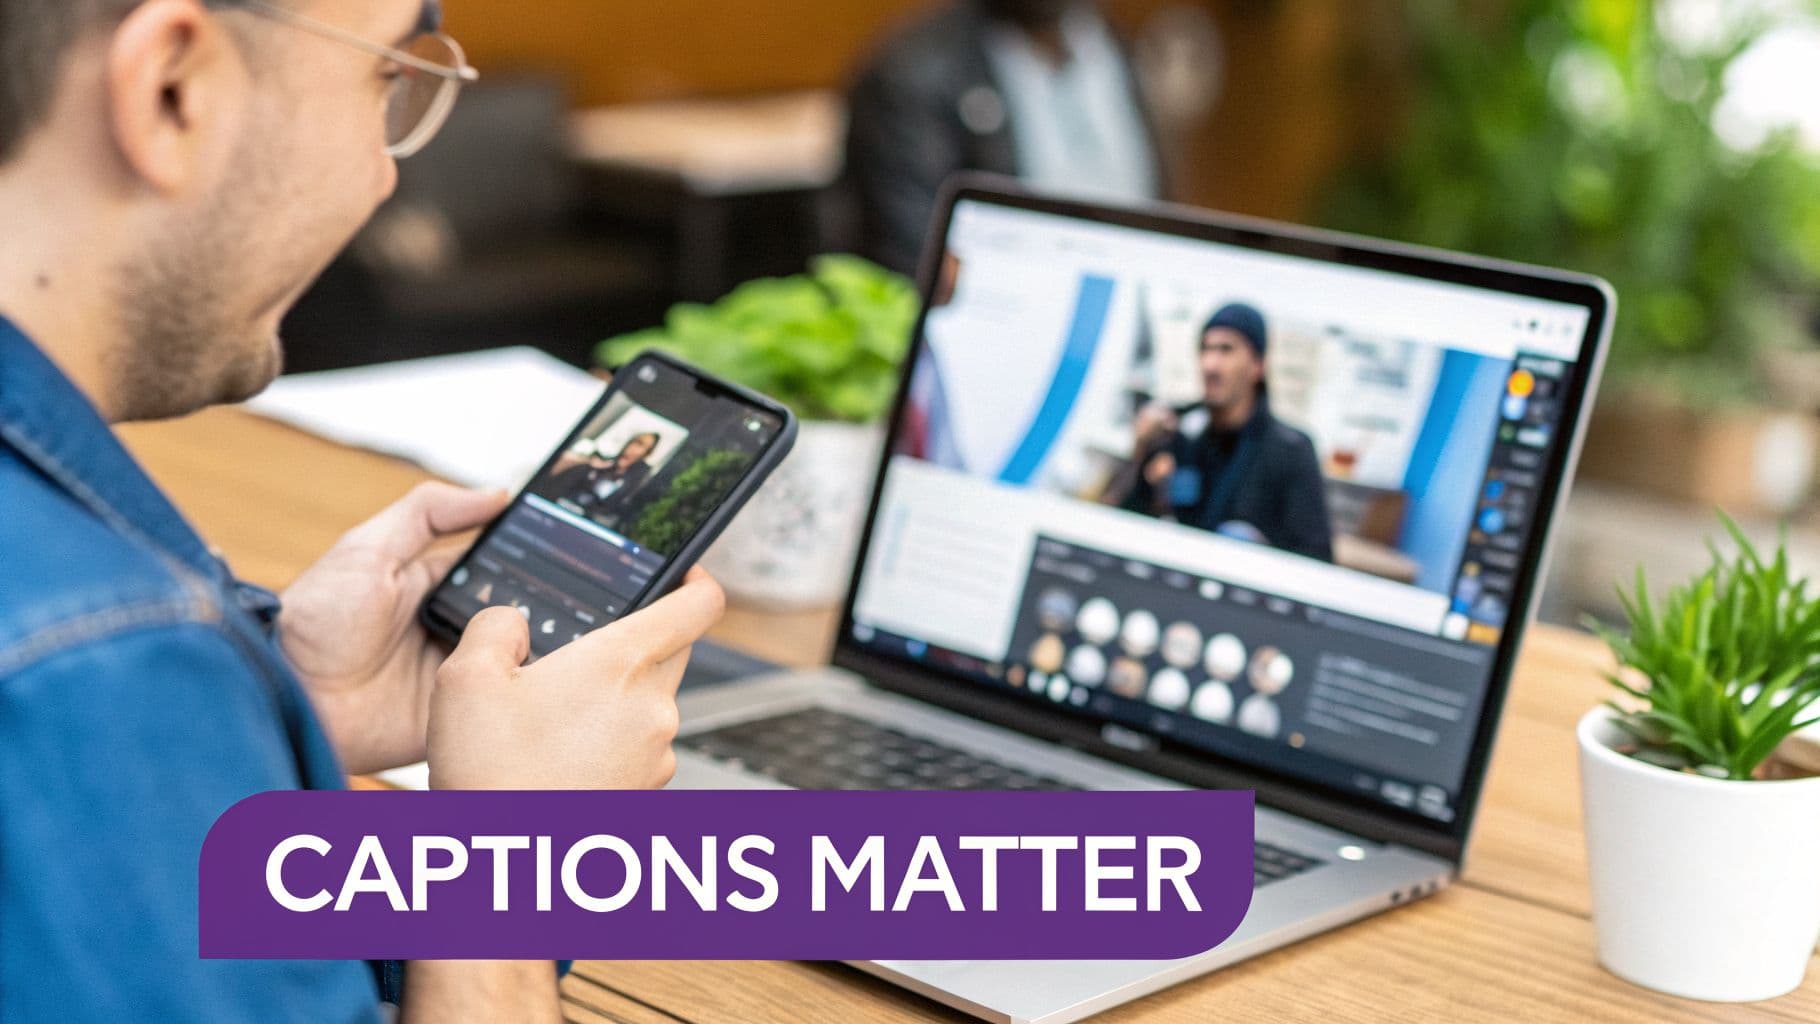
If you've ever felt like your videos are hitting a wall, there’s a good chance you’re overlooking one of the most powerful tools in your kit: closed captioning. Getting your captions right involves a few different paths—you can use AI to generate them automatically, create an SRT file from scratch, or burn the text directly into your video.
Whichever route you take, the goal is the same: making your content accessible, easier to find, and far more engaging for everyone, especially those watching without sound.
Why Captions Are a Must-Have for Modern Video
Let's be real: if you're still treating captions as an optional add-on, you're falling behind. We live in a world where over 50% of viewers watch videos with the sound off. Think about it—people scrolling on public transport, in a quiet office, or late at night. Without captions, your video is just silent moving pictures with no context, and that's an instant scroll-past.
But it's not just about catering to silent viewers. Captions are your secret weapon for boosting a video’s overall performance. They pull viewers in, help them understand and remember your message, and give your SEO a serious lift.
Boost SEO and Discoverability
Here’s something many creators forget: search engines can’t watch videos. Google and YouTube rely on text to understand what your content is about. When you upload a caption file, you’re essentially handing them a full, keyword-rich transcript on a silver platter.
This gives the algorithms exactly what they need to index your video properly. The result? Your content starts ranking for a much wider variety of search terms, driving more organic traffic your way. For anyone using a tool like MyKaraoke Video, this is huge. A perfectly captioned lyric video becomes a magnet for fans searching for that specific song, dramatically increasing its chances of being discovered.
Understand the Different Caption Types
Before we jump into the "how-to," it’s crucial to know the lingo. People often mix these up, but each serves a distinct purpose.
- Closed Captions (CC): These are the captions viewers can toggle on or off. They're designed for accessibility and include not just spoken dialogue but also important sound cues, like
[upbeat music]or[door slams]. This gives viewers who are deaf or hard of hearing the full experience. - Open Captions (OC): You've seen these everywhere on social media. They are "burned" or embedded directly into the video file, meaning they’re always visible and can't be turned off. They're great for ensuring your message gets across, no matter what.
- Subtitles: This term is technically for translating dialogue into another language. Subtitles assume the viewer can hear the audio and just needs a translation, so they usually don't include non-speech sounds.
If you want to go a bit deeper on the fundamentals, this article on What Is Closed Captioning is a great resource.
The market data paints a clear picture of this trend. The global captioning industry was valued at $32.17 Billion** in 2024 and is expected to explode to **$66.21 Billion by 2035. This isn't just corporate-speak; it reflects a massive demand for accessible content. In fact, videos with captions can see up to 40% higher engagement—a number no creator can afford to ignore.
So, you're ready to add captions to your video. Great move. But now you're staring down a few different paths, and it’s not always clear which one to take. The truth is, there's no single "best" way to create captions—it all comes down to your project, your budget, and how much time you have on your hands.
Choosing a method isn't just a technical detail; it's a strategic decision that shapes your entire workflow. Let's break down the three main approaches so you can figure out what makes the most sense for you.
Choosing Your Captioning Method
Deciding how you'll create your captions is the first major step. Each approach has its own set of trade-offs between speed, cost, and accuracy. This table gives you a quick overview to help you compare them at a glance.
| Method | Best For | Pros | Cons |
|---|---|---|---|
| AI Transcription | Social media clips, internal videos, creating a quick first draft. | Incredibly fast and cost-effective; gets a usable draft done in minutes. | Requires manual proofreading; prone to errors with names, jargon, or poor audio. |
| Manual SRT Creation | Short videos, lyric videos, projects where perfect timing and accuracy are non-negotiable. | Complete control over every word, timestamp, and punctuation mark. | Extremely time-consuming and tedious, especially for longer videos. |
| Professional Service | High-stakes commercial projects, legal/accessibility compliance, broadcast content. | Guarantees 99%+ accuracy; handles complex audio and industry terms perfectly. | The most expensive option; requires lead time for turnaround. |
Ultimately, you're balancing time, money, and quality. A quick Instagram Reel has very different needs than a feature film that needs to meet accessibility laws.
The Rise of AI-Powered Transcription
Let's be honest, automatic transcription is usually the fastest and cheapest way to get captions on your video. Modern AI tools can listen to your audio and spit out a time-coded transcript in minutes—a job that would take a human hours.
This speed makes AI a lifesaver, especially if you're churning out a lot of content. It’s perfect for getting a solid first draft for social media clips, internal meetings, or quick vlogs. The key, however, is to go in with your eyes open. AI is good, but it's not perfect.
Key Takeaway: AI-generated captions are a fantastic starting point, but they will almost certainly need a human touch. Expect to find misspelled names, misunderstood technical terms, or funky punctuation. Always set aside time to give them a final proofread.
This move toward automation is only getting bigger. In fact, AI-powered software like the tools built into MyKaraoke Video are projected to grab 71.9% of the market by 2035. With over 60% of marketers already using or planning to use AI for captioning, it’s clear this isn't just a passing trend. For more on this, Research Nester has some great data on the market's growth.
Manual SRT Creation for Full Control
On the other end of the spectrum is creating a caption file by hand. If you're a perfectionist who needs absolute precision, this is your method. An SRT (SubRip Subtitle) file is just a simple text document that holds all your caption information in numbered chunks. Each one has:
- A start and end timestamp (formatted like
HH:MM:SS,ms) - The actual text you want to appear on screen
Building one from scratch means you’re listening to your video, typing out every word and important sound, and meticulously setting the timing. I've found this is the only way to go for things like lyric videos, where a single mistimed word can ruin the effect. You don't need fancy software—any basic text editor will do the trick.
It's a painstaking process, but it gives you an intimate understanding of your video's audio rhythm. If you'd rather not use a plain text editor, our guide on software for transcribing video covers some great tools that can help.
When to Hire a Professional Service
Sometimes, you just can't afford any mistakes. For those mission-critical projects—a big product launch, a paid ad campaign, or content that has to meet strict legal accessibility guidelines for government or education—hiring a professional captioning service is a smart investment.
These services use real human transcriptionists to guarantee 99% or higher accuracy. They catch the nuance, context, and industry jargon that AI completely fumbles, delivering a polished and professional final product that you can trust completely.
A Creator’s Workflow for Perfect Lyric Video Captions
Let’s move past the theory and get our hands dirty. Forget about wrestling with clunky software or spending hours manually timestamping every single word. I’m going to walk you through a much smarter workflow for creating perfectly synced lyric videos.
This whole process can be done right in your browser using a tool like MyKaraoke Video. It's a great example of how you can create professional captions in just a few stages. The best part? There’s no software to install. You just need your audio track and your lyrics.
From Raw Text to Synced Captions
To get started, you just upload your audio file and paste your lyrics directly into the tool. It's that simple.
Once your assets are loaded, the AI-powered "Auto-Sync" feature steps in. This is a game-changer. It analyzes the audio, matches the lyrics to the vocal track, and generates a fully time-coded draft in seconds. All that tedious work is done for you.
But while the AI is incredibly fast, it's not the final step. Think of it as a really good first draft. For professional results, a human touch is still essential.
In lyric videos, timing isn't just a technical setting—it's an art form. If a word appears on screen even a fraction of a second too late, it can completely break the viewer's immersion. That’s why a quick manual polish isn't just a recommendation; it's non-negotiable.
This is a common workflow that blends speed with precision. You start with a fast AI pass, then a human refines it for accuracy and context.
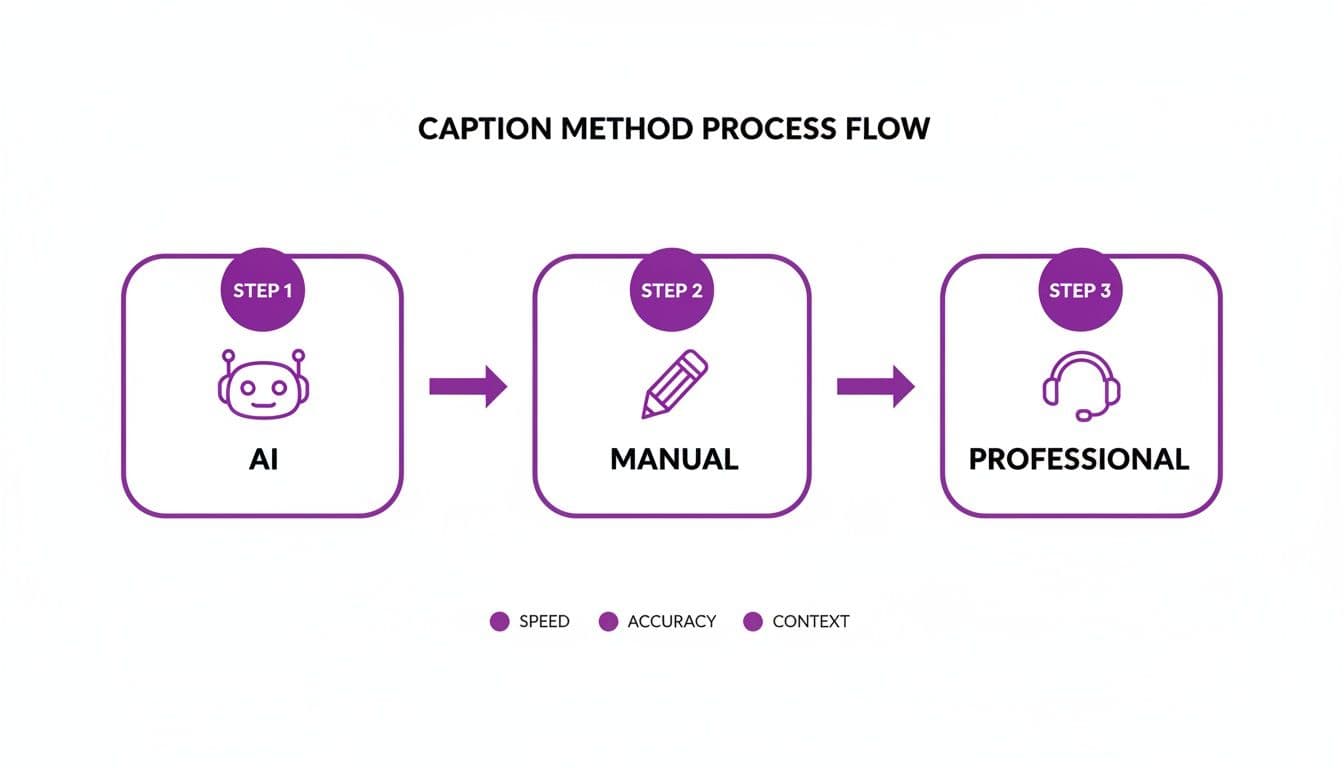
As the diagram shows, the most effective process combines the speed of AI with the nuance of a human editor.
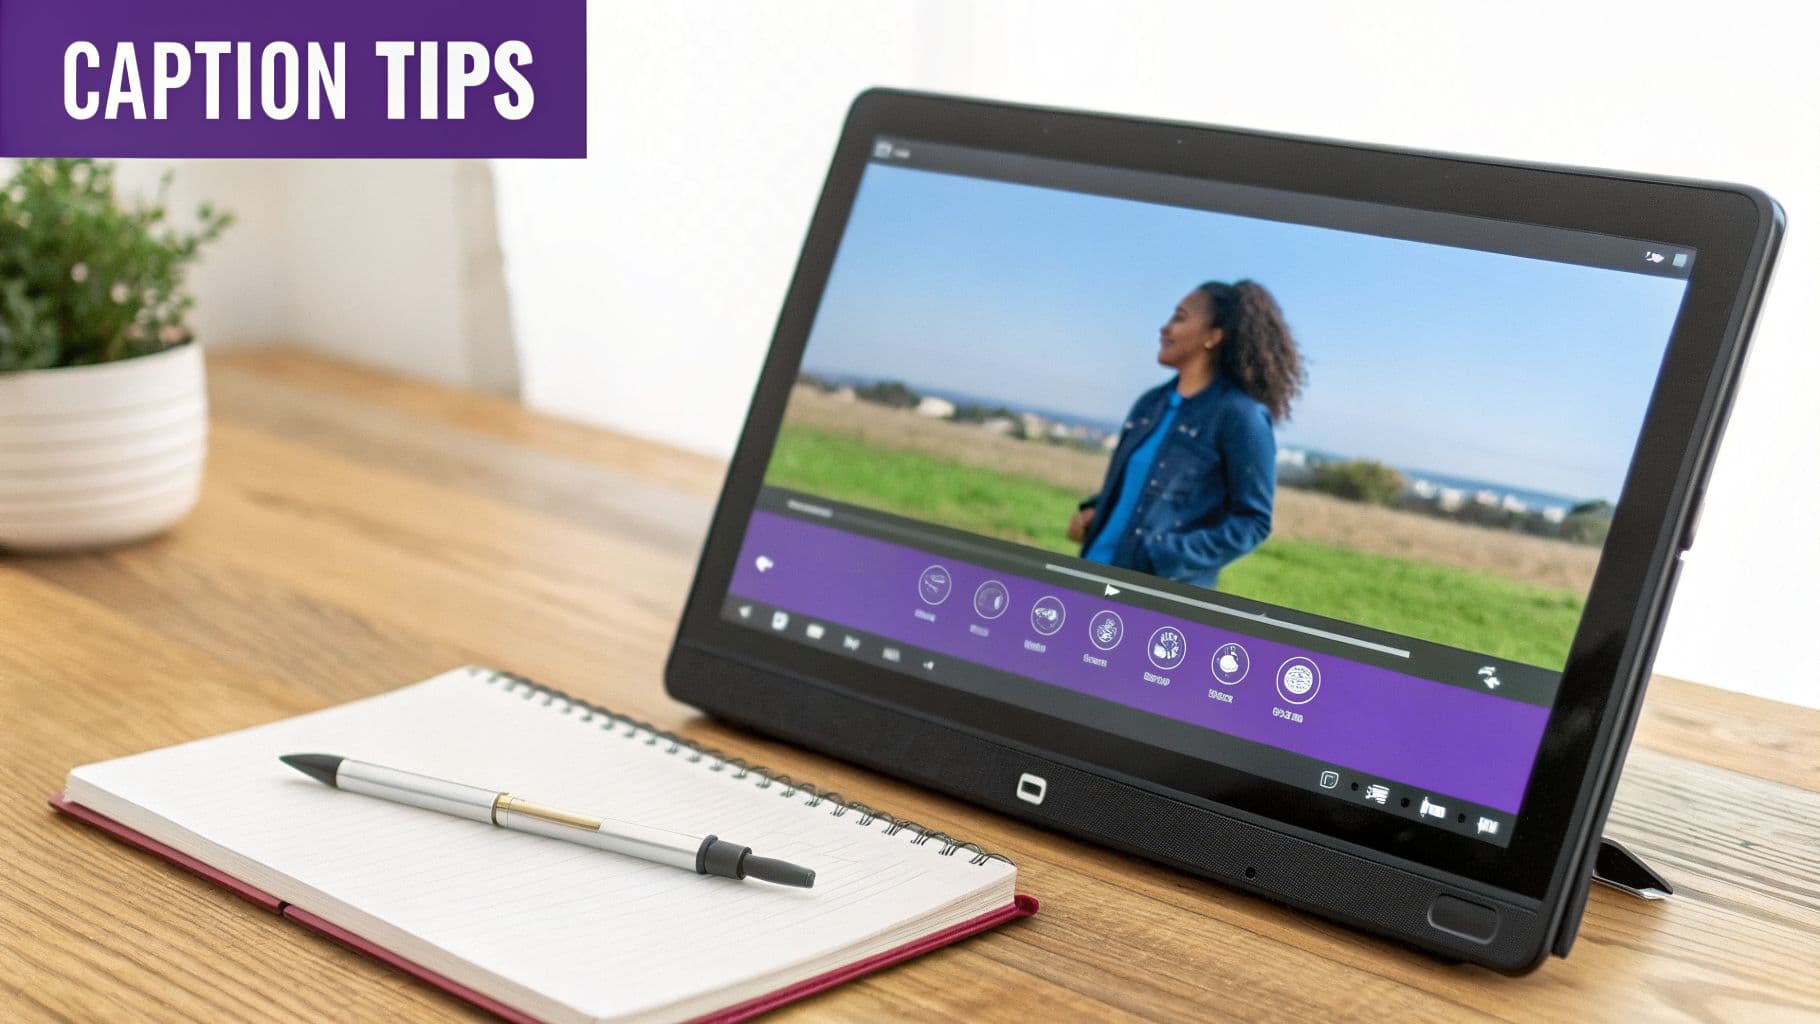
Polishing Your Captions in the Sync Editor
After the auto-sync gives you a head start, you’ll jump into what’s called a Sync Editor. This is where you make the magic happen, refining the AI’s work to get that flawless synchronization. It’s a visual workspace where you can see your audio waveform lined up with your lyric captions.
The interface gives you precise control. You can just click and drag to adjust the start and end times of each caption line, nudging them into the perfect spot.
Most of the time, this fine-tuning is surprisingly quick. You'll probably just be making a few small adjustments:
- Adjusting line timing: Drag the edges of a caption block to line up perfectly with a singer’s phrasing.
- Splitting or merging lines: Break up long sentences into more readable chunks or combine short, choppy phrases.
- Fixing minor text errors: Correct any typos or formatting hiccups you spot in the lyrics.
Honestly, this hands-on editing phase is what really separates an amateur video from a professional one.
Customizing and Exporting Your Video
With your timing locked in, it’s time to focus on aesthetics. A great tool will let you customize how your text looks, turning basic captions into a core part of your video’s visual style. You can play with fonts, colors, and text sizes, or add effects like outlines and backgrounds to make sure your lyrics pop against any background.
Once you’re happy with how everything looks and feels, you’re ready to export. The beauty of this process is that the captions are burned directly into the video file as open captions. This means they are always visible and will show up on any platform you upload to—YouTube, Instagram, Facebook—with zero extra work.
The final output is a high-quality, 1080p MP4 file, completely ready for you to share with the world.
How to Upload Captions on YouTube, Facebook, and Instagram
Creating your caption file is only half the battle. Now you have to get it live on the platforms where people will actually see it. Each social network has its own quirks for handling captions, and knowing them upfront will save you a ton of frustration.
Whether you've got a polished SRT file ready to go or you're planning to rely on auto-captions, here’s a breakdown of how to add closed captions on the big three.
The demand for accessible video is absolutely surging. The global market for captioning services is projected to hit a staggering $648.74 million by 2033. This isn't just a trend; it's a response to how we consume content. For instance, videos with captions retain viewers 80% better—a game-changer on mobile where sound is often off. You can dig deeper into these numbers with these captioning market insights.
Adding Captions on YouTube
When it comes to captions, YouTube offers the most control, making it a great place to start. While YouTube does automatically generate captions when you upload a video, you should never trust them completely. I've seen some hilarious (and brand-damaging) mistakes.
It’s best to treat them as a rough first draft. To add your own accurate file:
- Head over to YouTube Studio and find the video you want to edit.
- Click Subtitles from the menu on the left.
- Select ADD LANGUAGE and choose the language of your video.
- Finally, click ADD under the “Subtitles” column.
This is where you can upload your SRT file. If you don't have one, you can still edit YouTube's auto-generated text right in their editor. Trust me, correcting a few errors is much faster than transcribing an entire video from scratch.
Adding Captions on Facebook
Facebook makes adding captions pretty straightforward for both new and existing videos. As you're uploading a new video, look for the Captions option in the settings panel.
What if your video is already live? No problem.
- Find the video on your page, click the three-dot menu, and choose Edit video.
- In the editor, navigate to the Captions and subtitles tab.
- From here, you can upload your SRT file.
Like YouTube, Facebook also has an auto-generate feature. It's a decent starting point, but always give it a quick review to fix any awkward phrasing or typos before saving.
Pro Tip: I always recommend naming your SRT file using Facebook's convention:
filename.[language_code]_[country_code].srt. For a video in American English, that would look likemyvideo.en_US.srt. This little step helps Facebook correctly identify and serve your captions.
Adding Captions on Instagram
Instagram plays by a different set of rules, especially for short-form content like Reels and Stories. You won't be uploading an SRT file here. Instead, you'll use a native feature called the Captions sticker.
Once you've recorded or uploaded your Reel, tap the sticker icon at the top of the screen and find the "Captions" sticker. Instagram will automatically transcribe the audio and display it as animated text on your screen.
You can then tap the text to change the font and color to match your brand's aesthetic.
For longer videos on your main feed, your best bet is to burn the captions directly into the video file itself. This creates what are known as open captions—they're always visible, no matter what. Using a tool like MyKaraoke Video is perfect for this, as it ensures your captions are a permanent part of the video. To make sure your file is formatted correctly for the platform, check out our guide on social media video specs.
Taking Your Captions From Good to Great: Best Practices for Pros
So, you've figured out how to add captions to your video. That's a huge first step, but it’s really just the beginning. Anyone can hit a button on an auto-caption tool, but what separates the pros from the amateurs are the small, thoughtful details that create a truly accessible and polished final product.
The real goal is to think beyond a simple word-for-word transcript. You want to craft an experience for someone who relies entirely on your text to understand what’s happening. It all comes down to timing, context, and readability.
Get the Timing and Pacing Just Right
There's nothing more distracting than captions that are out of sync. If they show up before someone speaks or hang around long after they've finished, it completely breaks the viewer's focus. The gold standard is perfect synchronization—the text should appear on screen the moment the words are spoken.
Pacing is just as important. Instead of letting a long, rambling sentence fill the screen, break it into shorter, more digestible lines. This makes the text much easier to scan and follow, especially for people scrolling through a busy feed.
Rule of Thumb: I always stick to a maximum of two lines of text on the screen at once. It’s a simple rule that prevents the screen from looking cluttered and gives people enough time to read comfortably without hitting pause.
This one little change can dramatically improve the viewing experience.
Describe Key Sounds to Add Context
Remember, closed captions are for viewers who can’t hear the audio at all. That means your job is to paint a complete picture with words, and that includes more than just dialogue. Important non-speech sounds, sometimes called atmospherics, provide crucial emotional cues and context.
You just need to add a short, clear description in brackets. Think about what the viewer is missing without the sound.
- [upbeat music] can completely change the tone from serious to positive.
- [crowd cheering] shows excitement and approval that dialogue alone can't.
- [door slams] adds a layer of drama or finality.
- [phone rings] signals an important event is about to happen.
These aren't just minor additions; they transform a basic transcript into an immersive experience and ensure the full story gets across.
Make Readability and Contrast a Priority
All this work is for nothing if people can't actually read your captions. When you have control over the caption style (like with open captions burned into your video), clarity should be your top priority.
Stick with clean, simple, sans-serif fonts—think Arial, Helvetica, or something similar. More importantly, make sure there’s enough contrast between your text and the video background. You can almost never go wrong with white text that has a subtle black outline or a semi-transparent black background box. It's a classic for a reason: it works everywhere.
If you want to dive deeper into font selection, we have a whole guide on choosing a good subtitle font.
Answering Your Top Video Captioning Questions
Diving into video captions for the first time usually brings up a handful of common questions. Getting these sorted out from the start will save you a ton of headaches and help you get it right. Let's clear up some of the most frequent uncertainties I hear from creators.
What Is the Real Difference Between Closed Captions and Subtitles?
It's easy to use these terms interchangeably, but they serve two very different purposes.
Subtitles are all about translation. They assume the viewer can hear the audio just fine but doesn't speak the language. Their only job is to translate spoken dialogue.
Closed captions (CC), however, are designed for accessibility. They assume the viewer can't hear the audio at all. This means they have to do more than just transcribe words; they must also describe important sounds that add context, like [tense music], [phone rings], or [audience applauds]. It's about creating an equivalent experience for someone who is deaf or hard of hearing.
Subtitles translate language for those who can hear. Closed captions translate the entire audio experience for those who can't. That’s the heart of true accessibility.
Do Captions Actually Improve My Video’s SEO?
They absolutely do, and it's one of the biggest missed opportunities I see. Search engines like Google and YouTube are brilliant at reading text, but they can't watch your video to understand its content.
When you upload a caption file, you're essentially handing them a full, perfectly organized transcript of your entire video. This gives their algorithms a goldmine of keywords and phrases to index. The result? Your video starts showing up in search results for a much wider variety of queries, pulling in more organic views.
How Accurate Do My Captions Really Need to Be?
AI-generated captions are a fantastic starting point, but they are rarely perfect. You should always aim for at least 99% accuracy.
That last 1% might not sound like much, but it's where the real problems hide.
- Clarity: A single misplaced word can make a sentence completely nonsensical.
- Professionalism: A video full of captioning errors just looks sloppy and can damage your credibility.
- Meaning: Think about how easily a word like "can" can become "can't," completely flipping the meaning of your message.
Taking a few extra minutes to manually proofread your captions is one of the highest-return investments you can make in your video's quality.
Can I Add Captions to a Video That Is Already Published?
Yes! This is a huge relief for creators with a backlog of content. On almost every major platform, you can add or edit captions on videos that are already live.
On YouTube, for instance, you just head into YouTube Studio, pick your video, and you'll find options to upload a new SRT file or edit the existing captions directly. There’s no need to delete the video and re-upload, which means you won't lose all those hard-earned views, comments, and engagement metrics. This makes it easy to go back and make your entire library more accessible.
Ready to stop wrestling with complicated software and start creating stunning lyric videos with perfectly synced captions? MyKaraoke Video provides a powerful, browser-based solution that automates the heavy lifting, giving you back hours of your time. Get started for free today and see the difference.