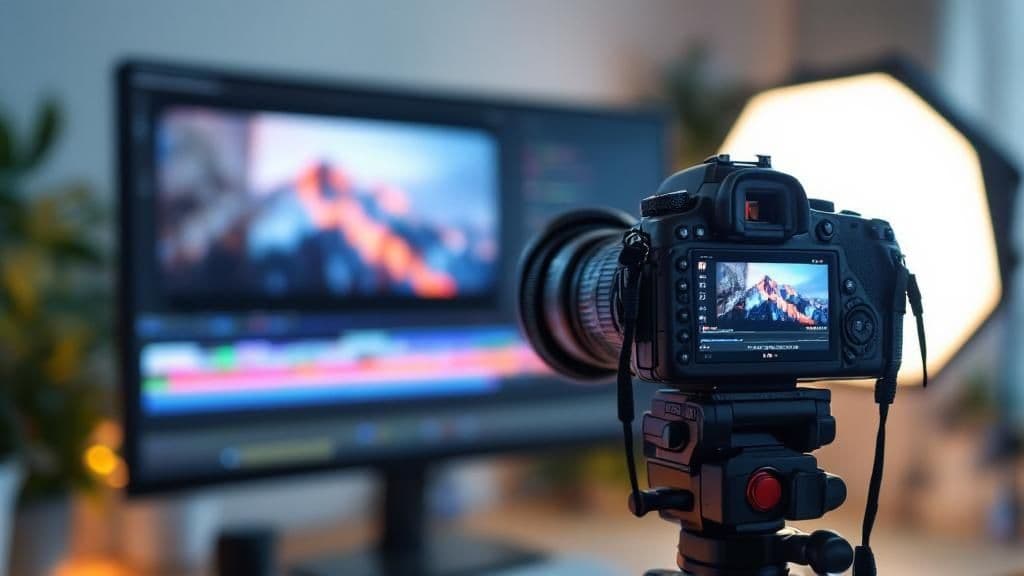
Understanding What YouTube Actually Wants
YouTube wants happy viewers. That means understanding how the tech stuff behind your videos makes or breaks the experience. Don't just hit the bare minimum – go above and beyond! Keep viewers glued to their screens, and YouTube's algorithm will reward you with more visibility. Because engaged viewers tell YouTube your content is worth watching.
Why Resolution and Bitrate Matter
Take a peek at this infographic – it shows just how much video resolution affects whether someone keeps watching or clicks away:
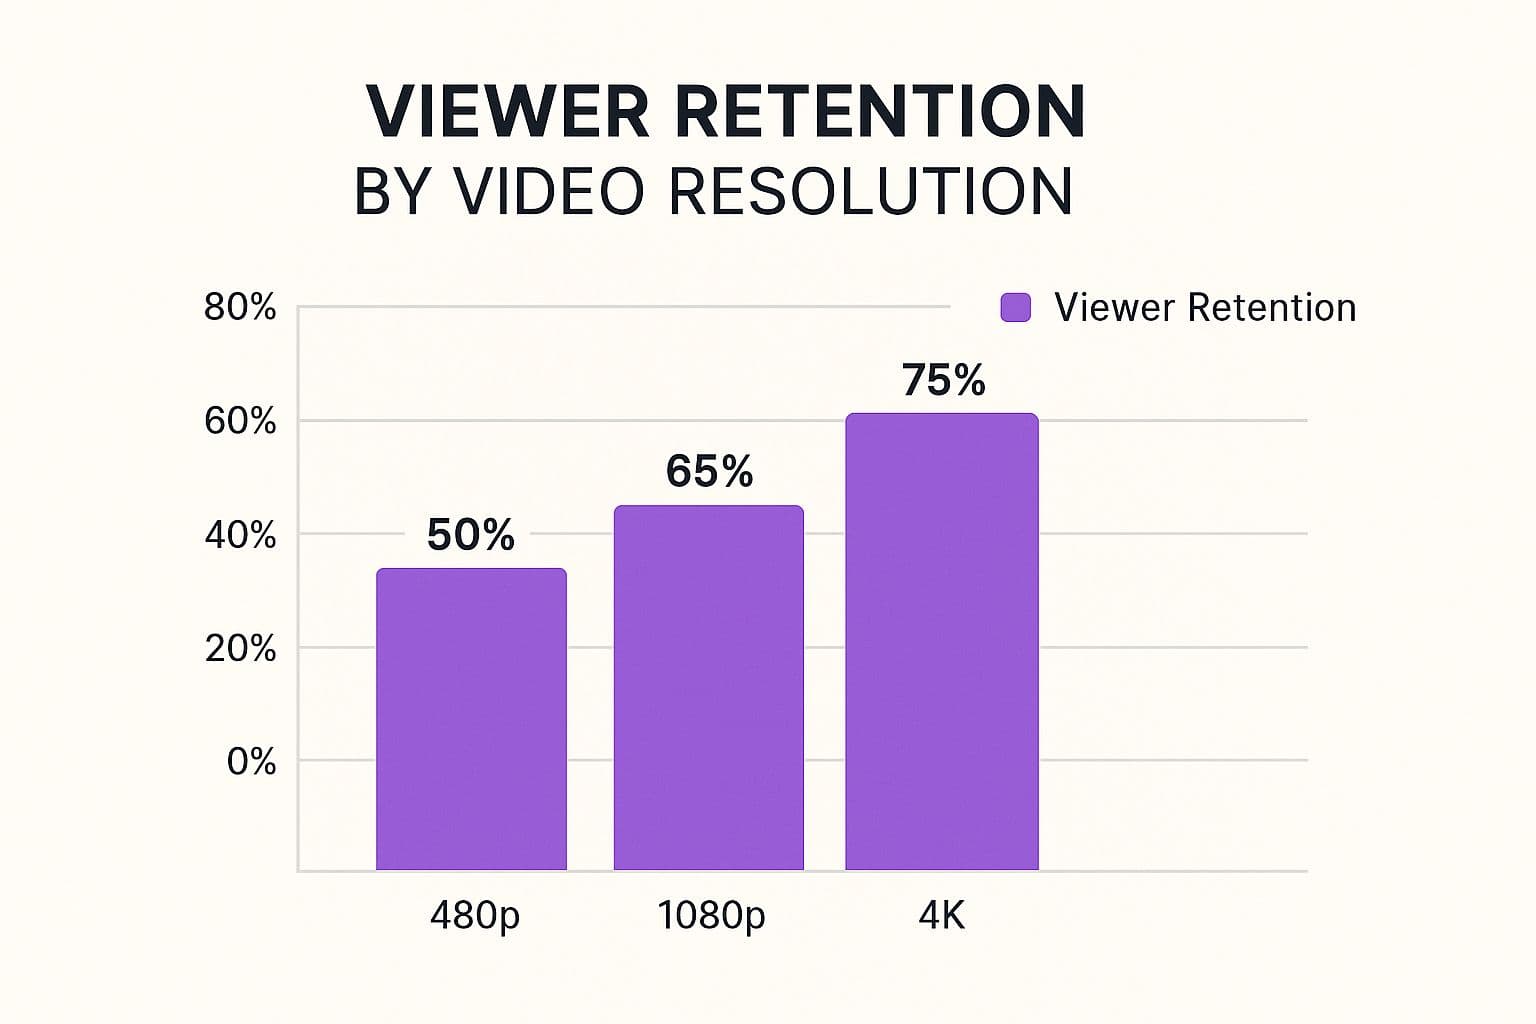
The numbers don't lie! Higher resolutions like 1080p and 4K keep viewers hooked way longer than lower resolutions like 480p. Crisp, clear visuals create an immersive experience that makes people want to stay tuned. Plus, resolution and bitrate are statistically two of the biggest factors in how viewers perceive video quality on YouTube. While YouTube supports various resolutions, 1080p (Full HD) hits the sweet spot – top-notch quality without gigantic files. YouTube uses adaptive bitrate streaming, meaning it adjusts the quality to match the viewer's internet speed. So, a 1080p video might stream at 5 to 8 Mbps, but 4K needs a whopping 20 Mbps or more. Want more juicy stats? Check these out: Learn more about YouTube stats and trends. But remember, resolution is just one piece of the puzzle.
YouTube’s Compression and You
Every video uploaded to YouTube gets squeezed – compressed – to play smoothly on all sorts of devices and internet connections. Even if your original video is ultra-high quality, YouTube will still compress it. Uploading in 4K gives YouTube more to work with, resulting in a better-looking video after compression. Think of it like baking: better ingredients make a better cake!
Balancing Quality and File Size
Shooting for the best resolution is important, but massive file sizes can make uploading a nightmare (and playback a pain for viewers with slower internet). That's where bitrate comes in. Bitrate is basically the density of information in your video. Higher bitrate usually equals better quality but bigger files. Finding the sweet spot is essential. Want to make awesome music videos? Check this out: How to master music video creation. Optimizing for YouTube means picking a bitrate that maximizes quality without blowing up your file size. It's this balancing act that's key to how to improve video quality on YouTube.
To help you visualize this balancing act, let's look at the following table:
YouTube Video Resolution and Bitrate Requirements Comparison of different video resolutions, their recommended bitrates, and optimal use cases for content creators
| Resolution | Recommended Bitrate | File Size (10 min) | Best For |
|---|---|---|---|
| 480p (Standard Definition) | 1.5-3 Mbps | ~100-200 MB | Older devices, limited bandwidth |
| 720p (HD) | 3-6 Mbps | ~200-400 MB | Most devices, decent bandwidth |
| 1080p (Full HD) | 5-8 Mbps | ~350-550 MB | High-quality viewing, good bandwidth |
| 1440p (2K) | 10-16 Mbps | ~700-1.1 GB | Premium displays, excellent bandwidth |
| 2160p (4K) | 20-45 Mbps | ~1.4-3.2 GB | Highest quality, top-tier bandwidth |
As you can see, choosing the right resolution and bitrate depends on your content and your target audience's internet access. While 4K is the ultimate in quality, it's not always practical. 1080p delivers great results for most viewers without requiring massive bandwidth.
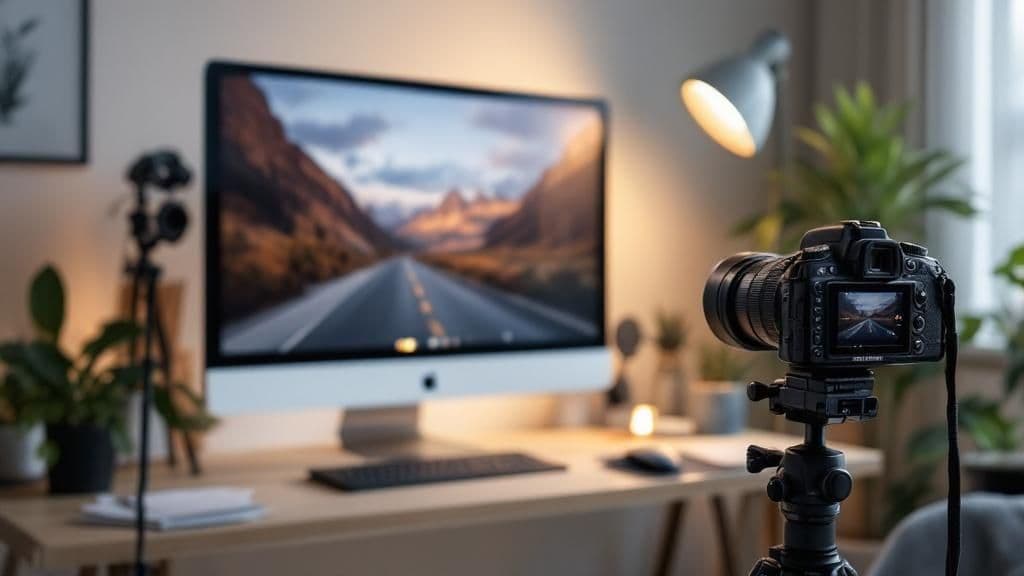
Setting Up Your Recording For Success
Great YouTube videos don't just happen; they're the result of planning and effort long before you hit "upload." This section explores the recording techniques that can take your content from amateur to pro, no matter your budget. It's all about making the most of what you already have.
Camera Settings: Maximizing Your Hardware
Even a simple camera can produce amazing results with the right settings. Think of your camera like a guitar – you need to tune it to get the best sound. The same applies to video. Exposure and white balance are two crucial settings. Proper exposure ensures your video isn't too dark or too bright, while correct white balance prevents unnatural colors. For example, indoor videos with incorrect white balance might look too yellow or blue.
- Frame Rate: 24 or 30 frames per second (fps) works well for most YouTube content. Higher frame rates like 60fps are best for action-packed videos needing smooth motion.
- Aperture: This controls how much light enters the lens. A wider aperture (lower f-number) lets in more light, great for low-light conditions. A narrower aperture (higher f-number) suits brighter environments.
- ISO: This controls your camera's light sensitivity. Lower ISO values give cleaner images, while higher ISO values can create noise or grain, especially in low light. Experiment to find the sweet spot between brightness and noise.
Before we dive into lighting, let's look at a handy table summarizing optimal camera settings for different kinds of content. This will give you a great starting point for configuring your camera:
To help you get started, here’s a handy table summarizing optimal camera settings for various content types:
Camera Settings for Different Content Types
| Content Type | Frame Rate | Aperture | ISO Range | Focus Mode |
|---|---|---|---|---|
| Talking Head Videos | 24fps or 30fps | f/2.8 - f/5.6 | 100-400 (indoors), 100-200 (outdoors) | Continuous Autofocus |
| Tutorials | 30fps | f/4 - f/8 | 100-400 | Continuous Autofocus or Manual Focus |
| Vlogs | 24fps or 30fps | f/2.8 - f/5.6 | Auto or 100-800 depending on lighting | Continuous Autofocus |
As you can see, each content type benefits from slightly different camera settings. Experimenting with these settings will help you achieve a professional look.
Lighting: Transforming Your Space
Lighting is incredibly important in video production. Imagine trying to see a painting in a dark room – the details are lost. Good lighting brings out your subject and creates a more engaging video. You don't need expensive equipment; natural light from a window can be great. The trick is to control and diffuse the light to soften harsh shadows. Even simple DIY diffusers, like a white sheet over a lamp, can dramatically improve your lighting.
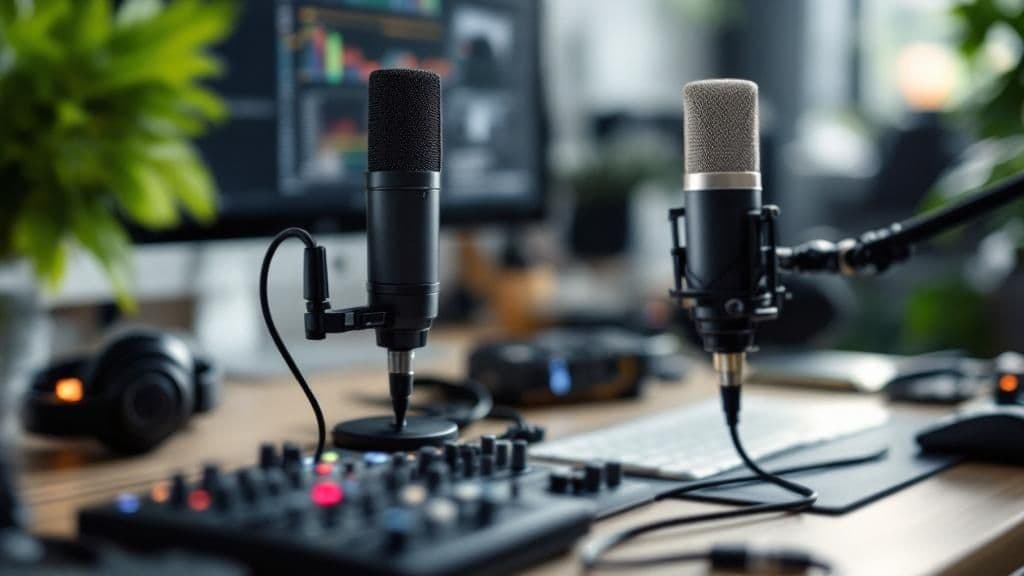
Audio: Keeping Viewers Engaged
While visuals matter, audio often plays a bigger role in how viewers perceive video quality. People are more likely to tolerate a slightly blurry video with clear audio than a visually perfect video with bad sound. Invest in a decent microphone – even a basic lavalier mic (Lavalier Microphone) can significantly boost your audio quality. Keep your recording space quiet and minimize background noise. For musicians creating videos, check out this helpful resource: How to master video editing for musicians.
Content-Specific Techniques
Different types of videos call for different recording approaches:
- Talking Head Videos: Maintain eye contact with the camera, use a tripod for stability, and ensure consistent lighting on your face.
- Tutorials: Use clear and concise language, and show close-ups of key details.
- Vlogs: A more relaxed style is fine, but still aim for good audio and lighting.
By mastering these recording techniques, you lay the foundation for high-quality YouTube videos that grab your audience and improve your channel's performance. This solid base also makes editing easier and more efficient, resulting in a better final product.
Editing Techniques That Actually Make A Difference

This is where the magic happens! Raw footage gets transformed into polished, engaging content ready to wow your YouTube audience. Think of editing as the secret sauce, the bridge between filming and captivating viewers. By understanding what the YouTube pros do, you can seriously boost your video game.
Color Correction and Grading: Setting the Mood
Color correction and color grading are your editing bread and butter. Correction is all about fixing things – like weird white balance or exposure issues – making sure your colors look real. Grading, on the other hand, is where the artistry comes in. It’s about shaping the mood and atmosphere. A sunny travel vlog needs a different vibe than a spooky short film, right? Think vibrant pops of color versus moody, desaturated tones. Learning these tools will totally transform your videos.
Noise Reduction: Cleaning Up Audio and Video
Nobody likes noise. Whether it's grainy visuals or annoying audio hiss, noise is distracting. Luckily, most editing software has noise reduction tools. For video, this means smoothing out that gritty look you sometimes get, especially in low-light situations. For audio, it’s like magic for minimizing background hum or that pesky microphone hiss. Don't go overboard though, too much noise reduction can make things sound (and look) unnatural. It’s all about finding the sweet spot.
Sharpening: Adding Polish
Sharpening is like adding a little extra sparkle to your footage. It brings out detail and gives your videos that professional sheen. This is especially useful because YouTube's compression process can sometimes soften things up. Just remember, less is more. Too much sharpening can make your videos look harsh and over-processed. Play around with the sharpening tools in your software and find what works best for you.
Efficient Workflows: Saving Time and Maintaining Quality
Time is precious! As you improve your videos, think about your workflow. Organize your footage before you start editing to avoid frustration (and wasted time). Learn those keyboard shortcuts! Many editing programs have them, and they can seriously speed things up – especially tasks like cutting and transitioning between clips. A structured workflow helps you create great content without spending hours on each video. This is key if you’re posting regularly.
Choosing the Right Editing Software
Your editing software is your command center. There are tons of options out there, from free programs like DaVinci Resolve to pro-level tools like Adobe Premiere Pro. Think about your budget and your tech skills when making your choice. User-friendly interfaces are great for beginners, while advanced software gives you ultimate control. Most software will have the noise reduction and color correction tools you need. Some even have special features for YouTubers, like direct uploading and optimization tools.
The Power of Audio Editing
Don't forget about sound! Clean, crisp audio is so important for how viewers perceive your videos. Whether it's dialogue, music, or sound effects, clear audio makes a huge difference. Most editing software has tools for noise removal, level balancing, and even adding in extra sounds. People often judge a video's quality based on its audio, so put in the time to make it shine.
By mastering these editing techniques, you'll take your YouTube videos from good to great. This will help you keep viewers hooked and boost your channel's success.
Mastering Export Settings For YouTube
So, your video masterpiece is finally ready. Before you unleash it upon the world (or at least, YouTube), let's talk export settings. You want your video to look its absolute best, right? This isn't the time to let YouTube's compression algorithms have their way with your precious creation. This section will guide you through the essential export settings that'll make your video sparkle and shine. And while we’re on the subject of maximizing your content’s reach, check out this great article on how to repurpose content for even more impact. Trust me, proper exporting ensures your viewers get the full experience, exactly as you intended, no matter what device they’re using.
Choosing the Right Codec
First up: codecs. Think of a codec as a translator for your video file. It compresses the video for easier uploading and streaming, then decompresses it for playback. For YouTube, H.264 reigns supreme. It's the Goldilocks of codecs – offering a just-right balance of quality and file size. This means smooth sailing (or streaming) for viewers on all sorts of devices. H.264 does a fantastic job of encoding your video efficiently while preserving as much detail as possible.
Bitrate: Finding the Sweet Spot
Next, we have bitrate, measured in Mbps (megabits per second). Bitrate is a bit of a balancing act: higher bitrates generally mean better quality, but they also mean bigger files. Larger files mean longer upload times (nobody likes waiting around) and potential buffering issues for viewers with slower internet connections. So, what's the magic number? For 1080p video, a bitrate of 5-8 Mbps is usually a good starting point. If you're working with glorious 4K footage, you might bump it up to 20-45 Mbps.
Resolution: Optimizing for Different Devices
Resolution is all about the number of pixels in your video. Higher resolutions, like 1080p (Full HD) or 4K, give you incredible clarity and detail but require more bandwidth. Lower resolutions like 720p are a good fallback option for viewers with less-than-stellar internet connections. Thankfully, YouTube uses adaptive streaming, which automatically adjusts the video quality based on the viewer's internet speed. However, uploading in a higher resolution like 1080p gives YouTube the best possible source material to work with, resulting in better quality even when streamed at lower resolutions.
Advanced Techniques for Superior Quality
Want to take things up a notch? Here are a few extra tips to really make your videos shine:
- Two-Pass Encoding: This technique analyzes your video during the first pass and then optimizes the compression during the second. It's like a dress rehearsal for your video – the second time's always the charm! You'll get higher quality and a more consistent bitrate, especially helpful for videos with lots of action or complex scenes.
- Audio Codec Selection: Don't neglect your audio! AAC is the preferred audio codec for YouTube. It delivers crisp, clear audio without bloating your file size. Remember, good audio is essential for a great viewing experience.
- File Size Optimization: While you always want to prioritize quality, there are smart ways to optimize file size without sacrificing visual fidelity. Variable bitrate encoding is a great way to reduce file size and improve playback for users with slower connections, all while minimizing any noticeable drop in quality.
By paying attention to these export settings, you're not just uploading a video – you're ensuring your content looks its absolute best on YouTube. And that means a happier audience, more engagement, and a boost for your channel's overall performance.
Getting Your Quality Content Discovered
So, you've poured your heart and soul into creating stunning videos on YouTube. They're practically cinematic masterpieces! But here's the catch: even the slickest production won't magically attract viewers. You need a strategy. You need to understand how to optimize your video quality specifically for YouTube. This section dives into the fascinating interplay between technical brilliance and reaching a wider audience.
Quality and the YouTube Algorithm
Believe it or not, crafting top-notch videos has a direct impact on how YouTube's algorithm treats your content. One of the secrets to improving your video quality on YouTube is understanding what the algorithm loves. Want to learn more? Check out this deep dive on the YouTube algorithm. In 2025, YouTube rolled out some exciting changes, giving a major boost to smaller, newer creators. Their content is now prioritized on home feeds, opening up a world of opportunities for growth. The algorithm is now all about keeping viewers glued to their screens. This means high-resolution videos, clever editing, and minimizing those pesky bounce rates while maximizing watch time. In short, focus on creating a truly enjoyable viewing experience.
Engagement Metrics: Watch Time and Retention
Ever heard of watch time and retention rates? These engagement metrics are your golden ticket to YouTube success. The longer people watch, the more YouTube thinks your content is valuable. And guess what? High-quality video and audio naturally encourage longer viewing sessions, giving those key metrics a healthy boost. Think about it: a video with crisp visuals and crystal-clear audio is way more engaging than a blurry, muffled mess. These seemingly small improvements tell YouTube that your content is worth sharing with a larger audience.
Thumbnails and Click-Through Rates
Your thumbnail is like the storefront for your video. Even if your video quality is phenomenal, a dull thumbnail will send potential viewers running. A high-quality, eye-catching thumbnail that accurately reflects your content, paired with a compelling title, is guaranteed to increase your click-through rate (CTR). That initial click is the first step in captivating your audience and boosting those all-important watch time metrics. Speaking of creating captivating content, you might find this interesting: How to master karaoke video creation for YouTube.
Upload Timing and Initial Engagement
Timing is everything! When you upload your videos can make a surprising difference. Think about your target audience’s time zone and when they’re most likely to be online. Uploading during peak viewing hours can give your initial views and engagement a significant boost. This, in turn, tells YouTube that your content is trending and worth promoting further. It's a beautiful cycle: quality content attracts viewers, leading to higher engagement, which translates into greater visibility and ultimately, helps your channel grow.
Advanced Quality Optimization And Problem Solving
Want to take your YouTube videos from "meh" to "marvelous"? You've come to the right place! This section dives into some common video production pitfalls and how to fix them, ensuring your content shines, whether your viewers are watching on a massive monitor or a tiny phone screen.
Conquering Low-Light Footage
Low-light filming can be a real pain, often resulting in grainy, noisy footage that lacks detail. But fear not, video adventurers! With a bit of planning and some post-production magic, you can rescue your videos from the darkness. First, invest in a camera that performs well in low-light conditions. Look for features like a wide aperture (low f-number) for maximum light capture and good ISO performance to handle higher sensitivities without excessive noise. Keep your camera as steady as possible during recording to avoid adding extra graininess. And in post-production, use noise reduction tools carefully. A little goes a long way – too much noise reduction can make your footage look artificial and blurry.
Taming Motion Blur in Action Content
Fast-paced action can sometimes lead to motion blur, making your video look less crisp. Want tack-sharp action sequences? Control your shutter speed! A faster shutter speed freezes motion, resulting in cleaner, more defined movement. Also, consider filming at a higher frame rate like 60fps. This gives you more frames to work with, which is great for smooth slow-motion effects and sharper action overall. While some editing software offers motion blur reduction tools, it's always best to get the footage right in-camera.
Ensuring Quality Across Mobile and Desktop
Your viewers watch your YouTube videos on everything from giant desktop screens to tiny phone displays. How do you make sure your videos look great on every device? Upload in 1080p (Full HD). YouTube's adaptive streaming automatically adjusts the resolution based on the viewer's device and internet connection. Check out WordPress for more configuration options if you use this platform. Think about aspect ratios, too. Vertical video (9:16) is perfect for mobile viewing, while traditional widescreen (16:9) is better suited for desktop.
Advanced Color Grading and HDR
Color grading is where the real movie magic happens. It's not just about correcting colors; it's about creating a mood and a style. Advanced color grading often involves using LUTs (Look-Up Tables) and tweaking curves and color wheels in your editing software. High Dynamic Range (HDR) is another game-changer, offering a wider range of colors and brightness levels. While HDR recording requires specific equipment and settings, it can significantly enhance the viewing experience on HDR-compatible displays. Want your videos to have that professional polish? HDR is definitely worth exploring.
Diagnosing and Fixing Common Problems
Even the best-laid plans can go awry. Here are a few quick fixes for common video woes:
- Pixelation: Often caused by low bitrate during export or a slow internet connection on the viewer's end. Try increasing your export bitrate and reminding viewers to check their connection.
- Audio Sync Issues: Make sure your audio and video tracks are lined up correctly during editing. Many video editing programs have automatic sync correction features.
- Compression Artifacts: These are those annoying blocks or distortions you sometimes see, usually caused by aggressive compression. Uploading in a higher resolution and using a higher bitrate can help minimize these artifacts.
By tackling these optimization techniques and troubleshooting common problems, you'll ensure your YouTube videos look fantastic and sound amazing, leading to a happier audience and more engagement.
Key Takeaways
This handy guide will walk you through how to create top-notch YouTube videos, using proven tricks of the trade and real-world examples from successful creators. Think of it as your personal checklist for every step of video production, helping you track your progress and consistently churn out awesome content that viewers will love. This, in turn, will fuel your channel's growth!
Pre-Production: Planning Your Masterpiece
- Define Your Content: First things first, what's the point of your video? A tutorial needs crystal-clear visuals and audio so viewers can follow along easily. A vlog, on the other hand, might have a more relaxed, informal feel. Knowing your video’s purpose will shape everything that follows.
- Target Audience Analysis: Think about your viewers’ internet speeds and what devices they usually watch on (mobile vs. desktop). Knowing this helps you choose the perfect resolution and export settings so everyone has a smooth viewing experience.
- Equipment Check: Make sure your camera, microphone, and lighting are ready to roll. Even budget-friendly gear can produce amazing results with the right settings and a little know-how.
Production: Lights, Camera, Action!
- Camera Mastery: Master your camera settings! Getting the right exposure, white balance, and frame rate can transform your footage from so-so to seriously professional.
- Lighting is Key: Whether you’re using sunlight or studio lights, controlling and diffusing your lighting can make a huge difference in how visually appealing your videos are.
- Audio Excellence: Great audio is essential for a high-quality video. Invest in a decent microphone and minimize background noise so viewers can immerse themselves in your content.
Post-Production: Polishing Your Gem
- Editing for Engagement: Use color correction and grading to enhance visuals. Clean up your audio and video with noise reduction, and add a touch of sharpening (don't overdo it!) to give your videos that extra polish.
- Workflow Efficiency: Get organized! Keep your footage neatly arranged and learn some keyboard shortcuts to speed up your editing process. Time is money, after all!
- Audio Enhancement: Believe it or not, clean audio can be even more important than perfect visuals. Focus on noise removal, balancing audio levels, and adding some background music or sound effects.
Exporting: Getting YouTube Ready
- Codec Choice: Stick with the trusty H.264 codec. It offers the best balance of quality and file size, ensuring smooth playback for everyone.
- Bitrate Optimization: Find the sweet spot for bitrate – good quality without huge file sizes. 5-8 Mbps is generally ideal for 1080p content, while 4K might need 20-45 Mbps.
- Resolution Selection: Always upload in the highest resolution you can (at least 1080p) so YouTube has the best source material for its adaptive streaming magic.
Optimizing for Discovery: Get Seen!
- Thumbnail Appeal: Create eye-catching thumbnails that accurately represent your content and make people want to click.
- Strategic Upload Timing: Think about when your audience is most likely to be online and try to upload during those peak viewing hours.
- Engage with Your Audience: Respond to comments and encourage interaction. It’s a great way to boost engagement metrics and show the YouTube algorithm that your content is valuable.
Troubleshooting: Fixing Common Glitches
| Problem | Solution |
|---|---|
| Pixelation | Increase export bitrate, or viewers might need to check their internet connection |
| Audio Sync | Align your audio and video tracks in your editing software. |
| Blurred Action | Use a faster shutter speed or film at a higher frame rate (like 60fps). |
| Low Light | Invest in a low-light camera, or carefully use noise reduction in post-production. |
By mastering these key takeaways, you’ll be well on your way to producing high-quality YouTube videos that grab your audience’s attention and help your channel thrive. Want to create awesome lyric videos without the hassle? Check out MyKaraoke Video, a browser-based tool for easily creating stunning karaoke and lyric videos: Create professional karaoke videos effortlessly with MyKaraoke Video.