
Making a great karaoke track really boils down to three things: getting a clean instrumental, timing the lyrics just right, and packaging it all into a polished video. You’ll start by either hunting down an official instrumental track or, more commonly these days, using a tool to strip the vocals out of the original song yourself. Once you have the music, the real work of syncing up the words begins.
The Modern Blueprint for Creating Karaoke Tracks
Not too long ago, making a decent karaoke track required some serious audio engineering chops and a studio setup. Thankfully, that's all changed. With the right software and good source audio, you can now create something that feels right at home in any karaoke bar, all from your own computer.
The real goal here isn't just to yank the vocals off a song; it's about building an actual experience for the singer. A killer karaoke track is a perfect mix of crystal-clear music, lyrics that appear at the exact right moment, and visuals that don't distract. This guide is your roadmap to getting it right, so you can skip the frustrating trial-and-error phase.
Core Components of a Great Karaoke Track
To get that professional feel, you need to nail these three elements:
- Pristine Audio: It all starts here. Your instrumental needs to be clean, without any weird vocal echoes or the telltale "swishy" sound you get from subpar vocal removers.
- Precise Lyric Syncing: This is absolutely critical. The lyrics on screen have to light up the instant they're meant to be sung. If the timing is off, the whole experience falls apart.
- Engaging Visuals: A simple background image, a subtle video loop, or some cool motion graphics can take your track from a basic audio file to a complete performance piece.
Understanding the Production Workflow
Think of the process as a series of building blocks. You'll source your audio first, then separate the vocals if you need to. After that comes the meticulous job of syncing the lyrics, and finally, you'll put it all together into a finished video. Every step depends on the one before it, so paying attention to the details along the way is key.
The real art of making karaoke tracks lies in the details. A track with perfectly synced, syllable-by-syllable timing feels intuitive and professional, while one that's slightly off can be frustrating for the singer.
This whole process is the engine behind a booming industry. The global karaoke market was valued at around USD 5.78 billion in 2024 and is expected to hit nearly USD 7.04 billion by 2032. This isn't surprising when you consider how tools like AI vocal removers and online video editors have made production so much easier for everyone. You can discover more insights about the growing karaoke market trends and see what's pushing the industry forward.
Finding the Right Audio Foundation
Before you touch a single lyric or browse for a background video, let's talk about the one thing that will make or break your karaoke track: the source audio. Honestly, the quality of your instrumental foundation sets the absolute ceiling for how good the final product can be. If you start with a tinny, low-quality file, it’s like trying to build a skyscraper on a shaky foundation. It just won't work.
Think of your audio sources as a quality pyramid. Right at the very top, the absolute gold standard, are official studio-released instrumentals. These are professionally mixed and mastered from the get-go without vocals, giving you a perfectly clean slate. If you can track one down for your chosen song, you've just made your life a whole lot easier.
But let's be real, official instrumentals are often hard to come by. That brings us to the next best thing: a high-fidelity, lossless audio file of the original track.
Why File Format Is a Bigger Deal Than You Think
When you’re prepping a song for vocal removal, not all audio files are created equal. You need a format that keeps as much of the original sound data intact as possible. This is where lossless files become your secret weapon.
Here’s the simple breakdown of what to look for:
- Your Best Bet (Lossless): Formats like FLAC, WAV, and ALAC are your new best friends. They pack in 100% of the original audio data. This means the vocal remover has the maximum amount of information to analyze, resulting in a much cleaner instrumental with fewer weird-sounding artifacts.
- Use with Caution (Lossy): Files like MP3s and AACs are great for listening on your phone, but they’re not ideal for this kind of work. They shrink the file size by permanently throwing away bits of audio data. When you remove the vocals from a compressed file, that missing data can create a muddy, distorted mess.
Starting with a low-quality MP3 (like a 128kbps file you found on some sketchy website) is a guaranteed recipe for disappointment. The compression artifacts get magnified during processing, leaving you with that dreaded "swishy" or watery sound in the background. If you absolutely have to use an MP3, make sure it’s at least 320kbps. But I can't stress this enough: always hunt for a lossless version first.
The old saying "garbage in, garbage out" has never been more true. The cleaner and more detailed your source audio, the cleaner and more professional your final instrumental will sound. This is single-handedly the most important choice you'll make in this whole process.
A Quick Word on the Legal Side
Okay, let's get the legal stuff out of the way, because it's important. Using copyrighted music without the right permissions for anything public or commercial can land you in some hot water.
When you create a karaoke track, you're dealing with a couple of different copyrights:
- The Musical Composition: This is the sheet music—the melody and lyrics. It’s owned by the songwriter or their publisher.
- The Sound Recording: This is the actual "performance" of the song you hear, owned by the record label.
To legally use a popular song for a karaoke video you share publicly (especially on a platform like YouTube), you technically need permission for both. Organizations like ASCAP, BMI, and SESAC handle the licensing for public performances of compositions.
Now, if you're just making tracks for a party at your house, you don't really have to worry. But if you're building a karaoke channel or providing tracks for a paid event, you have to take licensing seriously. Copyright infringement cases have led to some hefty fines. My advice? Always err on the side of caution and look into the proper licenses if your project is for more than just personal fun.
Mastering Vocal Removal With AI Tools
Once you have the best possible version of your audio file, the real magic begins. This is where we need to strip away the lead vocals to get a clean instrumental, and I can't overstate how much modern AI has changed the game. Forget the clunky, often disappointing results from older methods; today’s tech offers a level of precision that used to be exclusive to high-end recording studios.
The old-school approach, known as phase inversion, tried to work by inverting one channel of a stereo track. The goal was to cancel out any sound panned directly to the center—which is usually where the lead vocal sits. The problem? It often took the bass, kick drum, and snare along for the ride, leaving you with a thin, hollow, and artifact-riddled track. If you've ever heard an instrumental with that distinct "swishy" or underwater sound, you've heard the ghost of this outdated technique.
AI-powered vocal removers, on the other hand, are a whole different beast. They operate on a much more intelligent level.
The Power of AI Stem Separation
Modern tools like Moises and LALAL.AI don't just crudely subtract audio. Instead, they use machine learning models trained on enormous libraries of music. These models have learned to identify the unique sonic fingerprints of different instruments—vocals, bass, drums, piano, you name it.
When you feed a song into one of these tools, the AI analyzes the entire frequency spectrum and intelligently "un-mixes" the track into separate audio files called stems. This gives you an incredible amount of control, letting you isolate not just the vocals but any instrument you want. The final result is a much cleaner, fuller-sounding instrumental that keeps the original track's power and depth intact.
The leap from phase inversion to AI stem separation is like going from a blunt chisel to a surgical laser. One is a brute-force method with lots of collateral damage, while the other offers precise, clean cuts with minimal disruption to the surrounding audio.
To get the most out of these tools, a little prep work goes a long way. This infographic breaks down the basic workflow for getting your audio ready.
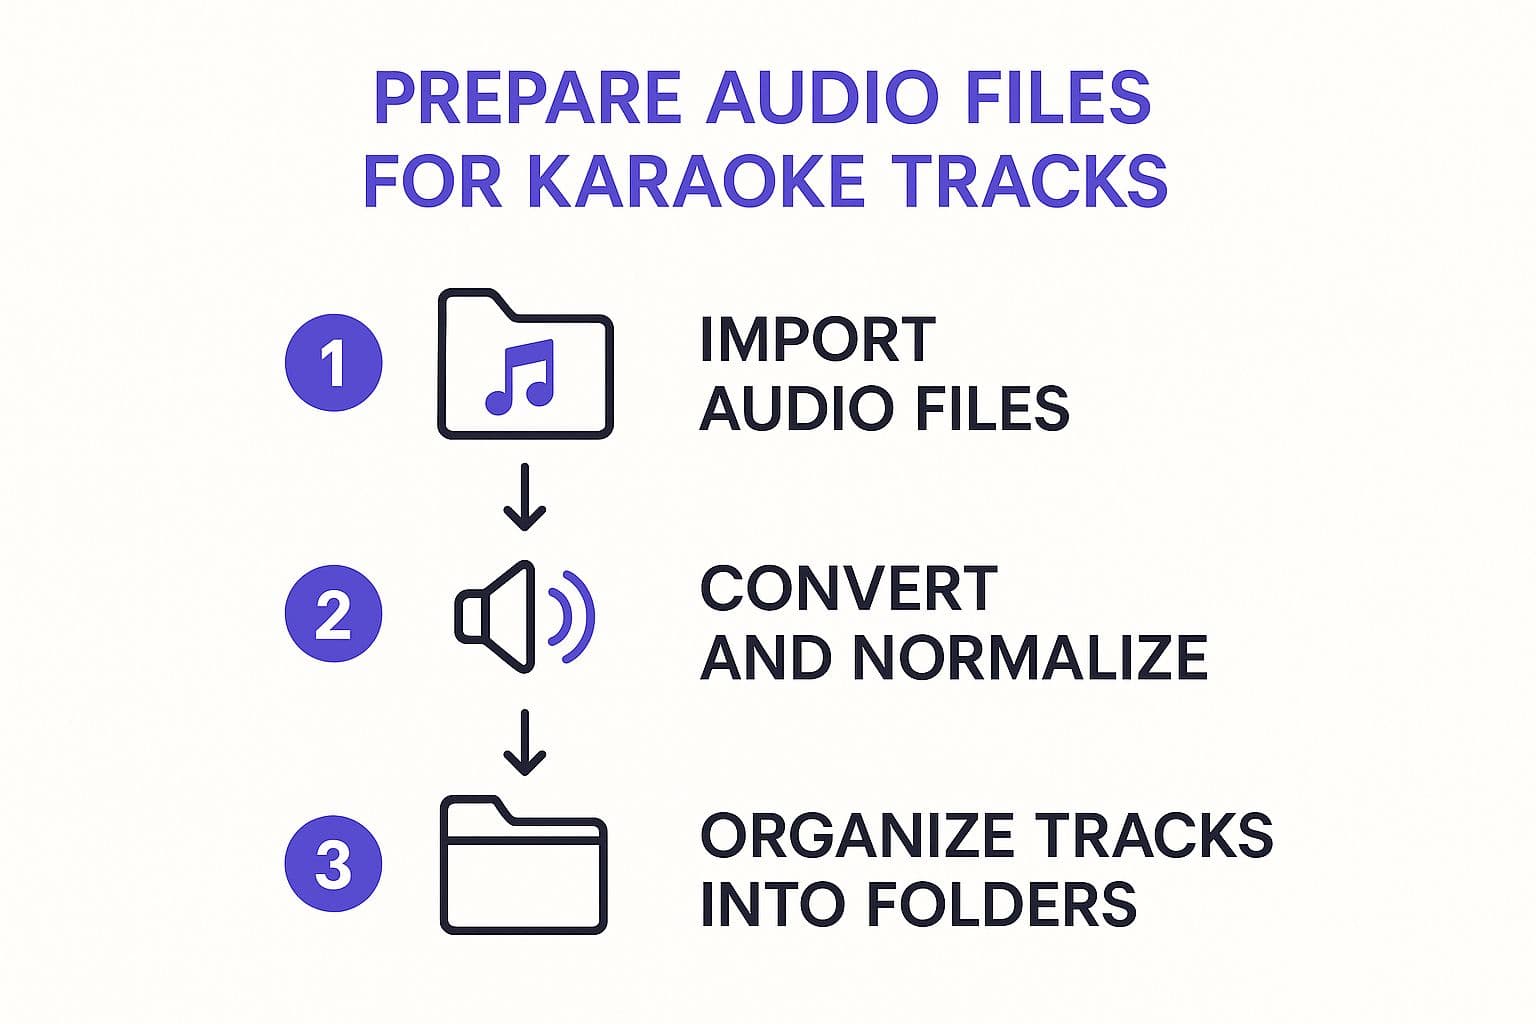
Following these simple steps ensures your files are in the ideal format for AI processing. Trust me, it leads to much cleaner and more reliable results when you finally get to the fun part.
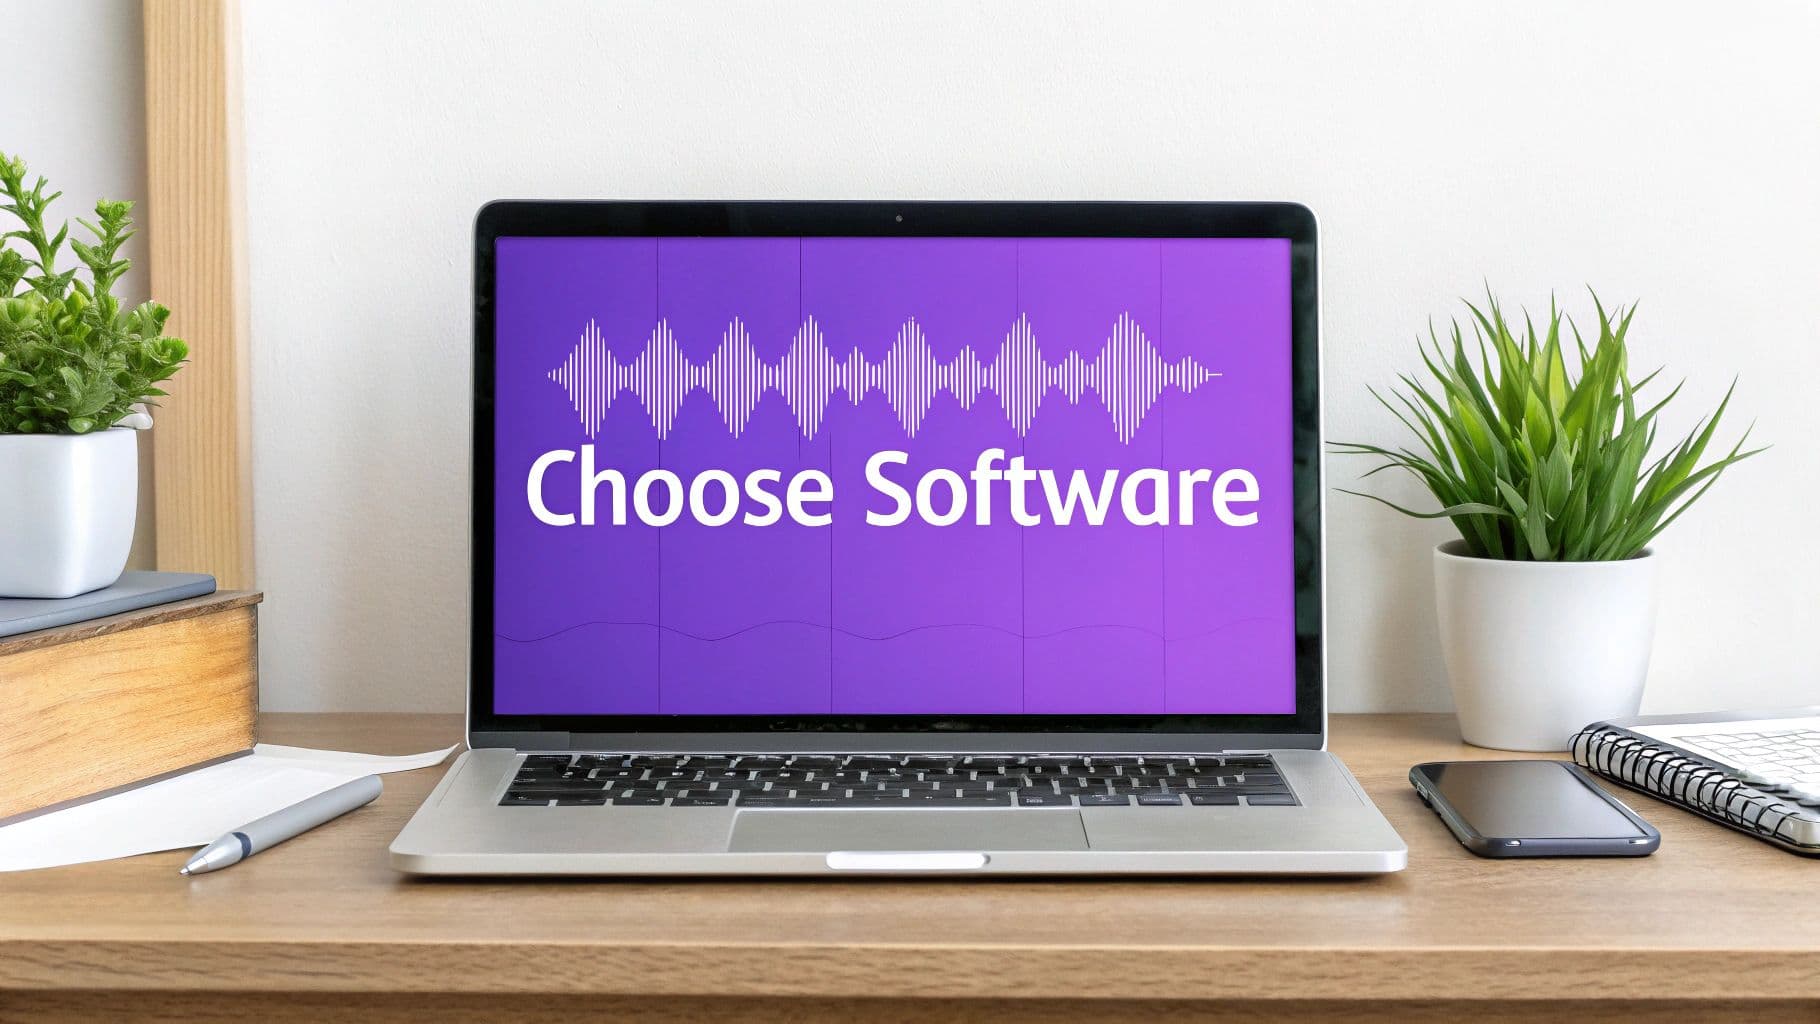
Choosing Your AI Vocal Removal Tool
The market for these AI audio tools has exploded, which is great because it gives us plenty of options to fit any budget or technical skill level. Generally, they fall into two camps: free, open-source software and paid, cloud-based services.
- Free Options (like Ultimate Vocal Remover): These are powerful desktop apps that run locally on your computer. They offer a ton of customization, letting you experiment with various AI models. The trade-off is a steeper learning curve, and you’ll need a reasonably beefy computer to process tracks without waiting forever.
- Paid Services (like LALAL.AI or Moises): These web-based platforms are known for being incredibly user-friendly and fast. You just upload a track, and their powerful servers do all the heavy lifting. They usually run on a subscription or credit-based model and provide a much smoother experience, especially if you're just starting out.
Comparing Popular Vocal Removal Tools
With so many options out there, it can be tough to decide where to start. This table gives you a quick overview of some of the leading vocal removers, highlighting what makes each one unique.
| Tool | Technology | Key Features | Pricing Model |
|---|---|---|---|
| LALAL.AI | Phoenix AI Network | High-quality stem splitting (up to 10 stems), batch processing, API access. | Freemium / Credit Packs |
| Moises | Machine Learning | AI mastering, chord detection, smart metronome, mobile and web apps. | Freemium / Subscription |
| Ultimate Vocal Remover | Open-Source Models | Highly customizable, runs locally, supports multiple AI models (e.g., MDX-Net, Demucs). | Completely Free |
| PhonicMind | Proprietary AI | Stem separation for vocals, drums, bass, and other instruments. Simple web interface. | Pay-per-song / Subscription |
Each tool has its strengths. If you need top-tier quality and are willing to pay for it, LALAL.AI is a fantastic choice. For an all-in-one musical toolkit, Moises is hard to beat. And if you're a tinkerer who wants total control, UVR is the way to go.
Practical Tips for a Flawless Instrumental
Even with the best AI, a few extra steps can take your instrumental from good to truly professional. The main goal here is to hunt down and eliminate any lingering vocal remnants—often called "ghost vocals"—that can be distracting for the person singing.
- Check for Backing Vocals: The AI might not catch every harmony or ad-lib. Listen closely to your new instrumental and see if any background vocal parts slipped through. Some tools actually give you the option to isolate and remove these separately.
- Use an Equalizer (EQ): If you still hear faint vocal whispers, a little EQ can work wonders. Human vocals often sit in a specific frequency range (usually 1-4 kHz). By making a small, careful reduction in this range on your instrumental track, you can often minimize those ghost vocals without messing up the sound of the other instruments.
- Listen on Different Devices: This is a big one. Don't just check your work on your fancy studio headphones. Play the instrumental on your laptop speakers, in your car, and through a cheap pair of earbuds. This will help you catch issues that might only show up on certain types of speakers.
The demand for high-quality user-generated content is soaring, especially in the world of mobile apps. The global karaoke app market is projected to hit a staggering USD 14,814 million by 2032. Creating tracks for these platforms means your work has to be polished and professional.
For a deeper dive into specific techniques, check out our guide on how to remove vocals from a song, where we cover more advanced tips and tricks. To see how these tools fit into the bigger picture, this guide on the best AI content creation tools is a great resource.
Syncing Lyrics for a Perfect Performance

Alright, you've got a clean, crisp instrumental track ready to go. That’s a huge milestone, but it's really only half the battle. The true soul of any karaoke track is the on-screen lyrics—they're the guiding star for every aspiring singer.
If the timing is off by even a fraction of a second, the whole experience feels clunky and frustrating. Perfectly synced lyrics are the invisible hand that tells the performer exactly when to breathe and when to belt it out. This part of the process is less about audio engineering and more about meticulous, rhythmic precision. It’s where your track becomes a truly interactive performance piece.
The goal is simple: make the singer feel confident, not confused. When the words light up at the exact moment they need to be sung, it creates a seamless flow that lets the performer get lost in the music.
The Right Tools for Timing Lyrics
To nail this kind of accuracy, you need software built for the job. You could technically try to slap some text onto a video editor's timeline, but dedicated tools make the process infinitely smoother and far more professional.
Here are a few of the go-to options I've seen people use:
- Dedicated Karaoke Software: Tools like KaraFun Studio are built from the ground up for this. They have specialized interfaces for timestamping lyrics word-by-word or even syllable-by-syllable, giving you incredible control.
- Video Editing Suites: Professional editors like Adobe Premiere Pro or DaVinci Resolve are also powerful choices. They let you manually place and time text layers with pinpoint accuracy, but the workflow isn't purpose-built for karaoke, so it can be a bit more tedious.
- Browser-Based Editors: Modern tools, including our own MyKaraoke Video, offer a streamlined, all-in-one solution. These platforms often use AI to help with the initial timing and provide an intuitive editor for fine-tuning, which means you don't have to deal with complex software installations.
For anyone just starting out, a browser-based tool or dedicated software like KaraFun Studio is usually the most straightforward path. They handle all the technical formatting behind the scenes, letting you focus purely on the timing.
Mastering the Art of Synchronization
Synchronization is a game of precision. What separates a good karaoke track from a great one often comes down to the timing style you choose. Do the lyrics light up line by line, or do they guide the singer through every single word?
The most common and effective approach is word-by-word highlighting. As each word is sung, it changes color, giving the singer a clear and immediate cue. This method hits that sweet spot between providing solid guidance and maintaining readability, which is why it's the standard for most professional karaoke tracks.
For faster-paced songs or tracks with tricky phrasing, you might even consider syllable-by-syllable highlighting. This is the absolute pinnacle of precision, breaking down each word into its phonetic parts. It takes more effort, there's no doubt about it, but it ensures the singer can navigate even the most rapid-fire lyrical passages with confidence.
Pro Tip: When you're syncing, always listen more than you watch. I find it helps to close my eyes and just tap along to the rhythm of the vocals on the original track. This helps you internalize the song's cadence and flow before you even start placing timestamps.
Best Practices for Lyric Presentation
Once your timing is locked in, the final piece of the puzzle is how the lyrics actually look on screen. This directly impacts the singer's ability to follow along, and poor visual choices can be just as disruptive as bad timing.
Keep these core principles in mind:
- Font Choice is Crucial: Stick with a clean, bold, sans-serif font. Think Arial, Helvetica, or Montserrat. You'll want to avoid overly decorative or thin fonts that are tough to read from a distance or on a low-resolution screen.
- High-Contrast Colors: The highlighted text needs to pop. Classic combinations like white text that fills with bright yellow or blue are popular for a reason—they just work.
- Smart Line Breaks: Don't let your text lines run on forever. Try to break them at natural pauses in the song's phrasing. This gives the singer a visual cue for when to take a breath and makes the lyrics feel much more digestible.
The importance of visual clarity can't be overstated, especially in major karaoke markets. The Asia-Pacific region, for instance, dominates the global market with a 42.3% share. In countries like Japan, home to an estimated 9,000 karaoke boxes, the on-screen experience is meticulously designed. Creating tracks for these audiences means understanding visual standards and licensing through bodies like JASRAC. You can learn more about the global karaoke market's nuances and what drives its growth.
For those looking to get even more granular with timing, especially when aligning video elements, you can dive into our detailed guide on how to sync audio with video for more advanced techniques.
Bringing It All Together: Producing Your Karaoke Video
You've got a crisp instrumental track and perfectly synced lyrics ready to go. Now for the fun part: turning those elements into a polished video that looks as good as it sounds. The visuals are more than just a background; they set the mood and turn a simple sing-along into a full-blown experience.
This is where your creative vision really takes center stage. A great background elevates the entire track, but the trick is to choose something that complements the music without distracting from the lyrics. After all, the words need to be the singer's primary focus.
Choosing Your Visual Backdrop
Think of the background as the stage for the performance. Whatever you choose should match the song's vibe. A high-energy pop anthem, for instance, might call for vibrant, moving graphics, while a soulful ballad works best with something more serene and atmospheric.
Here are a few popular routes you can take:
- Static Images: This is the most straightforward option. A clean, high-resolution photo or a simple branded graphic gets the job done without any fuss. It's a great way to ensure the lyrics are always crystal clear.
- Video Loops: I'm a big fan of using short, seamlessly repeating video clips. Think of gentle ocean waves, a cozy fireplace, or abstract light patterns. They add a touch of life and ambiance without being overwhelming.
- Motion Graphics: These are a step up from static images, adding a professional flair. Subtle animations like floating particles or slow-panning geometric shapes can make a huge difference.
Ultimately, you’re creating an atmosphere. Going beyond just displaying lyrics and incorporating effective visual storytelling techniques can make your karaoke video far more memorable and engaging for the person holding the mic.
Dialing in the Technical Specs
Before you render the final file, take a moment to get your technical settings right. This is crucial for making sure your video looks sharp on everything from a phone to a big-screen TV.
Pay close attention to these key details:
- Resolution: I always recommend Full HD (1920x1080p) as the absolute minimum. If you have high-quality source footage, exporting in 4K (3840x2160p) is even better—it looks fantastic and future-proofs your work.
- Aspect Ratio: Stick with the universal standard of 16:9. This is the widescreen format used by most TVs, monitors, and online platforms, so your video will fill the screen perfectly without those dreaded black bars.
- Frame Rate: For smooth, natural-looking motion, 30 frames per second (fps) is the way to go. If you're aiming for a slightly more cinematic feel, 24 fps can also work well.
Don't sleep on the technical details. I've seen beautifully synced tracks get ruined by a pixelated, low-res export. A professional presentation shows you care about the final product, and your audience will notice.
Exporting the Final Track
It's time to export your project into a single, shareable video file. The goal here is to find the sweet spot between high quality and a manageable file size. A massive file is a pain to upload and share, while an over-compressed one will look and sound awful.
For the best results, use the MP4 format with the H.264 codec. It’s the gold standard for a reason, offering excellent quality at a reasonable file size. It plays nicely on just about any device or platform you can think of. When exporting, aim for a video bitrate between 8-12 Mbps for a 1080p video; it's a solid starting point that balances quality and file size.
And remember, the final audio is just as important as the video. To really make your track shine, check out our guide on how to enhance audio quality.
Frequently Asked Questions About Making Karaoke Tracks
When you first get into making your own karaoke tracks, you're bound to run into a few questions. It’s totally normal. Whether you're wondering about the legal side of things or just trying to get that perfect, crisp audio, there's a bit of a learning curve. Let's tackle some of the most common questions I hear from people just starting out.
So, Is It Actually Legal to Make My Own Karaoke Tracks?
This is the big one, and the answer isn't a simple yes or no—it's all about context. If you're making a track for strictly personal use, say for a karaoke night at your house with some friends, you're pretty much in the clear. You aren't making money off it or distributing it, so it's highly unlikely anyone will have a problem.
Things get tricky, though, when you start sharing your creation publicly. Posting it on YouTube, for instance, opens up a whole different can of worms, especially if you plan to monetize it. Karaoke tracks touch on multiple copyrights: the musical composition (the melody and lyrics) and the sound recording itself.
As a rule of thumb, if you're distributing or publicly performing a karaoke version of a song you don't own, you technically need licenses. This usually means getting permission from performing rights organizations (like ASCAP or BMI) and possibly a mechanical license for your new instrumental version. Not getting these can lead to copyright strikes.
When in doubt, always play it safe. If your project is meant for more than just your living room, do your homework on the licenses you'll need.
How Do I Get the Best Possible Audio Quality?
Getting that clean, professional sound really comes down to two key things: the quality of your source file and the power of your vocal removal tool. I can't stress this enough: starting with a lossless audio file, like a WAV or FLAC, instead of a compressed MP3 is the single biggest leap in quality you can make.
After that, your results depend heavily on the software you're using.
- If you're new to this: Online AI tools like Moises or LALAL.AI are fantastic. They strike a great balance between getting high-quality results and being incredibly easy to use.
- For the power users: Desktop software like Ultimate Vocal Remover gives you granular control over the AI models, letting you really dial in the separation process to get an even cleaner instrumental.
A final pro tip: always test your finished instrumental on a few different systems. Listen on your good headphones, in your car, and even through your tinny laptop speakers. This will help you catch any weird audio artifacts you might have missed.
What's the Best Software for Syncing Up the Lyrics?
Choosing the right tool for lyric syncing can turn a tedious task into a genuinely fun part of the process. The best fit for you really boils down to your comfort level with tech and what you're trying to achieve.
Software designed specifically for karaoke, like KaraFun Studio, is built from the ground up for this job. It has specialized features that make word-by-word timing much simpler, which is a huge help if you see yourself making a lot of these tracks.
If you'd rather have an all-in-one solution, a video editor like DaVinci Resolve or a browser-based tool like MyKaraoke Video can be a game-changer. These let you sync lyrics and edit the video in the same place, which really simplifies the workflow. The most important thing is finding a tool that feels intuitive and gives you precise timing control—that’s the secret to making karaoke tracks that feel polished and professional.
Ready to stop juggling different apps and create amazing karaoke videos all in one place? MyKaraoke Video brings AI-powered lyric syncing and a powerful editor right into your browser. You can create professional 1080p karaoke videos in minutes, not hours. Start creating for free today at MyKaraoke Video.