Before you even think about syncing lyrics or picking fonts, getting your core assets together is the most important step. A truly great karaoke video is built on three pillars: a clean instrumental track, an engaging background, and a rock-solid lyric script. Nail these, and the rest of the process becomes so much smoother.
Your Karaoke Video Creation Toolkit
Think of this as your pre-flight checklist. Taking the time to gather and organize your materials now will save you a world of headaches later on. A well-prepped project folder is your best friend.
This isn't just a hobbyist's game anymore, either. The global karaoke market was valued at around $5.38 billion** back in 2021 and is on track to hit **$7.93 billion by 2025. That's a massive market hungry for high-quality, engaging content.
Before we jump into the software, let's break down the essential components you'll need for your project. Having these ready to go is half the battle.
Essential Components for Your Karaoke Video Project
| Component | Key Considerations | Where to Find |
|---|---|---|
| Instrumental Audio | Must be high-quality and vocal-free. Avoid low-bitrate MP3s. | Official artist releases, dedicated karaoke track services (Karafun), or AI vocal removers (LALAL.AI). |
| Background Visuals | Engaging but not distracting. High contrast with lyrics is critical. | Stock video sites (Pexels, Pixabay), high-resolution photos, or simple color gradients. |
| Lyric Script | Must be 100% accurate to the recording, including ad-libs. | Lyric websites (always double-check!), then manually edit in a plain text (.txt) file while listening. |
With these three assets in your project folder, you're ready to start building your video with confidence.
Sourcing Your Instrumental Track
The entire foundation of your karaoke video is a crisp, clean instrumental. You absolutely need an audio file that's stripped of the lead vocals so your singer can shine. Seriously, avoid ripping low-quality audio from online videos—that muffled, compressed sound will instantly make your final product feel cheap.
Here are the best places to look:
- Official Instrumentals: Your first stop should always be searching for an official instrumental version released by the artist. These provide the best possible audio fidelity, hands down.
- Karaoke Music Providers: Services like Karafun or Sunfly are goldmines. They have huge libraries of professionally produced, fully licensed backing tracks made specifically for karaoke.
- AI Vocal Removers: What if there's no official instrumental? Tools like LALAL.AI have gotten remarkably good at using AI to digitally strip the vocals from a standard song, leaving you with a very usable backing track.
Finding Compelling Background Visuals
The background visual is what sets the mood. You're looking for something that complements the song's vibe without being so busy that it distracts from the lyrics. Fast cuts and chaotic visuals are a huge no-no; they make the text hard to follow and pull focus from the performance.
A few ideas that work really well:
- Looping Video Clips: Think subtle. Abstract patterns, slow-motion landscapes, or gentle animations are perfect for creating atmosphere without being overwhelming.
- High-Quality Still Images: Sometimes, less is more. A single, powerful, high-resolution photo that echoes the song's theme can be incredibly effective.
- Solid or Gradient Colors: For a clean, modern aesthetic, you can't go wrong with a simple color background. It puts 100% of the focus right where it belongs: on the lyrics.
The best background supports the song's energy without competing with the text. High contrast between your lyrics and the background is non-negotiable for readability.
This infographic breaks down that whole pre-production workflow, from grabbing your audio to prepping the lyrics.
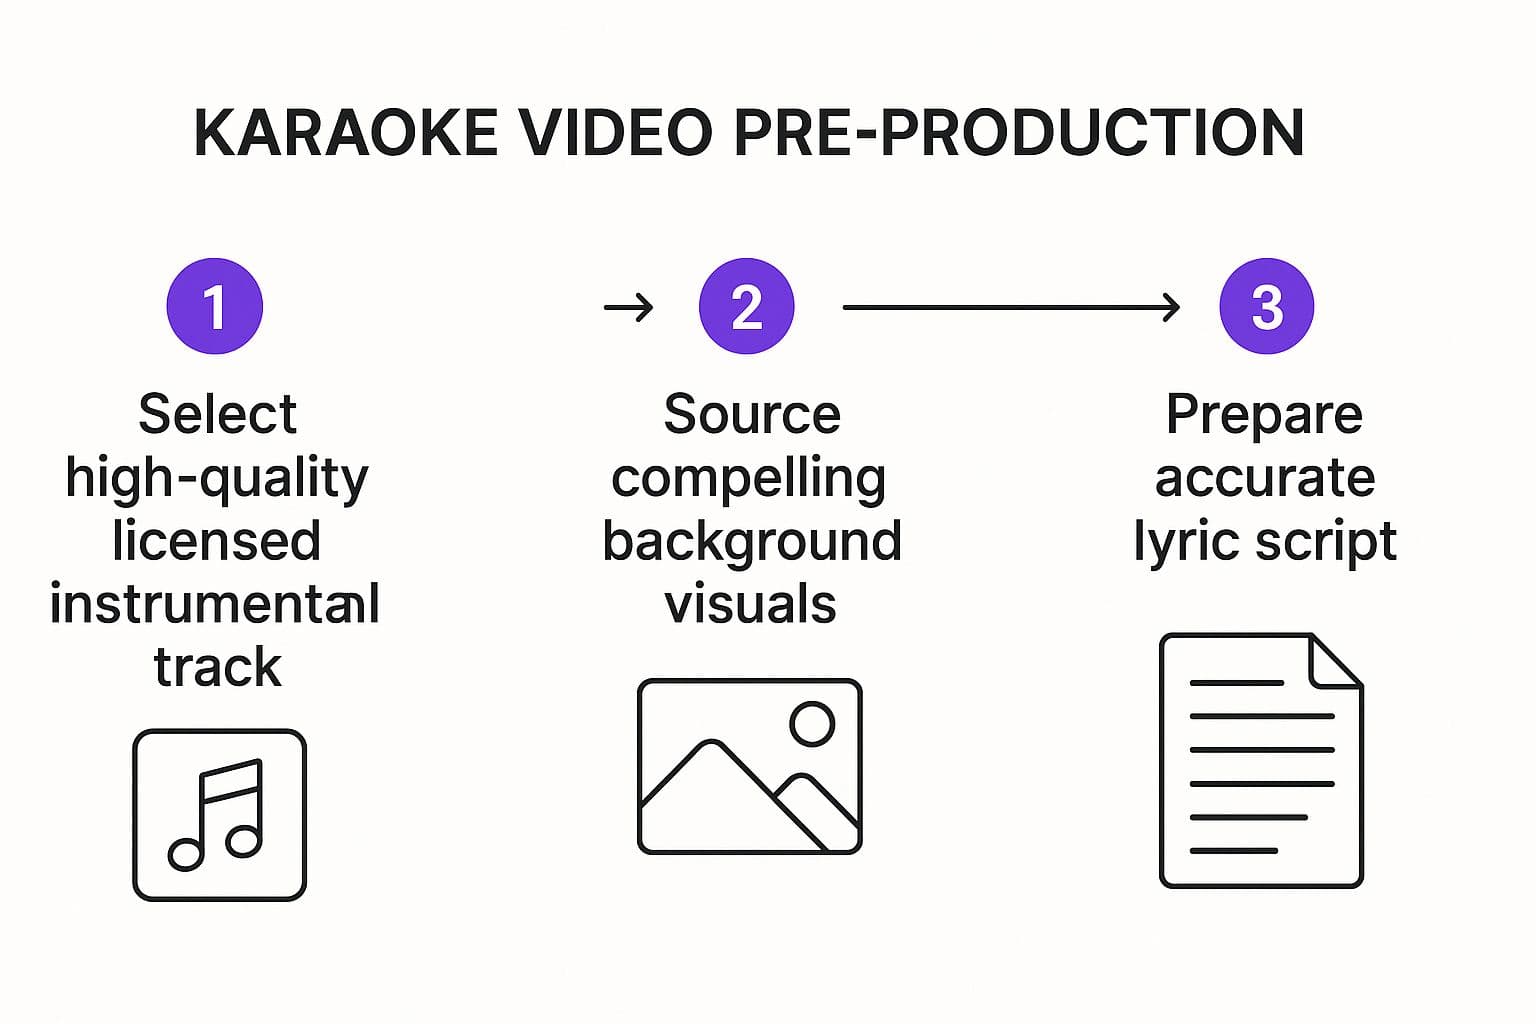
As you can see, it's a logical progression. You secure your audio, find the right visuals to match, and then finalize the script. Each step builds on the last.
Preparing an Accurate Lyric Script
Last but not least, you need a plain text (.txt) file containing the song's lyrics. And I mean perfectly accurate. The words in your script have to match the sung vocals exactly.
Copying lyrics from a website is a decent starting point, but you have to go further. Play the song, listen closely, and edit that text file for every little ad-lib, repeated word, or phrasing quirk. This might seem tedious, but trust me, this meticulous work now will make the lyric synchronization process a thousand times easier later.
If you're also thinking about the physical setup, we have a great guide on the https://www.mykaraoke.video/blog/best-professional-karaoke-equipment. And for those who want to really power up their production, it's worth exploring some of the best AI video creation tools on the market today.
Getting the Lyric Timing Just Right
Once you have your song and lyrics ready, it's time to dive into what I consider the heart of any great karaoke track: syncing the lyrics. This is where the magic happens. Get it right, and singers feel like superstars. Get it wrong, and even a simple song becomes a frustrating mess.
The trick is to make the lyrics appear on screen just a hair before they need to be sung—think about 0.3 to 0.5 seconds early. This little bit of lead time gives the singer a moment to see the words, breathe, and hit their cue without ever feeling rushed. It’s a subtle thing, but it makes all the difference.
First Pass: Laying Down the Basic Timing
To get started, pull your instrumental track and your plain text lyric file into the MyKaraoke Video editor. You'll see the audio waveform and your lyrics side-by-side on a timeline, which is your canvas for syncing.
Most people tackle this in one of two ways:
- Tapping it out: This is my go-to for a first draft. Just hit play on the song and tap a key (like the spacebar) for each word or syllable in real time. It’s intuitive and gets you a solid foundation quickly.
- Dragging and dropping: This method is all about precision. You can visually drag lyric blocks and align them perfectly with the bumps and spikes in the audio waveform.
I’ve found that a hybrid approach works best. I’ll do a quick pass with the tapping method to get the general rhythm, then I’ll zoom in and use the drag-and-drop editor to nudge things into perfect alignment.
My Two Cents: Don't even think about doing this without a good pair of headphones. Your laptop speakers will lie to you. You need to hear every little percussive hit and vocal cue to really nail the timing, especially on that crucial first beat of a line.
How to Handle Fast-Paced and Tricky Rhythms
So, what about those songs that aren't straightforward four-four time? I'm talking about rapid-fire rap verses, syncopated pop hits, and anything with a rhythm that just won't sit still. If you try to sync these word-by-word, you'll drive yourself crazy.
The better move here is to sync by the phrase. Instead of trying to catch every single word in a lightning-fast line, just time the entire phrase to appear at the right moment. The singer's brain is smart enough to follow the flow from there.
Take a classic like Eminem's "Lose Yourself." Syncing the line "His palms are sweaty, knees weak, arms are heavy" as one perfectly timed block is way more effective and readable than a frantic, unreadable mess of individual words. If you want to get deeper into the technical side of this, our guide on how to sync audio with video is a great resource.
What to Do During Instrumental Breaks
A long guitar solo or intro can leave a singer hanging if the screen just goes blank. It breaks the flow and can make people think the video has frozen.
Here’s how I handle those musical interludes to keep everything feeling smooth:
- Add a simple cue: Just putting "(Guitar Solo)" or "(Instrumental)" on the screen works wonders. It tells the singer what's happening and when to expect the vocals to come back in.
- Give them a countdown: For intros or long pauses before a verse, a classic "3... 2... 1..." is the universal karaoke signal to get ready. It helps singers come in strong and right on beat.
- Don't rush to a blank screen: For those shorter gaps between lines, I like to leave the last sung line on-screen for an extra beat. It prevents that jarring, flickering effect of the screen going empty for just a second.
The Finishing Touch: Syllable-Level Syncing
For slower songs, especially ballads, just timing whole words doesn't quite cut it. If you want that classic, professional "bouncing ball" feel, you need to sync down to the syllable. This means breaking up words and timing each part.
Let's look at a line like "I will always love you." A basic sync highlights the whole phrase at once. But a truly polished version breaks it down:
- "I"
- "will"
- "al-ways"
- "love"
- "you"
This level of detail guides the singer through the melody and helps them hold onto notes for the right duration. Yes, it takes more work upfront, but syllable-level syncing is what separates an amateur video from a high-quality track. It makes the experience incredibly intuitive, letting the singer forget about the screen and just focus on their performance.
Designing a Visually Captivating Karaoke Track
Alright, you've got your lyrics synced up perfectly. Now for the fun part. This is where you get to put on your director’s hat and turn a simple lyric video into something that pulls people in and makes them want to sing.
The design choices you make here—from the background you pick to the font you use—give the song its entire personality. It's the difference between a video that’s just functional and one that’s genuinely exciting to perform with.
A great design isn't just about looking cool; it serves a purpose. It needs to set the mood, guide the singer, and above all, be crystal clear. Let’s get into the key ingredients for making your karaoke track look amazing.
Choosing the Right Background
Think of your background as the stage for your lyrics. Its job is to set the tone without ever upstaging the star of the show: the words. I've seen countless videos where a busy, distracting background completely ruins the experience by making the text impossible to read.
Here are a few go-to approaches that I've found work best:
- Subtle Looping Videos: Think slow-moving abstract graphics, a gentle fly-over of a forest, or maybe some cosmic animations. The key is low visual noise. You want a little movement to add vibe, not a full-blown action movie competing for attention.
- High-Resolution Static Images: Never underestimate the power of a single, powerful image. For a heartfelt ballad, a stunning landscape photo can be far more impactful than a busy video could ever be.
- Simple Color Gradients: If you want a clean, modern look that guarantees readability, a simple gradient is your best friend. This is a foolproof way to ensure high contrast and keep the focus right where it belongs—on the text.
Pro Tip: When in doubt, go simpler. A minimalist background that makes lyrics pop is always a better choice than a flashy one that makes them hard to see. Your number one goal is readability, period.
Mastering Fonts and Colors for Readability
The typography you choose is absolutely critical. Get it right, and the singer can relax and have fun. Get it wrong, and they'll spend the whole song squinting. This isn't just about making things pretty; it's about creating a smooth, accessible user experience.
To nail the clarity, stick to these fundamentals:
- Pick a Bold, Sans-Serif Font: There's a reason you see fonts like Arial Bold, Helvetica, and Montserrat everywhere. They're clean, easy to read from a distance, and don't have any of the frilly bits that can make letters blur together.
- Go for High Contrast: The classic combo is bright yellow or white text for the upcoming lyrics. It’s a classic for a reason—it just works. This combination stands out against almost any dark or muted background you can throw at it.
- Add a Text Outline or Shadow: This is the pro move that makes all the difference. Adding a thin black outline or a subtle drop shadow to your text creates a crisp edge, separating the letters from the background. It guarantees readability even if the background has some lighter spots.
If you want to dive deeper into pairing visuals with music, we've got a whole guide on https://www.mykaraoke.video/blog/how-to-make-visuals-for-music.
Perfecting the Lyric Wipe Effect
That "lyric wipe" or "fill" effect is the heart and soul of karaoke. It's the colored highlight that sweeps across the text, showing the singer exactly which word to hit and when. Getting this effect dialed in is what separates an amateur video from a professional one.
Here’s how to get it just right:
- Choose a Contrasting Wipe Color: The color filling in the words needs to stand out against the base text color. A vibrant blue or red filling over white or yellow text is a common and highly effective choice.
- Adjust the Wipe Speed: The speed of the wipe has to feel natural and match the pacing of the singer. In MyKaraoke Video, this is all handled by the syllable-level syncing you did earlier. For long, held notes, the wipe glides slowly; for rapid-fire rap verses, it zips along precisely.
- Keep it Consistent: Once you've landed on a color scheme and wipe style that works, stick with it. Consistency helps the singer feel comfortable and keeps the whole experience looking clean and polished.
Thinking about these elements goes beyond just making a video; it's about understanding the art of visual storytelling. When you thoughtfully combine the background, text, and timing, you're not just putting words on a screen—you're creating an immersive journey that makes the performance so much better.
Adding Pro Touches and Exporting Your Video
You’ve synced your lyrics and dialed in the design—the heavy lifting is done. Now it's time for the final 10%, the part of the process that really separates a good karaoke video from a great one. These are the professional finishing touches that make the singer's experience smooth and intuitive.
Think of it this way: these little additions, like intro screens and countdowns, are all about anticipating the singer's needs. They aren't just for show; they provide crucial cues that help the performer feel confident and ready.
Polishing Your Video with Professional Cues
When was the last time you did karaoke? That brief moment before the music starts is everything. You need a second to find your key, catch a breath, and get set. A video that just throws you into the first verse can be jarring. This is exactly why a proper lead-in is non-negotiable.
A few simple additions can completely change the feel of your video:
- Set the Stage with an Intro Screen: Start with a simple screen showing the song title and artist. This confirms the singer has the right track and gives them a moment to prepare. Inside MyKaraoke Video, you can do this easily by adding a custom text block right at the beginning of your timeline.
- Cue the Singer with a Countdown: Nothing says "get ready to sing!" more clearly than a visual countdown. A simple "3... 2... 1..." just before the first lyric appears is the perfect, universal signal. It removes all the guesswork.
- End Cleanly with an Outro: Just as you started, you need a clean finish. An outro screen could be a simple "Thanks for Singing!", your logo, or music credits. It provides a sense of closure instead of the video just cutting off abruptly.
These elements create a complete, thoughtful package. It shows you've considered the user experience, which is more important than ever. The home karaoke market is booming, with projections showing the household segment growing at a CAGR of 4.2% between 2024 and 2032. It’s a clear sign that people are investing in quality at-home entertainment. You can dive deeper into these karaoke market trends on marketresearchfuture.com.
My Personal Tip: For the intro screen, I've found that letting it hold for about 5-7 seconds is the sweet spot. It's just enough time for someone to read the title and get oriented, but not so long that it drags. It’s all about nailing that perfect pacing.
Getting Your Export Settings Right
Now for the final, most critical step: exporting the video. All your hard work syncing and designing won't mean a thing if the final file is pixelated or in a format nobody can play. The settings you choose here are what lock in the final quality of your project.
While export settings can sound intimidating, MyKaraoke Video does a great job of simplifying things. You really only need to focus on a few key choices that will have a big impact on your final product. Let's break down what truly matters.
Choosing the Right Resolution and Format
For almost any use case you can think of—from a YouTube channel to a smart TV—1080p (1920x1080 pixels) is the modern standard. It gives you a crisp, high-definition picture that looks fantastic on today's screens without creating a monstrously large file.
Here's a quick cheat sheet for the most important export settings:
| Setting | Recommendation | Why It Matters |
|---|---|---|
| Resolution | 1080p (Full HD) | This hits the perfect balance between high quality and a manageable file size. It's the standard for YouTube and looks sharp on TVs. |
| Format | MP4 (H.264 codec) | MP4 is the undisputed king of video formats. It's compatible with virtually every device, platform, and video editor out there. |
| Frame Rate | 30 FPS | For a karaoke track with mostly static backgrounds, 30 frames per second delivers perfectly smooth playback without overkill. |
| Bitrate | 8-12 Mbps | This is the data rate for your video. A bitrate of 8-12 Mbps for 1080p footage ensures excellent quality without a bloated file. |
Once you hit the export button, MyKaraoke Video renders everything in the cloud, which is a huge plus—it won't bog down your own computer. You’ll get a notification as soon as your high-quality MP4 is ready to download. From there, your professional-grade karaoke video is ready to share, upload, and enjoy.
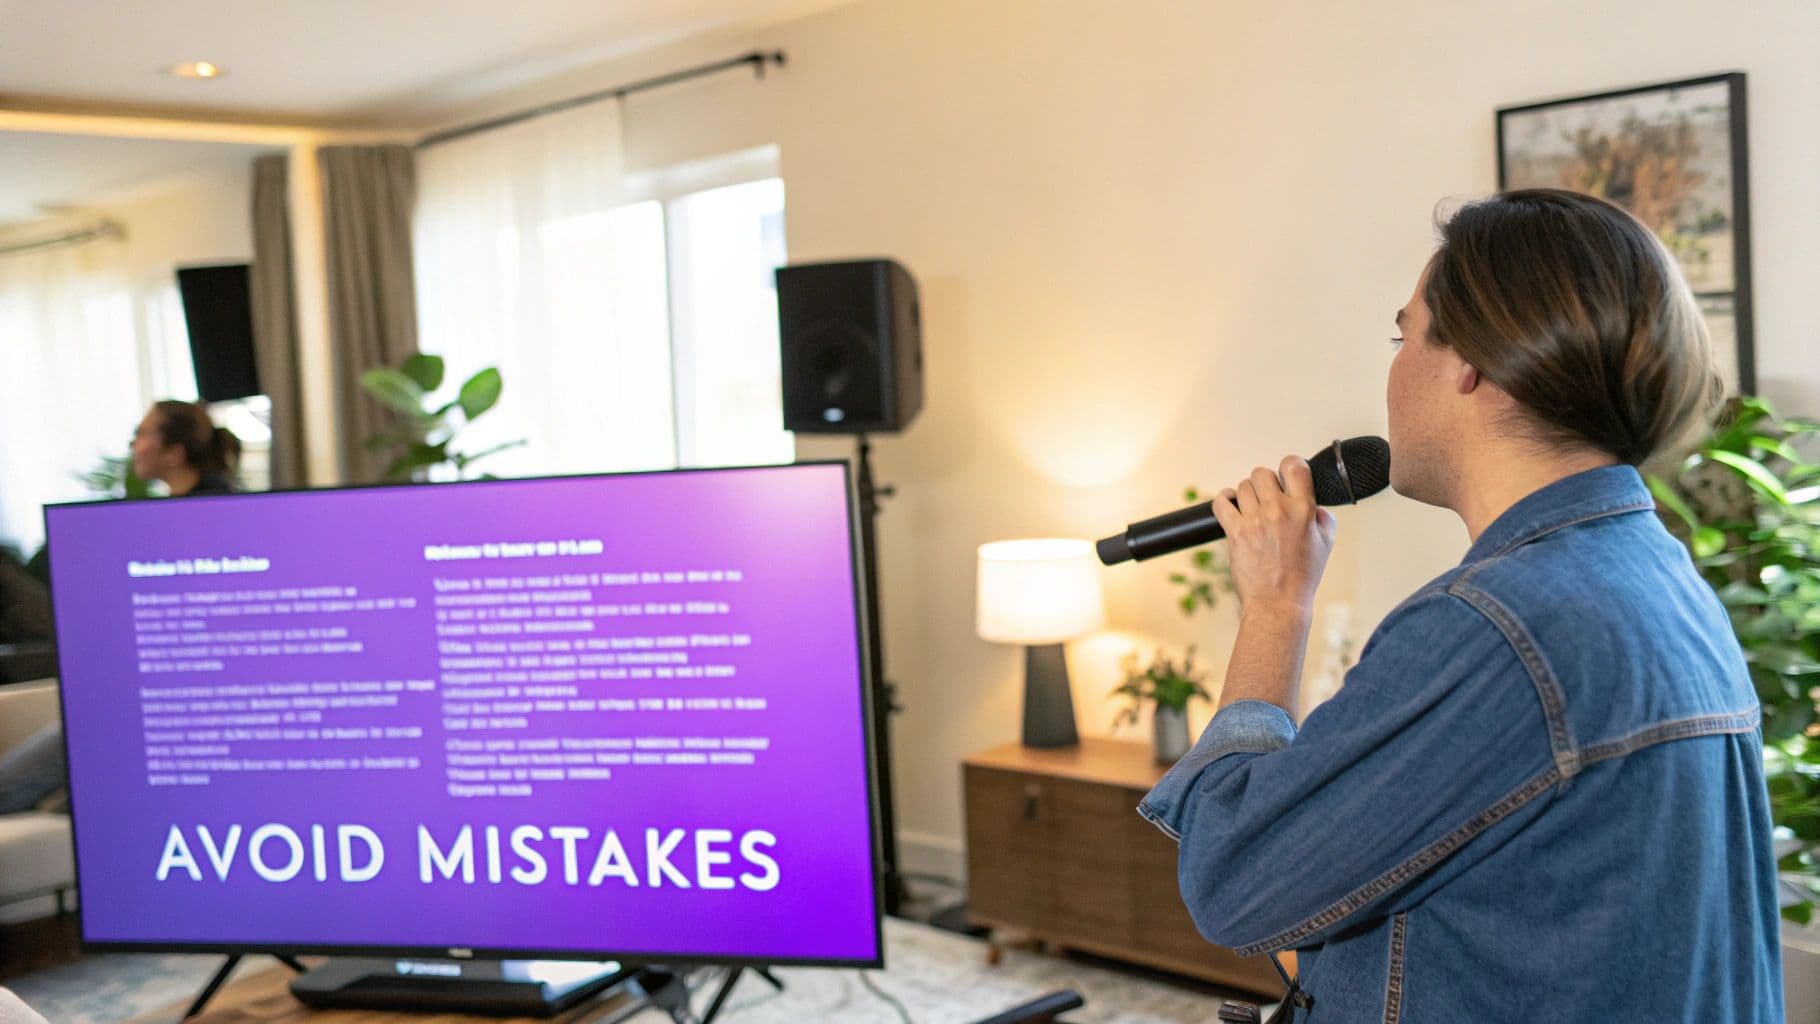
Common Karaoke Video Mistakes to Avoid
Making your own karaoke video is a blast, but it's easy to fall into a few common traps that can make the final product more frustrating than fun for the singer. I've seen it happen time and time again. Once you know what to look for, though, you can dodge these issues and create something that feels truly professional.
Let’s break down the most common slip-ups I see and how you can steer clear of them.
So many of these mistakes come from the same place: focusing too much on flashy visuals instead of what the singer actually needs. A great karaoke video has one job—to make singing along feel effortless and natural. Everything else is just window dressing.
Ignoring Audio Quality
The absolute quickest way to ruin your video is to start with a bad instrumental track. If you use a low-bitrate MP3 or, even worse, audio you ripped from a random online video, the final product will sound muddy, tinny, and just plain amateur. The singer ends up fighting against a distracting, low-quality track, which completely kills the performance.
Do yourself a favor and always start with the best audio you can get your hands on. A professionally made instrumental from a service like Karafun or a clean track separated with an AI tool like LALAL.AI will give you a crisp, clear foundation. Think of it this way: great audio is non-negotiable.
Choosing Illegible Fonts and Colors
This one is probably the design flaw I see most often. That gorgeous, swirling script font might look amazing on its own, but it's a complete nightmare to read on a screen, especially from a few feet away. The same goes for color choices that lack contrast—think light gray text on an off-white background. The lyrics become practically invisible.
To nail readability every time, just follow these simple guidelines:
- Pick the Right Font: Stick with a bold, clean, sans-serif font. Think Arial, Helvetica, or Open Sans. They're built for screen clarity.
- Crank Up the Contrast: The classic bright white or yellow text is a classic for a reason. To make it pop against any background, add a thin black outline or a subtle drop shadow.
The goal here is effortless reading. A singer shouldn't have to squint or struggle to follow along. High contrast is your absolute best friend.
Creating Laggy or Off-Sync Lyrics
Nothing throws a singer off more than lyrics that don't sync up perfectly with the music. If the highlight "wipe" lags even a fraction of a second behind the vocal, the singer feels like they’re constantly playing catch-up. On the flip side, if the wipe is too far ahead, they might jump in on a line too early. It's a momentum killer.
Perfect timing is the soul of a great karaoke experience. This is where getting meticulous with syllable-level timing in a tool like MyKaraoke Video really pays off. It ensures the visual cues on screen match the audio flawlessly, giving the singer the confidence they need to just let loose. As technology has improved, so have these tools—especially in places like North America, a major market for advanced karaoke apps thanks to high smartphone adoption. You can dig into more trends about the global karaoke market on precisionbusinessinsights.com.
Using Distracting Background Videos
Finally, resist the urge to use a background video that’s just too busy. A fast-paced clip with a ton of action and quick cuts does nothing but compete with the lyrics for the singer's attention. The background should be there to set a mood, not steal the spotlight.
A better approach is to go for something more subtle. Think slow-moving abstract patterns, gentle aerial shots of landscapes, or even a simple, high-quality static image. When the background is minimalist, the lyrics remain the star of the show—and that's exactly how it should be.
Answering Your Top Karaoke Video Questions
Even with a great tool, you're bound to run into a few questions along the way. It happens to everyone. Let's tackle some of the most common ones I hear from people who are just getting started making their own karaoke videos.
What's the Best Software for Making Karaoke Videos at Home?
Honestly, the "best" software really depends on what you're comfortable with and how much you want to spend.
If you're just dipping your toes in, a straightforward, browser-based tool like MyKaraoke Video is a fantastic starting point. It gets you creating right away without a massive learning curve. Dedicated apps like Karafun Studio or Power Karaoke are also solid choices built specifically for this purpose.
For the pros who want total control over every pixel, something like Adobe Premiere Pro offers endless possibilities for custom typography and effects. Just be prepared for a much steeper climb to get the hang of it. The trick is to find a tool that fits your style, so you can spend your time being creative instead of fighting with the software.
How Can I Legally Use Popular Songs?
This is a big one, and it's smart to ask. Using copyrighted music without permission can get you into hot water, especially if you’re posting your creation on a public platform like YouTube. If it’s just for a private party in your living room, you really don’t have anything to worry about.
For anything you share publicly, though, here are your safest bets:
- Go for royalty-free instrumentals. These tracks are made specifically for creators to use without getting tangled in licensing knots.
- Buy licensed karaoke versions. This is my preferred method. Companies like Karafun or Sunfly Karaoke sell professionally produced tracks that already have all the necessary rights cleared.
Always, always read the fine print on any music you download. It's a crucial step that protects you and your work when you're making a karaoke video for the world to see.
A lot of people think using a short clip of a song is covered by "fair use." That’s a risky game to play with public content. Getting the proper license from the start is always the most professional and safest way to go.
What Are the Most Readable Fonts and Colors for Lyrics?
Readability is everything. If people can't easily follow along, the whole experience falls apart. There's a reason you see the same styles over and over—they just work. Stick with a clean, bold, sans-serif font like Arial, Helvetica, or Open Sans. They're crisp and easy to see, even from across the room.
For colors, high contrast is your best friend. You can't go wrong with these classic combinations:
- The Main Text: A bright white or a vibrant yellow.
- The Text Outline: A thin black outline or a subtle drop shadow. This makes the words pop against practically any background you can throw at them.
- The "Fill" Color: A bold primary color like blue or red works perfectly to show the singing progress. It grabs the eye without clashing with the other text.
How Do I Remove Vocals from a Regular Song?
A professional, pre-made instrumental track is always going to give you the best quality. But sometimes, you just can't find one for that perfect, obscure song you want to use. When that happens, AI-powered vocal removers are your new best friend.
Services like LALAL.AI or Moises.ai do a surprisingly good job of analyzing a regular song file and isolating the vocals so you can strip them out. The technology has gotten incredibly good over the last few years. While the results aren't always 100% perfect—you might hear a few little audio artifacts—it’s an amazing option for creating a backing track that doesn't exist anywhere else.
Ready to put all this into practice? MyKaraoke Video gives you everything you need—from a simple sync editor to full design control—to create a fantastic, professional-looking karaoke video in minutes, all from your browser. Start creating for free at https://www.mykaraoke.video and see just how easy it can be.