
Uploading a video to Twitter (now X) is pretty simple. Whether you're on your phone or computer, you can get it done in under a minute. It’s just a matter of starting a new post, tapping the media icon to grab your video, typing out your message, and hitting Post.
Your Quick Guide to Posting Videos on Twitter
But before you rush to upload, it’s worth taking a moment to understand Twitter’s rules. Knowing the platform's video limits can save you a ton of frustration and make sure your content looks as sharp as you intended.
Twitter has specific restrictions for video length, file size, and format, and these change depending on whether you have a free account or a Premium subscription. Getting this right is more important than ever.
After all, tweets with video get 10 times more engagement than those without. With over 8.3 billion videos being watched on X every single day in 2024, you want your content to be part of the action, not stuck in upload limbo.
This quick visual breaks down the main things you need to know.
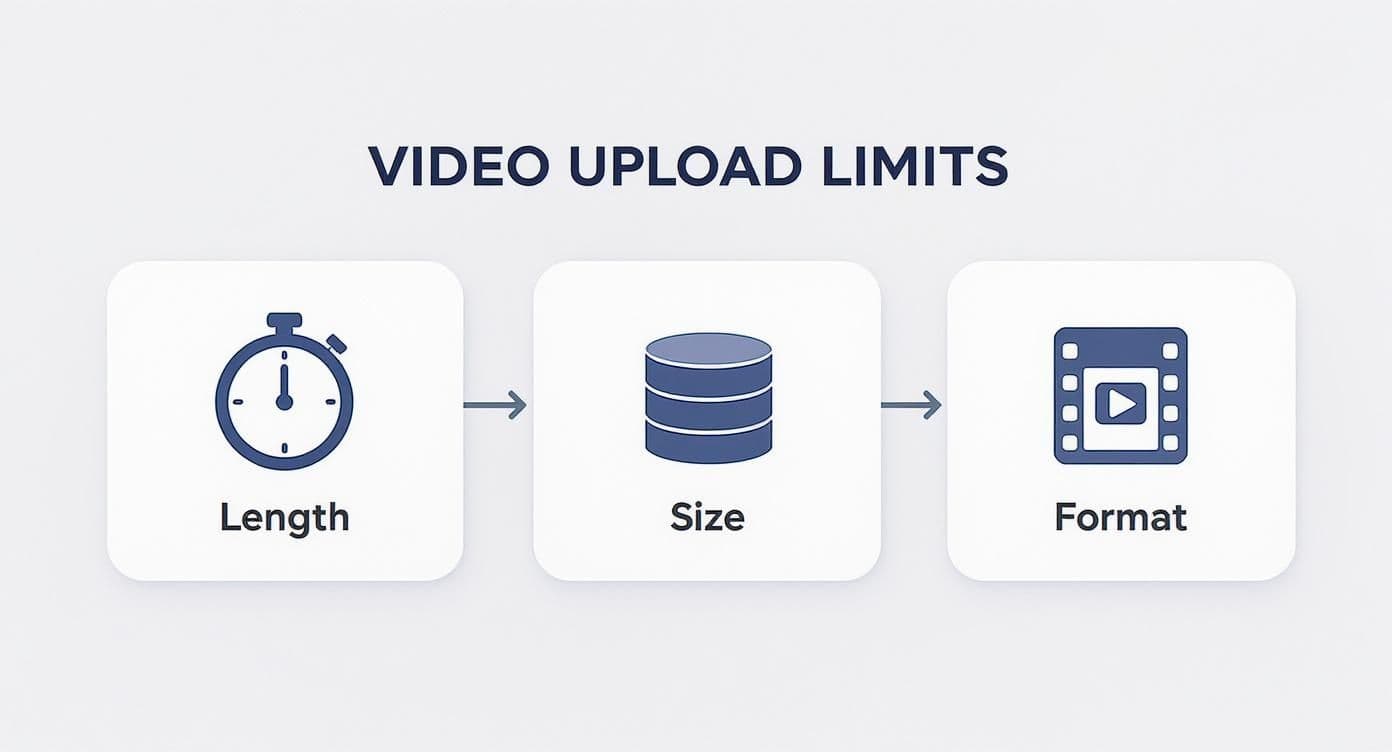
The biggest difference is clear: while free users are capped at 140 seconds, a Premium subscription opens the door to much, much longer content.
Twitter Video Upload Requirements at a Glance
To make it even clearer, here’s a table that lays out the exact specifications you need to be aware of. It's a handy cheat sheet to reference before you upload.
| Specification | Free Account Limit | Premium Plus Limit |
|---|---|---|
| Max Video Length | 2 minutes and 20 seconds | Up to 3 hours (1080p) |
| Max File Size | 512 MB | 8 GB (1080p) |
| Max Resolution | 1920 x 1200 or 1200 x 1900 | 1920 x 1200 or 1200 x 1900 |
| Recommended Formats | MP4 (with H264 format) | MP4 (with H264 format) |
| Frame Rate | 60 FPS or less | 60 FPS or less |
Sticking to these guidelines helps you avoid any unexpected errors and ensures your video looks its best after Twitter processes it.
Getting the Specs Right
The platform is friendly with common formats like MP4 and MOV, but if you stick to the recommended specs, you’ll sidestep any weird quality loss that can happen during compression.
For anyone on a free account, that 2-minute-and-20-second limit is the hard stop. But for creators who need more runway—think podcasters, journalists, or anyone sharing in-depth tutorials—the Premium Plus subscription is a game-changer. It bumps the limit all the way up to 3 hours with a file size of 8 GB.
The information here covers the essentials for a smooth upload. But if you find yourself running into tricky issues or just want to master every aspect of the platform's video features, you might want to check out this comprehensive guide on uploading videos to Twitter. It's a great resource for tackling more advanced scenarios.
Posting Videos from Your Desktop or Phone

Whether you’re polishing a video at your desk or capturing a live moment on your phone, Twitter (or X, as it's now known) has you covered. The process is a little different between a computer and a mobile device, but the fundamentals are the same. Getting comfortable with both means you’re always ready to share great content.
Let's walk through the desktop experience first, which is my go-to for uploading professionally edited or higher-quality videos.
From Your Computer’s Web Browser
Uploading a video from your computer is often as simple as dragging and dropping the file. Once you’re logged into your account, you can get a polished post live in just a few clicks.
Here’s how it works:
- Find and click the big blue Post button, usually located in the menu on the left.
- In the pop-up window, look for the Media icon (it looks like a little picture of mountains) and click it. This brings up your computer’s file browser.
- Hunt down the video file you want to share and select it. Twitter is pretty friendly with common formats like MP4 and MOV, so you shouldn’t have any trouble.
- As the video processes, draft the text for your post. This is the perfect time to write a killer hook, add a few relevant hashtags, and tag anyone featured in the video.
- Once the video is ready and you’re happy with your text, hit Post.
Sometimes, a high-quality MOV file can be a bit too hefty for a smooth upload. If you find yourself in that boat, you might need to shrink it down. We have a whole guide that shows you how to compress a MOV file without losing that crisp quality.
Using the Mobile App
For videos shot directly on your phone, the mobile app is your best friend. It’s quick, efficient, and where most of the action happens anyway—a whopping 93% of video views on the platform come from mobile devices. The steps are virtually the same whether you're on an iPhone or an Android.
One of the best parts about the mobile process is the built-in trimmer. It’s a simple but incredibly useful tool that lets you snip the beginning or end of your clip on the spot, so you can jump straight to the good stuff without opening another app.
My Two Cents: Always use the mobile trimmer to cut out any dead air at the start of your video. The first three seconds are absolutely everything. Don't waste them on a shaky intro—get right to the action to stop people from scrolling.
Here’s the quick-and-dirty guide to mobile uploads:
- Tap the blue compose icon (the plus symbol inside a circle) in the bottom-right corner.
- Select the Media icon from the options to pull up your phone's gallery.
- Pick the video you want to post. The app will immediately show you the trimming tool; just drag the sliders to set your start and end points.
- Tap Done when you’re finished trimming. Then, just like on desktop, add your text, hashtags, and mentions.
- Ready to go? Hit Post to send it out into the world.
Getting Your Twitter Video Specs Just Right
Ever hit that upload button, full of excitement, only to watch your video fail or turn into a grainy, pixelated mess? We’ve all been there. Getting the technical details right before you post is the key to avoiding those frustrating moments and ensuring your content looks professional every single time.
The number one culprit I see is the file format. While Twitter technically accepts MOV files, the platform really, really prefers MP4. Think of MP4 (with an H.264 video codec and AAC audio) as the VIP pass for video on X. It’s the gold standard for quality and compatibility.
Choosing MP4 from the get-go solves a shocking number of upload headaches. It helps your video play nicely with Twitter's compression, preventing that dreaded blocky look. If you're curious about the nitty-gritty, you can learn more about what the MP4 video format is and why it's so widely used.
The Magic Numbers for a Perfect Upload
Besides the format, a few other specs are critical for a smooth experience. Dialing these in will make a huge difference in both quality and upload speed.
- Resolution: Stick to 1280x720 pixels (720p). Even though X supports higher resolutions, I've found that exporting at 720p often gives a cleaner result because it sidesteps the platform's more aggressive compression algorithms.
- Bitrate: Keep it under 2.5 Mbps for standard accounts. Trying to upload a video with a super high bitrate is one of the most common reasons for an upload to fail.
- Frame Rate: Export at either 30 or 60 FPS (frames per second). Anything else can lead to jerky, stuttering playback that will have viewers scrolling right past.
It's no surprise that getting this right matters. Eight out of ten user sessions on X now involve watching video, and an incredible 93% of those views are happening on mobile. That means your video needs to be optimized to load fast and look great on a small screen.
Here’s a little trick I’ve picked up over the years: export a 10-second test clip first. It takes a minute but can save you the headache of re-rendering a much longer video if you find a setting that's off.
Keeping an Eye on File Size
Finally, let's talk about file size. If you have a free X account, you're capped at 512MB per video. If your final export is bigger than that, you'll need to compress it.
Don't worry, this doesn't have to mean sacrificing quality. A good video compression tool can shrink the file down to size with almost no noticeable difference, ensuring your upload is quick and successful.
Crafting Video Tweets for Maximum Engagement
So, you know the technical steps to get a video onto Twitter. That’s the easy part. The real work is getting people to actually stop scrolling and watch it. On a feed that moves a mile a minute, your video has to earn every second of attention, and that comes down to a few key details.
Those first three seconds are gold. I mean it. Studies have shown that videos that get their main point across in that tiny window see a 13% jump in breakthrough metrics. Don't start with a slow fade or your company logo. Hit them with immediate action, a surprising visual, or a question that makes them think. You have to create an instant hook.
Writing Tweets That Stop the Scroll
The text you write with your video is the bait. It’s what makes someone pause long enough to even consider hitting that play button. Think of it as the headline for your content.
Here are a few approaches I’ve seen work time and time again:
- Ask a pointed question: "Is this the biggest mistake people make when...?"
- Spark some curiosity: "You won't believe what happened right after this."
- Promise a quick win: "Here’s how to fix [a common problem] in under 60 seconds."
The idea is to frame your video in a way that signals immediate value, whether that's a laugh, a solution, or just something interesting. This little bit of effort can make a huge difference in your view count.
It's a crowded field out there. But the data shows it's worth the effort: video tweets are 6 times more likely to be retweeted than images, and the average engagement rate for video hovers around 1.57%. That's a massive opportunity if you get it right.
Optimizing Your Video for Silent Viewing
This is a big one: a massive number of people—some figures put it as high as 92% on mobile—watch videos with the sound off. If your video needs audio to make any sense, you’re talking to an empty room.
This means adding clear, easy-to-read captions is non-negotiable. It makes your content accessible and, more importantly, ensures your message actually gets delivered, even in silence. If you're on the web app, you can upload a professional .SRT file directly.
Ultimately, great engagement starts before you even hit "upload." Using the right production software can make a world of difference; check out some of the best content creation tools for social media to level up your visuals. And if you're really aiming for the stars, our guide on https://www.mykaraoke.video/blog/how-to-create-viral-videos can give you a deeper strategic playbook.
Tapping into Advanced Features with Twitter Media Studio
Once you've got the hang of the basic upload process, it’s time to pull back the curtain on a tool most people don't even know exists: Twitter Media Studio. Think of it as your personal command center for every video, GIF, and image you share on the platform.
https://www.youtube.com/embed/eGJs6sGowKs
Instead of just uploading and forgetting, Media Studio gives you a full library of your content. This is a game-changer. It means you can easily find and reuse a video you posted months ago without digging through your old tweets or re-uploading the file. For anyone managing a brand or creating content consistently, this alone makes it an essential part of your workflow.
Track Performance and Monetize Your Content
This is where Media Studio really shines. It goes way beyond the simple view counts you see on a regular tweet, offering analytics that give you a real sense of what’s working. You can track things like:
- Video Views: See how many people actually watched.
- Completion Rates: Find out what percentage of viewers watched your video all the way through.
- Audience Retention: Pinpoint exactly where people are dropping off.
This kind of data is gold. It helps you figure out what your audience genuinely connects with, so you can stop guessing and start creating more effective video content.
For those with a bigger audience, Media Studio is also your gateway to making money. It's the hub for managing things like pre-roll ads and sponsorships, allowing you to turn your popular videos into a revenue stream directly on X (formerly Twitter).
Media Studio is what elevates your video from a one-off post to a managed content strategy. It gives you the tools to not just share videos, but to analyze, organize, and even profit from them.
Fine-Tune Your Videos Before They Go Live
Media Studio also gives you more control during the upload process itself. While you can trim a video on the mobile app, the web interface gives you a bit more precision for getting the start and end points just right.
More importantly, you can select a custom thumbnail. This is a massive advantage. A compelling thumbnail is often the single biggest factor in getting someone to stop scrolling and actually click play on your video.
And finally, remember to manage the conversation. Before you hit "Tweet," you have the option to decide who can reply—everyone, only people you follow, or just accounts you mention. This is a simple but powerful tool for keeping the discussion on track and maintaining a positive tone.
Answering Your Top Twitter Video Questions
You followed all the steps, but your video still looks… off. It happens. Uploading video to Twitter can sometimes feel like a roll of the dice, but most common issues have straightforward fixes.
Let's clear up some of the most frequent frustrations people run into.
Why Does My Twitter Video Look So Bad?
This is, without a doubt, the number one complaint. You post a beautiful, high-def video, and Twitter spits out a blurry, pixelated version. What gives?
The short answer is aggressive compression. Twitter has to make sure videos load quickly for everyone, even on slow connections. So, it compresses every single video file, and if your original file is too large or has a super high bitrate, the compression algorithm can really do a number on it.
The best way to fight back is to give Twitter's system less work to do. Before you upload:
- Export your video at 1280x720 (720p). This is often the sweet spot.
- Keep your bitrate under 5 Mbps.
- Stick with the MP4 format and the H.264 codec.
Think of it as meeting Twitter halfway. When you provide a file that's already close to its preferred specs, the final result is much cleaner.
Can I Post a Video Longer Than 2 Minutes and 20 Seconds?
You absolutely can, but not on a free account. That 140-second limit is a firm ceiling for standard users.
If you need to post longer-form content, you’ll have to upgrade to a Twitter Premium subscription. Depending on your tier, this unlocks the ability to upload much longer videos. For some premium users, this means you can post videos up to four hours long straight from your browser or iPhone. It's a huge advantage for anyone sharing podcasts, in-depth tutorials, or full interviews.
How Can I Add Captions to My Twitter Video?
Adding captions is non-negotiable these days, especially since so many people browse with the sound off. Twitter makes this pretty easy by allowing you to upload a SubRip (.SRT) file along with your video.
You'll find this option when you upload your video through the Twitter website, specifically in the Media Studio. Once your video is uploaded, look for a "Captions" or "Subtitles" button. From there, you just attach your .SRT file. It’s a small extra step that can massively boost how many people actually watch and understand your content.
A quick pro-tip: always upload your video directly to Twitter. Native videos autoplay in the feed, which is a massive attention-grabber. They consistently get more engagement and retweets than a post that just links out to YouTube. A YouTube link forces people to click away, adding friction that kills your view count.
Ready to create stunning lyric videos that stop the scroll? MyKaraoke Video makes it easy to turn any song into a professional-quality video in minutes with our AI-powered sync editor. Start creating for free at https://www.mykaraoke.video.