Creating a karaoke or lyric video that truly captivates an audience is more than just putting words on a screen. It's an art form that blends audio precision with visual storytelling, yet many creators struggle with clunky software, tedious manual syncing, and inconsistent visual quality. These technical hurdles can turn a creative project into a frustrating chore, resulting in content that fails to connect with viewers.
What if you could bypass the common headaches and focus entirely on creativity? This guide explores the essential video production best practices that separate amateur attempts from professional-grade content. We will dive deep into ten actionable strategies covering the entire creation process, from meticulous pre-production planning and high-quality audio management to advanced color grading and platform-specific export settings. Each point is designed to be a practical, step-by-step component of a larger, more effective workflow.
Following these core principles of professional video production will not only enhance the quality of your final output but also streamline your entire creative process. We will also highlight how a modern tool like MyKaraoke Video can simplify complex tasks, transforming your workflow and elevating your final product from good to unforgettable. By mastering these techniques, you can ensure your videos are polished, engaging, and ready to find their audience. Let’s explore the methods that will make your content stand out.
1. Mastering the Foundation: Impeccable Audio Preparation
Before a single lyric hits the screen, the quality of your audio track determines the ultimate potential of your entire video. This foundational practice is a critical first step in any professional video production workflow, especially for lyric and karaoke videos where music is the core component. Impeccable audio preparation involves sourcing the highest fidelity file possible and meticulously cleaning it up for synchronization.
This process isn't just about finding a song; it's about engineering the audio to be the perfect canvas. A well-prepared track has clean intros and outros, consistent volume levels, and a clear rhythm, which are all crucial for both automated AI syncing and manual timing adjustments. When you upload a pristine audio file into a tool like MyKaraoke Video, you are setting its powerful features up for success.
Why It’s a Foundational Best Practice
A polished audio track is the bedrock of an engaging karaoke experience. It ensures the lyric syncing process is smoother, faster, and far more accurate. This attention to detail prevents distracting volume shifts or awkward silent gaps, resulting in a professional product that keeps viewers engaged and singing along. Neglecting this step often leads to frustrating timing issues and a final video that feels amateurish.
Actionable Steps for Perfect Audio Prep
To implement this crucial video production best practice, follow these key steps:
- Source High-Fidelity Audio: Always start with the highest quality, uncompressed audio file available (WAV or FLAC are ideal). A compressed MP3 can introduce artifacts that may confuse AI-powered syncing tools and degrade the listener's experience.
- Trim the Silence: Use a free audio editor like Audacity to trim any unnecessary silence from the beginning and end of the track. This ensures the lyrics start precisely when the music does.
- Normalize the Volume: Apply a normalization effect to bring the track to a standard level, such as a -1.0 dB peak. This creates a consistent volume that won’t be too quiet or jarringly loud compared to other videos.
- Ensure Clarity: For tools that rely on beat detection, a clean track with a distinct instrumental and vocal separation yields significantly better automatic synchronization results.
2. High-Quality Audio Capture and Management
Long before the final export, the integrity of your production is determined by the quality of the sound you capture on set. This essential video production best practice emphasizes professional audio recording and monitoring, acknowledging the well-known industry truth: audiences will forgive poor video quality far more readily than poor audio. High-quality audio management involves using the right equipment and techniques to capture clean, clear sound that elevates the entire production.
This principle extends beyond just dialogue. It encompasses capturing clean ambient sound, known as "room tone," and ensuring all audio sources are recorded at optimal levels without peaking or distortion. In productions that blend live-action footage with lyric overlays, such as a music video, the captured audio becomes a critical part of the soundscape, and its quality must match that of the studio-recorded music track.
Why It’s a Foundational Best Practice
Pristine audio is the cornerstone of professional video content. It directly impacts viewer immersion and perceived production value. Clear audio ensures your message is understood, maintains emotional impact, and prevents the audience from being distracted by hisses, hums, or muffled sounds. Neglecting this step can render even the most beautifully shot footage unusable, as fixing bad audio in post-production is notoriously difficult and often impossible.
Actionable Steps for Perfect Audio Capture
To implement this crucial video production best practice, follow these key steps:
- Invest in Quality Microphones: Relying on a camera's built-in microphone is a common mistake. Use dedicated lavalier (lapel) and shotgun microphones to capture clean, isolated audio directly from the source.
- Always Monitor Your Audio: Have a dedicated person monitor the audio levels throughout the shoot using high-quality headphones. This allows for real-time adjustments and helps catch issues like wind noise or signal interference immediately.
- Record Room Tone: At every new location, capture at least 30 seconds of "room tone" - the ambient, silent sound of the space. This is invaluable in post-production for smoothing audio edits and filling gaps in dialogue.
- Use Backup Recordings: Whenever possible, record audio on a separate, dedicated device in addition to the camera's input. This redundancy provides a safety net against equipment failure or corrupted files. If you need to refine your recordings, you can learn more about how to enhance audio quality for your videos.
3. Proper Lighting Techniques and Three-Point Lighting
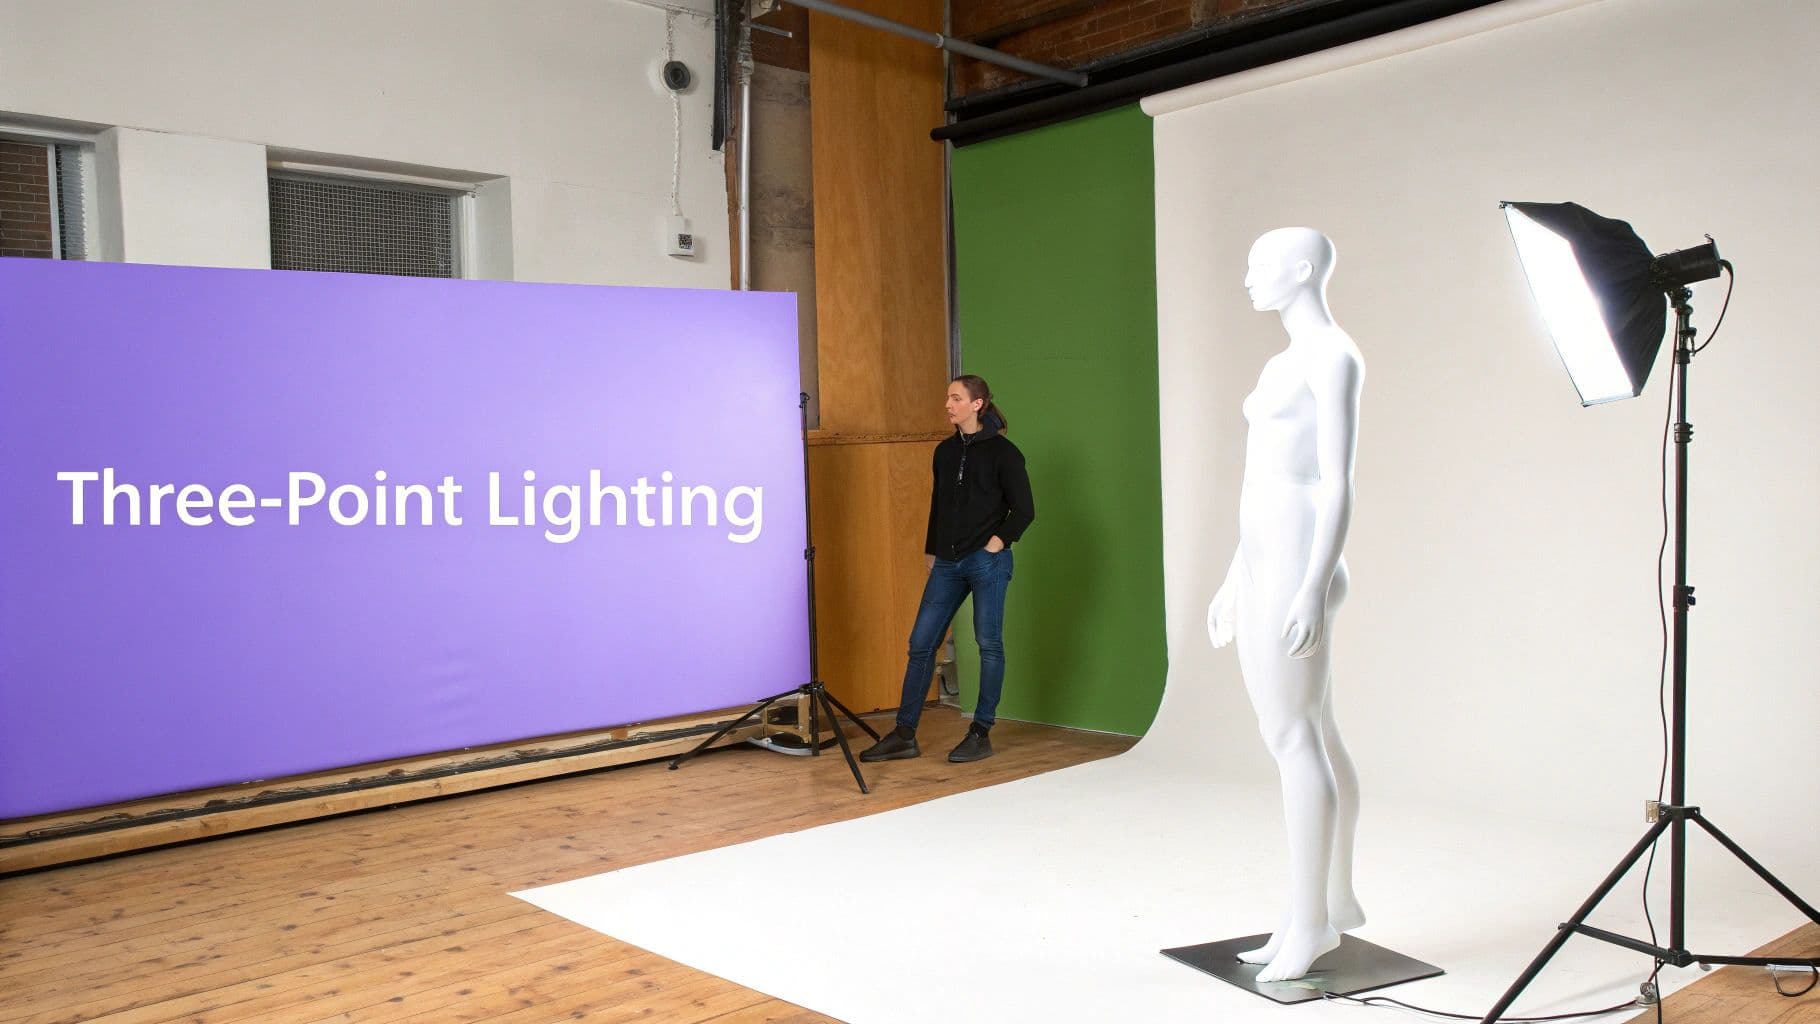
Beyond camera specs and lens choices, lighting is the single most powerful tool for shaping the visual quality and emotional tone of your video. Proper lighting techniques are a cornerstone of professional video production, transforming a flat, uninspired shot into something dynamic and cinematic. The foundational method is three-point lighting, a strategic setup that sculpts subjects, adds depth, and eliminates unflattering shadows.
This technique uses three distinct light sources: a key light (the main light on the subject), a fill light (to soften shadows created by the key), and a back light (to separate the subject from the background). Mastering this balance is one of the most impactful video production best practices you can adopt, elevating everything from a simple lyric video background to a full-scale music video performance.
Why It’s a Foundational Best Practice
Strategic lighting is what separates professional-grade content from amateur footage. It guides the viewer's eye, establishes mood, and ensures your subject is seen clearly and attractively. A well-lit scene appears more polished and high-budget, holding audience attention for longer. Neglecting lighting can result in grainy footage, distracting shadows, or a flat image that fails to connect emotionally with the viewer.
Actionable Steps for Perfect Lighting
To implement this crucial video production best practice, focus on these key techniques:
- Master the Three-Point Setup: Start by placing your key light to one side of the camera, then add a fill light on the opposite side at a lower intensity. Finish with a back light positioned behind the subject to create a subtle rim of light that provides separation.
- Use Diffusion: To avoid harsh, defined shadows, soften your light sources. Use a softbox, an umbrella, or even a white sheet to diffuse the light, creating a more flattering and gentle illumination on your subject.
- Match Color Temperature: Ensure all your lights have the same color temperature (measured in Kelvin). Mixing daylight (around 5600K) and tungsten (around 3200K) lights will create an unnatural color cast that is difficult to fix in post-production.
- Start with Natural Light: When possible, use a large window as your key light. It provides a beautiful, soft, and natural-looking source that can be supplemented with reflectors or smaller artificial lights to fill in shadows.
4. Investing in Quality Cameras and Sensor Technology
The visual quality of your video is directly tied to the camera and sensor capturing the images. While lyric and karaoke videos are often text-focused, the background footage or live performance elements must be crisp, vibrant, and professional. Investing in quality cameras and sensor technology is a core video production best practice that ensures your content has sufficient dynamic range, color depth, and resolution for both immediate use and future-proofing.
This practice goes beyond just resolution; it involves understanding how sensor size, frame rates, and recording formats (codecs) impact the final look. A camera with a high-quality sensor, like the full-frame sensor in a Panasonic S1H or the Super 35 in a Sony FX30, captures more light and color information. This provides greater flexibility in post-production for color grading and visual effects, transforming a simple background into a cinematic experience.
Why It’s a Foundational Best Practice
High-quality footage is the visual equivalent of a pristine audio track. It elevates the perceived value of your production and holds viewer attention far more effectively than grainy or poorly colored visuals. This is a crucial video production best practice because it provides the raw material needed for a polished final product. It ensures that your visual storytelling, whether abstract or narrative, looks intentional and professional, which is critical for standing out on premium platforms like YouTube.
Actionable Steps for Quality Capture
To implement this essential video production best practice, focus on these key steps:
- Prioritize Sensor Size: Choose a camera with a sensor that fits your needs. Larger sensors (like full-frame or Super 35) generally perform better in low light and offer a shallower depth of field for a more cinematic look.
- Record in a High-Quality Codec: Use a robust codec like ProRes or a high-bitrate internal format. This captures more color information (e.g., 10-bit color) and gives you significantly more latitude for color correction and grading in post-production.
- Test Extensively: Before any important shoot, test your camera in conditions similar to your planned environment. This helps you understand its limitations and how to get the best image with your specific lighting setup.
- Invest in Lenses First: Great lenses on a good camera body will almost always produce a better image than a mediocre lens on a high-end camera. Quality glass is a long-term investment that has a massive impact on sharpness, color, and character.
- Consider Renting for High-End Needs: For marquee projects, renting a high-end cinema camera like a RED or ARRI ALEXA can provide unparalleled image quality without the substantial upfront investment.
5. Color Correction and Grading in Post-Production
Once your video's timing and visual elements are locked in, the final step to achieve a cinematic, professional look is color correction and grading. This two-part post-production process is a crucial video production best practice that transforms raw footage into a visually cohesive and emotionally resonant piece. Color correction involves fixing technical issues like exposure and white balance, while color grading is the creative step where you apply a specific artistic style or mood.
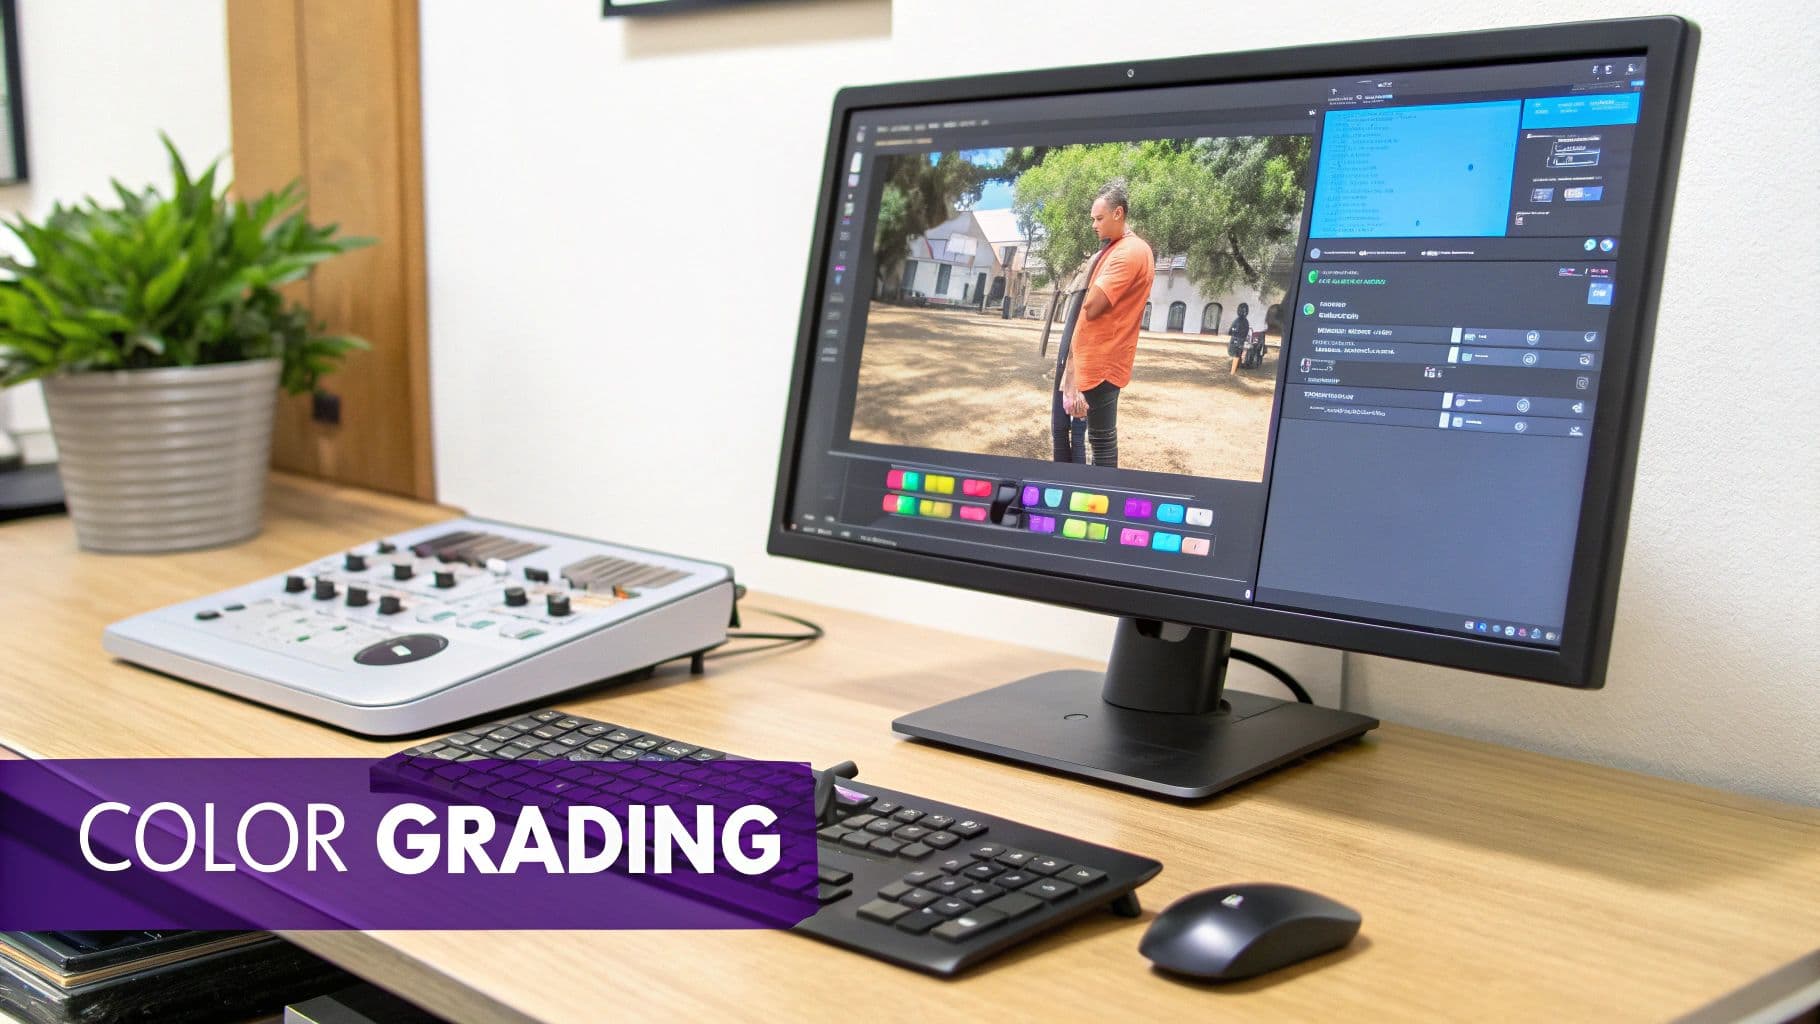
This process is what gives videos their signature feel, from the warm, nostalgic tones of a ballad to the high-contrast, vibrant look of a pop anthem. A consistent color palette not only makes your video more aesthetically pleasing but also reinforces your brand identity across all your content. For creators aiming for a polished, high-quality channel, mastering color is non-negotiable.
Why It’s a Foundational Best Practice
Thoughtful color grading elevates your video from a simple recording to an immersive experience. It directs the viewer's eye, enhances the narrative, and evokes specific emotions that complement the song's message. Skipping this step leaves your video looking flat and uninspired, creating a visual disconnect between different clips and detracting from the overall production value. A consistent grade ensures every video in your catalog feels like part of a unified, professional brand.
Actionable Steps for Perfect Color Processing
To implement this essential post-production best practice, follow these key steps:
- Correct First, Grade Second: Always begin by correcting technical issues. Use scopes like the waveform and vectorscope to fix exposure, set accurate white balance, and ensure color consistency across all clips.
- Use Reference Images: Create a mood board or use reference stills from films or other videos to guide your creative direction. This helps you stay focused on the desired look and feel.
- Create and Use LUTs: Develop custom Look-Up Tables (LUTs) that encapsulate your signature color grade. Applying a consistent LUT to all your videos saves time and reinforces your channel's unique visual brand.
- Work on a Calibrated Monitor: Grade your footage on a properly calibrated display in a controlled lighting environment to ensure the colors you see are accurate and will translate well to other screens. For optimizing your studio's operations, learning how to build a robust post-production schedule template that manages deadlines and resources efficiently is essential.
6. Non-Linear Editing and Efficient Workflows
Adopting a non-linear editing (NLE) system with a structured workflow is a cornerstone of modern video production. Unlike old-school linear tape editing, NLE software allows you to access and manipulate any part of your video timeline instantly. This flexibility is essential for creating polished lyric and karaoke videos, enabling you to make creative changes, correct timing errors, and experiment with visual elements without having to re-render the entire project from the start.
This approach is about more than just the software; it’s about the system you build around it. An efficient workflow includes organized file management, consistent naming conventions, and the use of proxies for high-resolution footage. By establishing these protocols, you create a stable and scalable post-production environment. For creators using tools like MyKaraoke Video, this means having a clean project file where assets are easy to locate, versions are simple to track, and performance remains smooth, even with complex 4K visuals.
Why It’s a Foundational Best Practice
A disciplined, non-linear workflow is a critical video production best practice because it safeguards your project's integrity and saves immense amounts of time. It prevents the chaos of lost files, confusing timelines, and slow system performance that plagues disorganized projects. For collaborative teams, like documentary crews or marketing agencies, a shared workflow ensures everyone is on the same page. For solo creators, it instills a professional discipline that makes complex edits manageable and future revisions painless.
Actionable Steps for an Efficient Workflow
To build a professional editing process, integrate these key steps into your workflow:
- Establish Naming Conventions: Before you import a single file, decide on a consistent naming system. A common format is
ProjectName_SceneNumber_TakeNumber_Date(e.g.,MyKaraokeSong_Verse1_Take02_20231026). - Organize with Bins: Inside your NLE, create a clear folder (or "bin") structure. Separate your assets into categories like
Footage,Audio,Graphics,Sequences, andExports. - Use Proxy Files: For 4K or high-bitrate footage that slows down your computer, create low-resolution proxy files. This allows for smooth editing, and you can switch back to the original high-quality files for the final export.
- Implement Version Control: Save new versions of your project file regularly (e.g.,
Project_v1,Project_v2_ColorCorrected,Project_v3_Final). This prevents catastrophic data loss and allows you to revert to an earlier state if needed. Choosing the right software is the first step; learn more about options in our video editing software comparison on mykaraoke.video.
7. Sound Design, Mixing, and Music Integration
While the source music is the star of a karaoke video, professional sound design and mixing elevate the entire experience from a simple sing-along to a polished broadcast-quality production. This advanced practice involves layering additional audio elements, cleaning up any non-musical sounds, and expertly balancing all components to create a cohesive and immersive soundscape. It's the audio equivalent of color grading and visual effects.
This process transforms a flat audio track into a dynamic one. For karaoke videos, this could mean adding subtle sound effects to transitions, integrating a countdown timer sound, or mixing in an optional guide vocal track. For creators using a platform like MyKaraoke Video, a well-mixed audio foundation ensures that the final rendered video sounds professional across any device, from high-end sound systems to mobile phone speakers.
Why It’s a Foundational Best Practice
Expert sound mixing is one of the key video production best practices that separates amateur content from professional work. It ensures clarity, emotional impact, and technical compliance with platform standards. Proper mixing prevents one audio element from overpowering another, like ensuring transition sounds don't drown out the music's intro. This attention to detail creates a seamless and enjoyable viewer experience, which can increase watch time and audience retention.
Actionable Steps for Professional Sound Design
To integrate professional audio post-production into your workflow, follow these key steps:
- Select High-Quality Music: Always start with well-produced music. For supplementary audio, use royalty-free libraries like Epidemic Sound or Artlist to find high-quality sound effects and background music that won't cause copyright issues.
- Organize Your Tracks: In your video editor, create separate audio tracks for the main song, sound effects, and any voice-overs or guide vocals. This organization is critical for precise control during the mixing process.
- Set Proper Levels: Mix your primary music track to peak around -6dB to leave "headroom." This prevents distortion and allows other elements to be heard clearly without clipping. Keep sound effects and other secondary audio at a lower volume to complement, not compete with, the main track.
- Test on Multiple Devices: Before finalizing, listen to your mix on different systems: studio headphones, earbuds, laptop speakers, and a TV. This ensures the audio sounds balanced and professional for your entire audience.
- Optimize for Distribution: Remember that good audio is crucial for engagement on platforms like YouTube. Beyond optimizing metadata, consider how strategically embedding YouTube videos for SEO can leverage your well-produced content to improve your website's search visibility and draw in more viewers.
8. Multi-Format Delivery and Platform Optimization
Creating a stunning lyric video is only half the battle; ensuring it looks and performs its best everywhere it's seen is what separates amateurs from professionals. Multi-format delivery is the practice of tailoring your final video file for the unique technical and cultural demands of each platform, from a 4K widescreen YouTube premiere to a vertical, bite-sized TikTok clip. This crucial final step in the video production workflow ensures your content is not just present but optimized for maximum engagement.
This process involves more than just clicking "export." It means strategically considering aspect ratios, resolutions, file formats, and even burned-in captions to align with how audiences consume content on different channels. A video perfectly formatted for a horizontal YouTube screen will be awkwardly cropped on Instagram Stories, diminishing its impact. Properly optimizing your deliverables is a key video production best practice that respects both the platform and the viewer.
Why It’s a Foundational Best Practice
Optimizing for each platform is the bedrock of a successful distribution strategy. It directly impacts viewer experience, engagement metrics, and discoverability. A video that fits natively within a platform's feed is more likely to be watched, shared, and favored by the algorithm. Neglecting this step can lead to black bars, poor-quality playback, and a general sense of unprofessionalism that undermines all the hard work you put into production.
Actionable Steps for Platform Optimization
To implement this essential video production best practice, follow these key steps:
- Create a High-Quality Master File: Always export your primary video from a tool like MyKaraoke Video in the highest possible quality (e.g., ProRes 422 or a high-bitrate MP4). This master file will serve as the source from which all other platform-specific versions are created.
- Adapt Aspect Ratios: Reframe and export versions for key platforms. Use 16:9 for YouTube, 1:1 for Instagram feeds, and 9:16 for TikTok, Reels, and Stories. This ensures your video fills the screen and looks professional.
- Optimize Export Settings: Tailor the resolution, bitrate, and codec for each platform to balance quality and file size. For a deeper dive, you can learn more about how the MP4 format works for web delivery at MyKaraoke.video.
- Add Burned-In Captions for Social: For platforms where sound is often off by default (like Facebook or Instagram feeds), render a version with stylized, burned-in captions to capture attention immediately.
- Test Before Publishing: Always upload your exported files as private videos first to check for any compression artifacts, aspect ratio issues, or audio sync problems on the actual platform before the official launch.
9. Professional Data Management and Backup Protocols
A lost project file or a corrupted hard drive can erase weeks of creative work in an instant. Professional data management is a non-negotiable video production best practice that safeguards your assets, from raw audio files to final video exports. It involves creating a systematic approach to organizing, storing, and backing up every component of your production, ensuring your projects are secure and recoverable.
This isn't just about dragging files into a folder; it's an insurance policy for your creative business. By implementing a robust strategy like the industry-standard 3-2-1 backup rule, you create redundancies that protect against hardware failure, software corruption, and even physical disasters. For a creator using a tool like MyKaraoke Video, this means securing your source audio, project files, custom templates, and exported videos so they are never permanently lost.
Why It’s a Foundational Best Practice
Solid data management is the invisible framework supporting a sustainable creative workflow. It prevents the catastrophic loss of time and resources, ensuring that you can always access, revise, or repurpose a project. For karaoke channels that produce a high volume of content, a well-organized archive and reliable backup system are essential for long-term consistency and asset management. Neglecting this practice risks not just individual projects, but your entire content library and professional reputation.
Actionable Steps for Flawless Data Management
To protect your valuable creative work, implement these professional data management protocols:
- Adopt the 3-2-1 Backup Rule: Maintain three total copies of your data. Store two copies on two different types of media (e.g., an internal hard drive and an external SSD). Keep one of these copies in an offsite location, such as a cloud storage service or a physical drive stored elsewhere.
- Automate Your Backups: Use software like Backblaze or Acronis to schedule automated daily or weekly backups. Set them to run during off-hours to avoid disrupting your workflow.
- Create a Logical Folder Structure: Organize all project files systematically. Create a master folder for each video with subfolders for "Audio," "Lyrics," "Project Files," "Graphics," and "Final Renders." Consistency is key.
- Test Your Restore Process: A backup is only useful if it works. At least once a quarter, perform a test restore of a small project file to ensure your backups are not corrupted and the recovery process functions as expected.
10. Crew Coordination and Technical Standards Documentation
Beyond individual skills, the success of a complex production lies in seamless collaboration and unwavering technical consistency. This video production best practice involves creating a centralized "production bible" that documents everything from creative vision to technical specifications. It ensures every team member, from the camera operator to the editor, is aligned, reducing errors and saving invaluable time.
This documentation serves as the single source of truth for the entire project. It defines the exact camera settings, color profiles, audio formats, and file naming conventions that must be followed. For a lyric video creator working with a remote team of animators or editors, having these standards clearly defined in a tool like Notion prevents the frustrating and costly process of re-rendering files that don't match the required specifications.
Why It’s a Foundational Best Practice
Clear documentation is the backbone of professional-grade production, eliminating ambiguity and ensuring a cohesive final product. It establishes a repeatable, high-quality workflow that can be scaled across multiple projects or videos. By standardizing technical requirements, you guarantee that every asset delivered, whether from an in-house team member or a freelancer, will integrate flawlessly into the final edit. This proactive approach prevents technical mismatches that can derail post-production timelines.
Actionable Steps for Perfect Documentation
To implement this crucial video production best practice, follow these key steps:
- Create a Production Bible: Use a collaborative platform like StudioBinder or Notion to centralize all project information. This document should include contact lists, creative briefs, shot lists, and technical specifications.
- Define Technical Standards: Specify the exact resolution (e.g., 3840x2160), frame rate (e.g., 29.97 fps), color space (e.g., Rec. 709), and audio format (e.g., 48kHz WAV) required for all deliverables. This is non-negotiable for maintaining quality.
- Establish a Handoff Protocol: Create a detailed checklist for post-production handoffs. This should outline required file formats, folder structures, and any necessary project files or notes for the editor or colorist.
- Conduct Pre-Production Meetings: Hold a mandatory meeting before shooting begins to walk every crew member through the documentation. This ensures everyone understands the expectations and has a chance to ask clarifying questions.
10-Point Video Production Best Practices Comparison
| Item | Implementation complexity 🔄 | Resource requirements ⚡ | Expected outcomes ⭐📊 | Ideal use cases | Key advantages 💡 |
|---|---|---|---|---|---|
| Pre-Production Planning and Storyboarding | 🔄🔄🔄 — Detailed, time‑frontloaded | ⚡ Medium — planning time, pre‑vis tools, small team | ⭐⭐⭐⭐ 📊 Fewer reshoots; streamlined schedule | Narrative films, commercials, complex shoots | Clarifies vision and reduces costs; review storyboards with crew |
| High-Quality Audio Capture and Management | 🔄🔄🔄🔄 — Technical monitoring & backup | ⚡ High — microphones, recorders, dedicated operator | ⭐⭐⭐⭐⭐ 📊 Major perceived quality improvement; less ADR | Dialogue‑heavy projects, documentaries, broadcast | Clean audio saves post time; always use a dedicated audio person |
| Proper Lighting Techniques and Three-Point Lighting | 🔄🔄🔄 — Setup and tuning per scene | ⚡ High — lights, modifiers, grip, time | ⭐⭐⭐⭐ 📊 Polished visuals; controlled mood and clarity | Interviews, studio shoots, cinematic scenes | Improves image and mood; match color temperature and diffuse harsh light |
| Investing in Quality Cameras and Sensor Technology | 🔄🔄🔄 — Technical learning curve | ⚡ Very High — camera bodies, lenses, editing hardware | ⭐⭐⭐⭐ 📊 Better dynamic range, grading flexibility | High‑end productions, low‑light, future‑proofing | Higher image quality and resale value; consider rentals before buying |
| Color Correction and Grading in Post-Production | 🔄🔄🔄🔄 — Skilled, iterative process | ⚡ Medium‑High — software, calibrated monitors, colorist | ⭐⭐⭐⭐ 📊 Cohesive look and emotional enhancement | Films, branded content, series, creators seeking signature look | Standardizes footage; use scopes, LUTs, and calibrated displays |
| Non-Linear Editing and Efficient Workflows | 🔄🔄🔄 — Organizational setup & training | ⚡ High — storage, powerful workstations, collaboration tools | ⭐⭐⭐⭐ 📊 Faster revisions; scalable collaboration | Long‑form projects, multi‑editor teams, fast turnaround | Use proxies, consistent naming, and 3‑2‑1 backups for reliability |
| Sound Design, Mixing, and Music Integration | 🔄🔄🔄🔄🔄 — Expert creative + technical work | ⚡ Very High — mixers, composers, mix stages, time | ⭐⭐⭐⭐⭐ 📊 Immersive audio; strong emotional impact | Feature films, premium streaming, high‑end commercials | Professional mixing elevates storytelling; deliver stems for flexibility |
| Multi-Format Delivery and Platform Optimization | 🔄🔄🔄 — Multiple specs and QC passes | ⚡ Medium — encoding tools, storage, testing time | ⭐⭐⭐⭐ 📊 Maximized reach and platform compliance | Social campaigns, multi‑platform distribution, broadcasters | Produce a high‑quality master then derive versions; include captions |
| Professional Data Management and Backup Protocols | 🔄🔄🔄 — Process discipline and verification | ⚡ High — RAID/NAS, cloud, backup software, maintenance | ⭐⭐⭐⭐ 📊 Prevents data loss; enables quick recovery | Any production with valuable footage or long‑term archives | Implement 3‑2‑1 backups and test restores regularly |
| Crew Coordination and Technical Standards Documentation | 🔄🔄🔄 — Ongoing documentation upkeep | ⚡ Medium — documentation tools, meeting time | ⭐⭐⭐⭐ 📊 Fewer errors; smoother handoffs across departments | Large crews, multi‑department productions, streaming | Create a production bible and hold pre‑production reviews |
Your Turn to Press Play
We've covered a comprehensive blueprint for excellence, deconstructing the essential video production best practices that separate amateur attempts from professional-grade karaoke and lyric videos. The journey from a simple audio track to a polished, engaging visual experience is built on a foundation of deliberate, strategic actions at every stage. You now have the roadmap to navigate this process with confidence and creativity.
The core message woven through all ten of our best practices is one of proactive control. Professional results don't happen by accident; they are the direct outcome of meticulous planning in pre-production, technical precision during production, and artistic finesse in post-production. It's about treating your video not just as content, but as a craft.
From Theory to Tangible Results
Let’s distill this extensive guide into its most critical, actionable takeaways. Mastering these principles will fundamentally elevate the quality and impact of your work:
- Pre-Production is Paramount: Your project's success is often determined before you ever press record. Detailed storyboarding, high-quality audio preparation, and clear documentation for your team are not just suggestions; they are prerequisites for a smooth and efficient workflow.
- Technical Excellence is Non-Negotiable: The "fix it in post" mindset is a trap. Prioritizing proper three-point lighting, selecting the right camera, and managing your data with professional backup protocols are crucial steps that save immense time and prevent catastrophic failures down the line.
- Post-Production is Where the Magic Unites: This is where your vision truly comes to life. Effective non-linear editing, nuanced color grading, and immersive sound design are the final layers of polish that create a captivating experience for your audience. Remember, every element, from font choice to background motion, contributes to the final story.
Key Insight: The most impactful improvement you can make is shifting from a reactive to a proactive workflow. By anticipating challenges in planning, audio prep, and data management, you free up valuable mental energy to focus on the creative aspects that will make your video stand out.
The True Value of Best Practices
Adopting these video production best practices does more than just make your videos look better. It builds a sustainable and scalable creation process. When you have a reliable system for everything from file naming conventions to platform-specific export settings, you eliminate friction and reduce the time it takes to get from concept to completion.
This efficiency is the key to consistency. For karaoke channel creators, musicians, and marketers, the ability to produce a steady stream of high-quality content is what builds and retains an audience. These practices are your toolkit for achieving that consistency without burnout. They empower you to focus on what matters most: connecting with your viewers through compelling, emotionally resonant visual storytelling.
Ultimately, this guide is about more than just following rules. It’s about understanding the "why" behind each practice so you can adapt, innovate, and develop your unique creative signature. You are now equipped with the technical knowledge and strategic foresight to not only create stunning lyric and karaoke videos but to build a workflow that supports your long-term creative goals. The stage is set, the track is ready. It's your turn to press play and create something unforgettable.
Ready to put these best practices into action without the technical headaches of manual lyric syncing? MyKaraoke Video is designed to streamline your workflow by automating the most time-consuming parts of karaoke video creation, allowing you to focus on the creative design and visual storytelling we've discussed. Transform your production process and start creating professional-grade videos today at MyKaraoke Video.