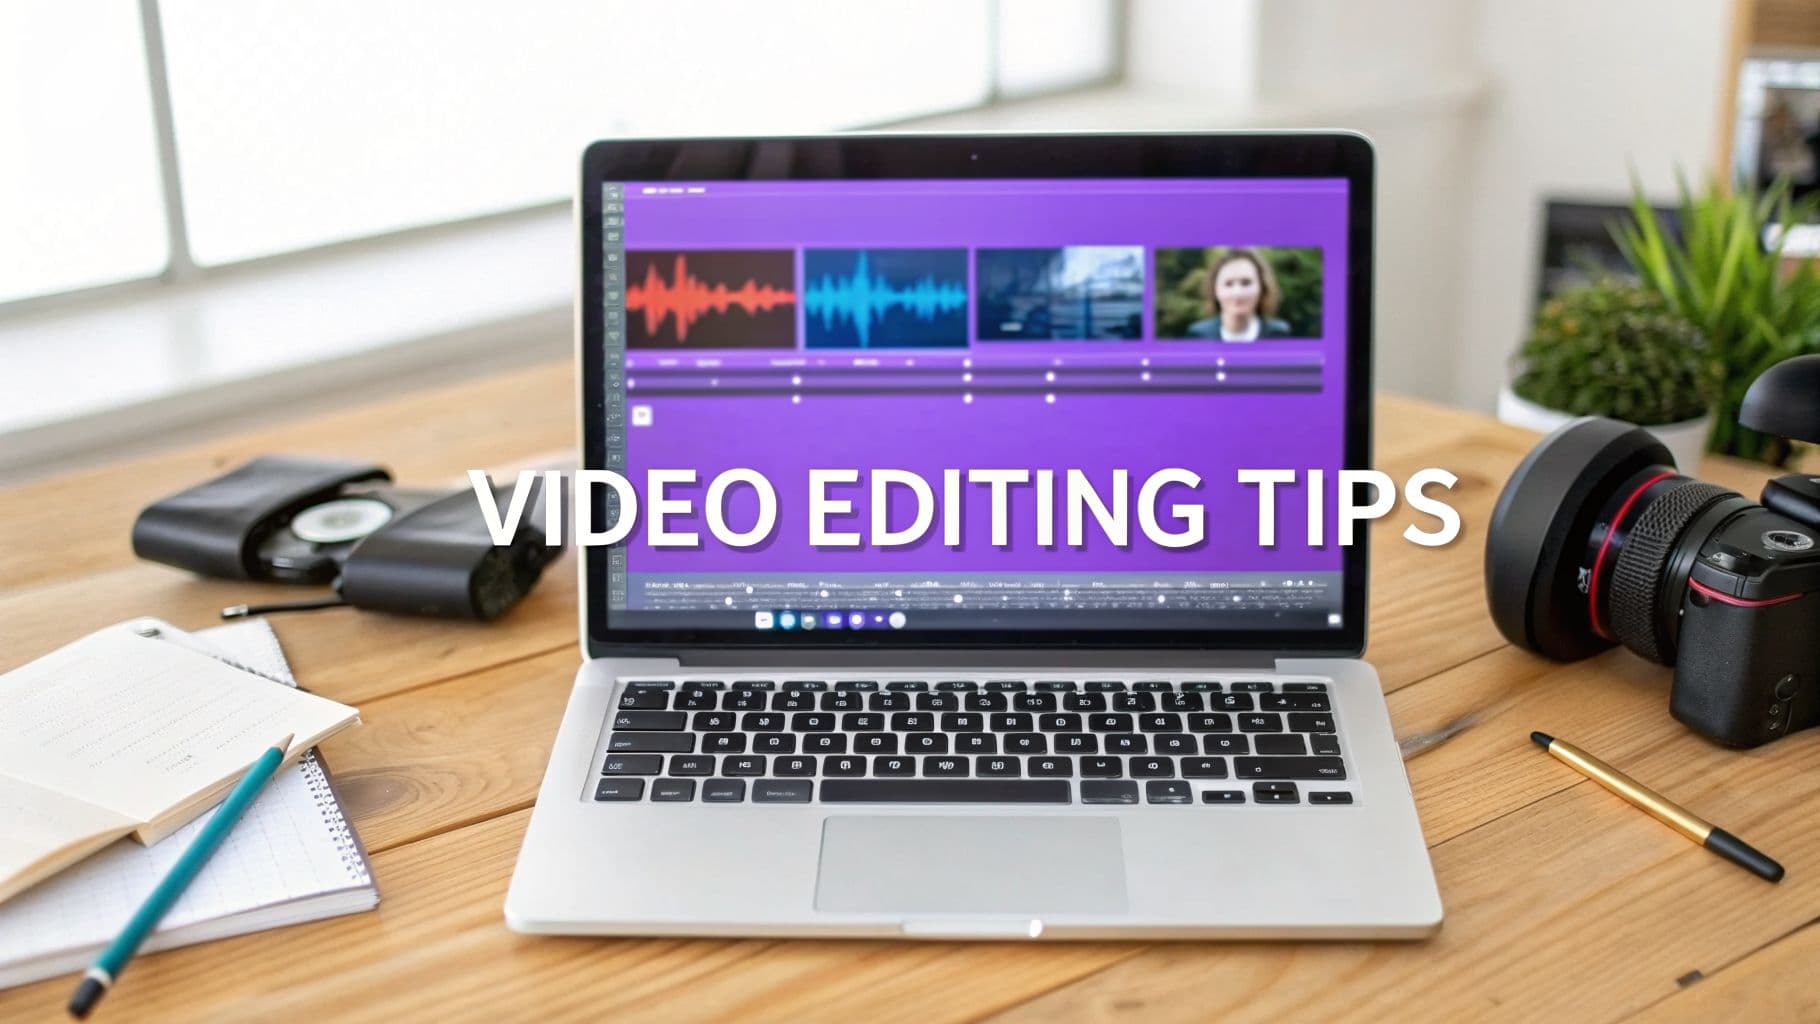
Jumping into video editing can feel overwhelming. Clunky software, confusing timelines, and endless settings often stand between you and a polished final product. Whether you're aiming to create viral lyric videos, manage a professional karaoke channel, or simply share your music with the world, the right techniques can transform a frustrating process into a creative one. This guide provides 10 actionable video editing tips for beginners, designed to bypass common hurdles and accelerate your learning curve.
We'll move beyond generic advice and dive into specific, practical strategies you can implement immediately. You will learn everything from mastering automated lyric syncing with tools like MyKaraoke Video to optimizing your export settings for every social platform. To truly go from novice to pro, selecting the ideal editing software is your first crucial decision, so it's worth exploring the best video editing software for beginners before you even press record.
This roundup focuses on efficiency and impact, covering key areas that many new editors overlook. We will cover:
- Workflow Automation: Syncing lyrics and organizing files to save hours.
- Visual Enhancement: Choosing brand-consistent colors, backgrounds, and typography.
- Technical Optimization: Fine-tuning export settings for platforms like YouTube, TikTok, and Instagram.
- Creative Polish: Using effects and transitions strategically to enhance viewer engagement.
By the end of this list, you'll have a clear roadmap to produce high-quality videos efficiently and confidently, turning complex tasks into manageable steps.
1. Master Automatic Lyrics Syncing to Save Hours of Manual Work
One of the most time-consuming tasks in creating lyric or karaoke videos is manually synchronizing text with the audio. This process often involves painstaking frame-by-frame adjustments to ensure each word appears at the perfect moment. For beginners, this can be an intimidating and tedious roadblock. Fortunately, modern tools offer a powerful solution: automatic lyrics syncing. This technology uses AI to analyze your audio track and intelligently align your provided lyrics to the correct timestamps, transforming a multi-hour task into a matter of minutes.
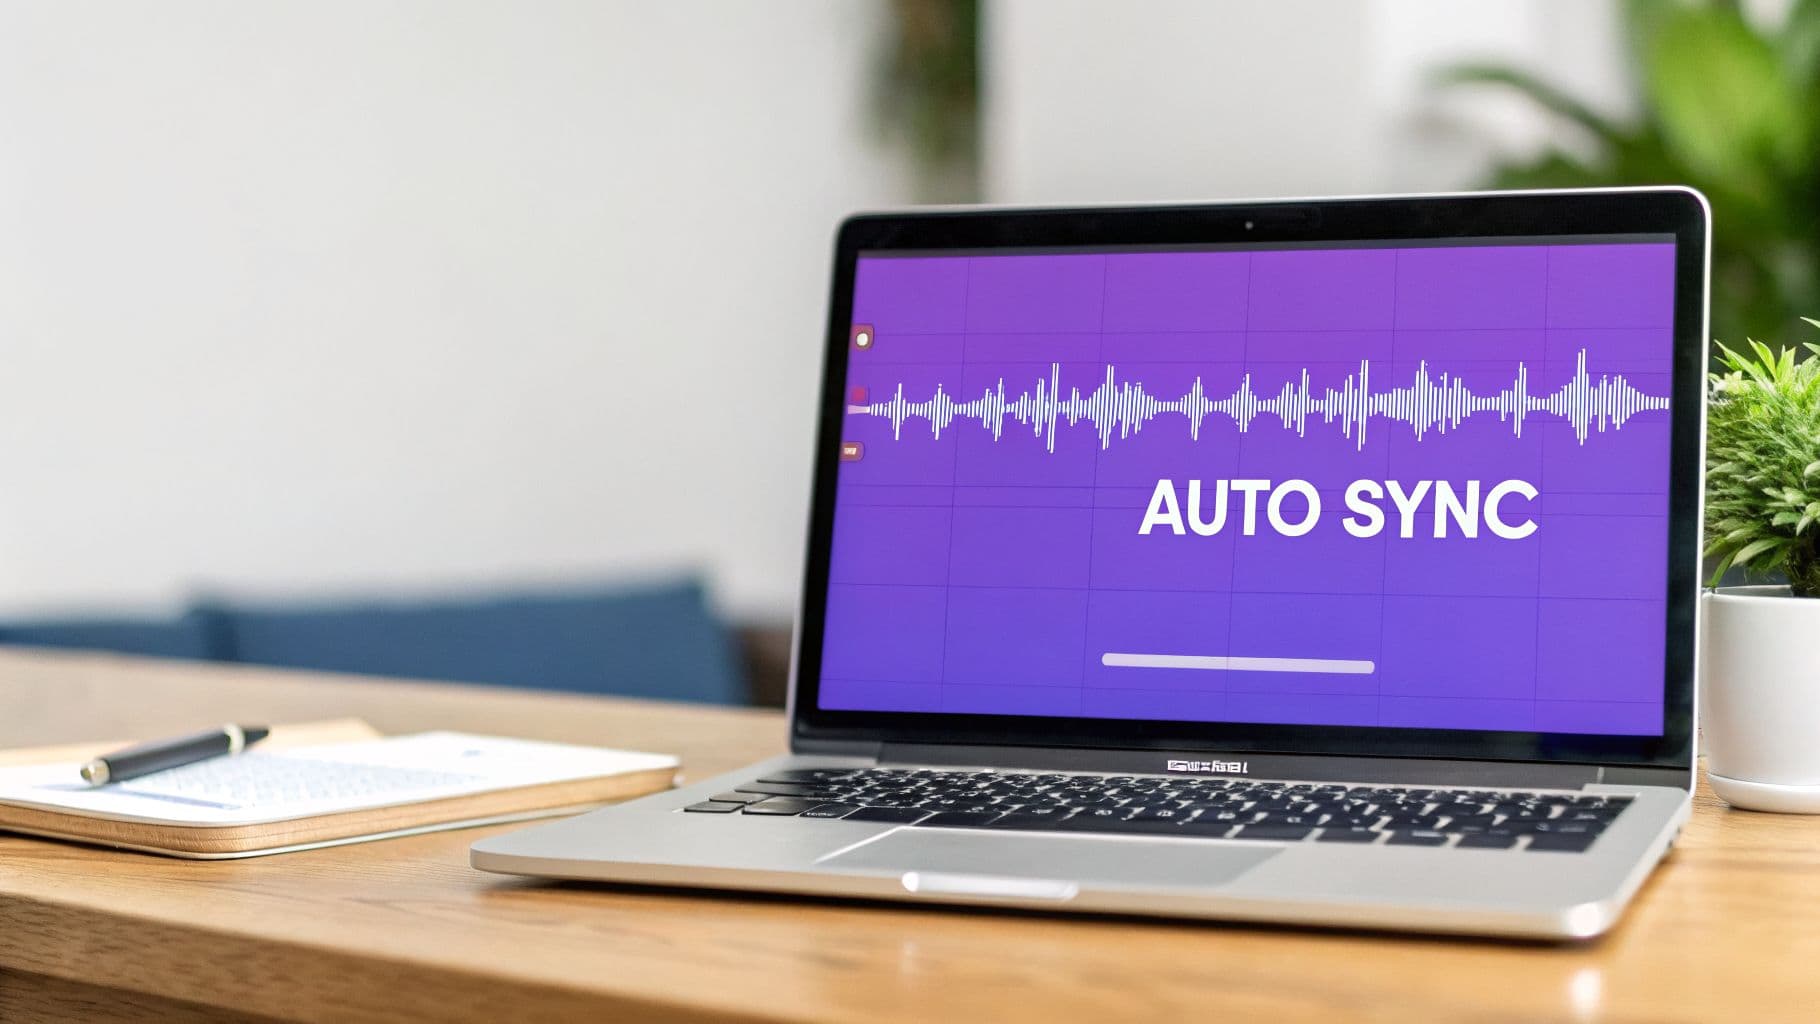
This method is a game-changer for anyone producing content at scale. Karaoke channel creators who need to process dozens of songs weekly can dramatically increase their output. Musicians preparing lyric videos for a new album can focus on creative visuals instead of technical timing. Even social media influencers can quickly produce engaging TikToks or YouTube Shorts with perfectly synced on-screen text, a key element for viewer retention.
How to Get the Best Results
To ensure the AI delivers the most accurate sync possible, follow these actionable tips:
- Prioritize Audio Quality: The AI relies on a clear audio signal to detect vocal timings. Use high-quality audio files, such as MP3s at 320kbps or uncompressed WAV files, for optimal performance.
- Format Your Lyrics Correctly: Before uploading, ensure your lyrics are clean and properly structured. Each line in your text file should correspond to a single lyrical phrase you want displayed on screen.
- Always Review the Preview: No AI is perfect. Always watch the automatically generated preview to catch any minor timing errors. Most tools, like MyKaraoke Video, allow for easy drag-and-drop adjustments to fine-tune the sync.
- Test a Small Section First: If you are new to the process, start by syncing a short song or just one verse. This helps you understand the workflow and how the tool interprets your files before committing to a full-length project.
By adopting this technique early, you can add a professional touch to your projects without the steep learning curve. This is one of the most effective video editing tips for beginners looking to create polished, engaging content efficiently. For a deeper dive, you can explore this guide on how to add lyrics to songs and master the process.
2. Choose the Right Color Scheme and Typography for Brand Consistency
The colors and fonts you choose are far more than simple decorations; they are the foundation of your video's visual identity. Color and typography decisions dramatically impact readability, mood, and professionalism. For beginners, establishing a consistent style guide early is crucial for building a recognizable brand, whether you are a musician, a karaoke channel creator, or a social media influencer. When viewers can identify your content by its look alone, you build trust and a loyal following.
This principle is key to creating a cohesive channel experience. Think of popular karaoke channels that use specific color combinations, like vibrant pinks and purples for K-pop tracks or elegant gold and black for classic ballads. Musicians often extend their album art's aesthetic into their lyric videos by using the same signature fonts and color schemes. This consistency makes your content feel deliberate and high-quality, encouraging viewers to watch more of your videos. For lyric videos, this is especially important for ensuring the text is always clear and easy to read.
How to Get the Best Results
To build a strong visual identity that resonates with your audience, follow these actionable tips:
- Establish a Core Palette: Choose two or three primary colors that reflect your brand's personality and stick to them. Use tools like Adobe Color or Coolors to find complementary shades.
- Prioritize Readability with High Contrast: Your text must be legible. Always place light-colored text on dark backgrounds or dark text on light backgrounds. A common, effective choice is white text with a subtle black outline or drop shadow.
- Select Clear, Legible Fonts: While decorative fonts can be tempting, they are often difficult to read on screen. Stick with clean sans-serif fonts like Arial, Helvetica, or Montserrat for body text. Reserve more stylized fonts for titles only.
- Create a Simple Style Guide: You do not need a complex document. Just a simple note with your color hex codes and font names will ensure every video you produce is consistent. This is one of the most powerful video editing tips for beginners for long-term brand building.
By deliberately choosing your colors and fonts, you move beyond amateur edits and start building a memorable brand. This thoughtful approach ensures your content is not only seen but also remembered.
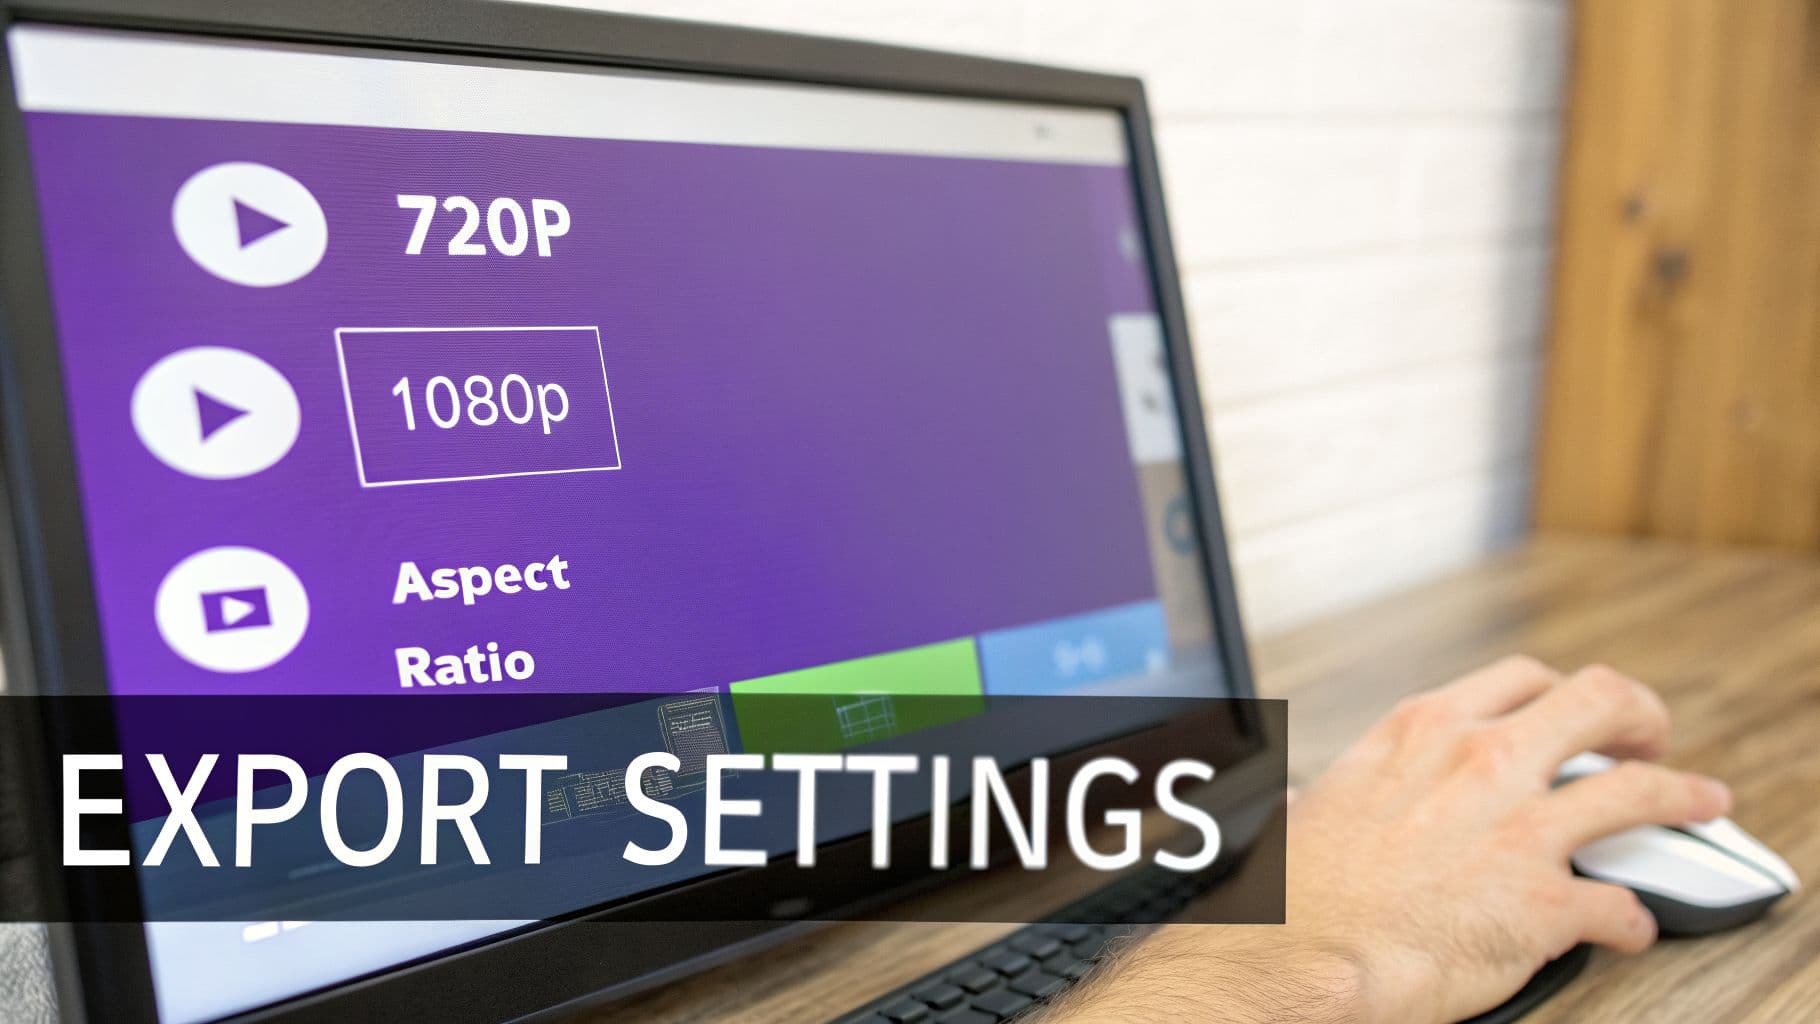
3. Optimize Video Resolution and Export Settings for Different Platforms
After pouring hours into creating the perfect lyric video, the final step is exporting it for the world to see. However, exporting with the wrong settings can ruin all your hard work, resulting in pixelated visuals, black bars, or even upload errors. Different platforms like YouTube, TikTok, and Instagram have unique requirements for video resolution, aspect ratio, and file format. Understanding these technical specifications is crucial for ensuring your content looks professional and performs well everywhere it is shared.
This knowledge is essential for any content creator. A musician releasing a new track needs a 16:9 landscape video for a premiere on YouTube but a 9:16 vertical cut for an Instagram Reel teaser. A karaoke channel owner must know that a 1080p resolution is the standard for crisp text on a TV screen, while a TikTok creator needs to optimize for mobile viewing. Mastering export settings ensures your video adapts to its environment, providing the best possible viewing experience for your audience.
How to Get the Best Results
To ensure your videos look sharp and upload smoothly across all platforms, follow these actionable tips:
- Start with 1080p as Your Standard: Exporting your video at a 1920x1080 resolution (1080p) provides a high-quality baseline that works well for most platforms, from YouTube to Facebook. Use the MP4 format with the H.264 codec for maximum compatibility.
- Match the Aspect Ratio to the Platform: Use a 16:9 aspect ratio for standard YouTube videos and desktop viewing. For mobile-first platforms like TikTok, Instagram Reels, and YouTube Shorts, a vertical 9:16 ratio is essential.
- Keep Your Original Files: Always save your high-quality project files and original source footage. This allows you to re-export your video in different formats later without losing quality.
- Test Your Export: Before you schedule a big release, upload your exported video as a private or unlisted file on your target platform. This allows you to check for any quality issues, compression artifacts, or formatting problems.
Learning to navigate these settings is one of the most important video editing tips for beginners, as it directly impacts the final quality of your work. For a detailed guide on the latest specs, you can explore this resource on social media video specifications to stay up-to-date.
4. Use Transitions and Effects Strategically to Enhance, Not Distract
When first exploring video editing software, the vast library of transitions and effects can feel like a creative playground. However, one of the most common beginner mistakes is overusing them, which can make a video look amateurish and distracting. The key is to use these tools strategically to enhance the viewer's experience, not overwhelm it. A well-placed transition guides the viewer smoothly from one scene to another, while a subtle effect can add atmosphere without pulling focus from the main content, like lyrics or music.
This "less is more" approach is crucial for lyric and karaoke videos where the text is the star. Professional music channels often use simple fade transitions between verses or a gentle text animation that syncs with a beat drop. For event videos or vlogs, a simple dissolve between clips is far more effective than a flashy spin or wipe. The goal is to create a seamless flow that feels intentional and polished, ensuring the audience remains engaged with your message.
How to Get the Best Results
To use transitions and effects like a pro, focus on subtlety and purpose. Follow these actionable tips:
- Stick to Simplicity: Choose one or two simple transition types for your entire video. Fades and dissolves are safe, professional choices that work in almost any context.
- Keep Transitions Short: A transition should be almost unnoticeable. Keep its duration short, typically between 0.3 and 0.5 seconds, to maintain the video's pacing and flow.
- Avoid Distracting Text Effects: For lyric videos, avoid text that spins, bounces, or flies across the screen. These effects make lyrics difficult to read and detract from the song. Instead, use simple fade-in or slide-in animations.
- Maintain Consistency: Using the same transition style throughout your video creates a cohesive and professional look. Save flashy, unique effects for a single, impactful moment if you must use them.
By mastering the art of subtlety, you can elevate your projects from amateur to professional. This is one of the most important video editing tips for beginners because it demonstrates a refined understanding of visual storytelling and audience focus.
5. Master Background Selection and Customization for Visual Appeal
The background of your lyric or karaoke video is far more than just empty space; it sets the entire mood and determines the professional quality of your final product. A poorly chosen background can make lyrics unreadable and distract from the music, while a well-selected one enhances the viewer's experience and reinforces the song's emotional tone. For beginners, mastering background selection is a foundational skill that can dramatically elevate the visual appeal of their work. This involves choosing between solid colors, gradients, images, or even video clips that complement the audio without overpowering the on-screen text.
This principle is key for creating content that connects with a specific audience. For instance, a K-pop karaoke video might use trendy, vibrant gradients to match the genre's high-energy aesthetic. Conversely, a lyric video for a classic ballad could feature a softly blurred photo of the artist to create a sense of nostalgia and intimacy. Wedding karaoke creators often use elegant solid colors or photos of the venue to maintain a sophisticated theme. This careful consideration creates a cohesive and immersive experience, transforming a simple sing-along into a polished piece of visual art.
How to Get the Best Results
To ensure your background enhances your video rather than hinders it, follow these actionable tips:
- Prioritize Contrast and Readability: The most important rule is that your lyrics must be easy to read. Use dark backgrounds with light text or light backgrounds with dark text. Solid colors and subtle gradients are often the safest and most effective choices for beginners.
- Use Images and Videos Wisely: If you use an image or video, make sure it is high-quality and thematically appropriate. Apply a blur effect or a semi-transparent color overlay to reduce visual noise and prevent the background from competing with the lyrics for attention.
- Match the Mood to the Music: Align your background choice with the genre and feel of the song. Use bright, energetic colors for upbeat pop tracks and muted, somber tones for ballads or acoustic pieces. This reinforces the song's emotional impact.
- Maintain Brand Consistency: If you are building a channel, consider using a consistent background style or color palette. Using your brand colors can help reinforce your identity and make your videos instantly recognizable. MyKaraoke Video offers extensive customization options to help you achieve this.
Learning to select and customize backgrounds is one of the most impactful video editing tips for beginners, as it directly affects the professionalism and watchability of your content. By focusing on readability and mood, you can create videos that are not just functional but visually stunning.
6. Synchronize Lyrics Precisely with Musical Beats and Phrasing
While automatic syncing gets you 90% of the way there, true professionalism lies in the final 10%. Advanced beginners can elevate their videos by moving beyond basic word-for-word alignment and learning to synchronize lyrics with the song's musical phrasing, rhythm, and emotional energy. This means adjusting timing to match beat drops, instrumental pauses, and the natural flow of a vocal performance, creating a seamless and immersive experience for the viewer.
This level of precision is what separates amateur lyric videos from polished, professional productions. For karaoke creators, this ensures singers can easily follow the melody and rhythm, not just the words. In music videos, it enhances the artist's message by visually emphasizing key phrases and emotional high points. Even for social media content, syncing text animations to a beat drop can make a video far more engaging and shareable.
How to Get the Best Results
Achieving this level of rhythmic precision requires an active listening approach and a keen eye for detail. Follow these actionable tips:
- Use the Waveform as Your Guide: The visual audio waveform in your editor is your best friend. Look for the peaks and spikes, which often correspond to drum hits and strong beat patterns. Aligning your text to appear just before these peaks creates a powerful, satisfying effect.
- Introduce a Slight Lead Time: In professional karaoke, lyrics often appear slightly before the singer is meant to sing them. A lead time of 50-100 milliseconds gives the singer a moment to prepare. This small adjustment dramatically improves the usability of a karaoke track.
- Listen for Natural Pauses: Pay close attention to where the artist breathes or where the music has instrumental breaks. Aligning the disappearance and appearance of text with these natural gaps makes the visual flow feel more organic and less robotic.
- Sync to Phrasing, Not Just Words: Instead of timing each individual word, try to time entire lyrical phrases. A line should appear as the musical phrase begins and disappear as it ends, matching the cadence of the performance.
By mastering beat and phrase synchronization, you add a layer of polish that viewers can feel, even if they can't articulate why. This is one of the most impactful video editing tips for beginners who want their content to look and feel professionally produced.
7. Organize Project Files and Maintain a Consistent Naming Convention
As you begin your video editing journey, you'll quickly accumulate a large number of files for each project: audio tracks, lyric text files, video clips, and final exports. Without a system, your computer can become a digital mess, making it difficult to find what you need and slowing down your entire workflow. Implementing a structured organization system with a consistent naming convention is a foundational skill that saves time, prevents confusion, and ensures quality control as your content library grows. This practice is crucial for maintaining an efficient production pipeline.
This structured approach is invaluable for creators managing a growing portfolio. Karaoke channel managers with libraries of over 100 songs can instantly locate the correct assets for a specific track. Music producers juggling original mixes, remixes, and acoustic versions can avoid accidentally using the wrong audio file. For freelance creators or those working with clients, a clear system with version history (e.g., "V1_ClientReview," "V2_Final") is essential for managing revisions and delivering the correct final product.
How to Get the Best Results
To build a robust and scalable organization system, follow these actionable tips:
- Create a Master Folder Structure: For each new project, create a main folder. Inside it, create subfolders like
01_Audio,02_Lyrics,03_Projects, and04_Exports. This keeps all related assets neatly contained. - Adopt a Naming Convention: A clear naming scheme is your best friend. A great starting point is
[Date]_[ArtistName]_[SongTitle]_[Version]. For example:2024-10-26_TheBand_OurSong_V1. - Use Version Control: When you revise a video, save it as a new file instead of overwriting the old one. Append version numbers like
V1,V2, or descriptors like_draftand_finalto track your progress and easily revert to a previous state if needed. - Archive and Back Up: Once a project is complete and uploaded, move its folder to an
_Archivedirectory to keep your active workspace clean. Regularly back up all your project files to an external hard drive or a cloud storage service to protect against data loss.
This organizational discipline is one of the most impactful video editing tips for beginners because it establishes a professional workflow from the very start. It allows you to work faster, avoid frustrating mistakes, and scale your video production efforts seamlessly.
8. Preview Content in Real-Time to Catch Issues Before Publishing
A common mistake many beginners make is exporting their project immediately after the final edit. The real-time preview feature in your editing software is your last line of defense against easily avoidable errors. This function allows you to see exactly how your karaoke or lyric video will appear to your audience before committing to the final render. It’s a critical step for catching timing issues, poor color contrast, text readability problems, and other mistakes that can detract from the viewer experience.

This quality control check is invaluable across different use cases. A karaoke channel creator can spot a subtle lyric desynchronization that was missed in the timeline editor, saving them from having to re-upload to YouTube. A musician can test their new lyric video on a phone screen to ensure the color choices are readable, even in bright environments. Similarly, a social media manager can preview a video destined for Instagram Stories to confirm it looks good in a vertical format before posting. This habit ensures a professional, polished final product every time.
How to Get the Best Results
To make your preview process as effective as possible, integrate these habits into your workflow:
- Preview the Full Video: Always watch the entire video from start to finish at least once before you export. Stopping and starting can make you miss subtle flow or pacing issues.
- Test on Actual Devices: Don't just rely on the preview window in your editor. If possible, watch the preview on the devices your audience will use, such as a smartphone, tablet, and desktop computer, to check for inconsistencies.
- Focus on Text Readability: Pay special attention to how text and lyrics appear on small screens. Ensure the font is large enough and the color contrast is strong enough to be read easily against the background.
- Verify Audio and Visual Sync: Listen closely for any audio distortions or synchronization drifts during playback. The preview is the perfect time to confirm that your automatically synced lyrics are perfectly aligned with the vocals.
Adopting this simple check is one of the most powerful video editing tips for beginners. It bridges the gap between how a project looks in your editor and how it will be experienced by the world, helping you publish content with confidence.
9. Use Keyboard Shortcuts and Workflow Optimization to Increase Editing Speed
One of the biggest differentiators between a novice and a seasoned video editor isn't fancy effects; it's speed. Manually clicking through menus for every single action, from playing a clip to trimming a timeline, adds up to hours of wasted time. By mastering keyboard shortcuts and optimizing your workflow, you can slash your editing time, allowing you to focus more on creativity and produce content much faster. This approach transforms editing from a slow, click-heavy chore into a fluid, efficient process.
This efficiency is crucial for content creators who need to maintain a consistent output. Professional karaoke channels that process over ten videos daily rely on optimized workflows to meet their demanding schedules. Similarly, viral content creators use templates to rapidly produce multiple variations of a trending video. For musicians, a streamlined process means they can quickly release lyric videos for trend-based content, capturing audience interest before it fades.
How to Get the Best Results
To integrate these speed-boosting habits into your editing, follow these actionable tips:
- Start with the Essentials: Don't try to learn every shortcut at once. Begin with 5-10 of the most common commands you use, such as play/pause, making a cut, navigating the timeline, and undoing a mistake.
- Create a Physical Cheat Sheet: Write down your essential shortcuts and post the list near your monitor. Having a physical reference helps build muscle memory much faster than searching through digital menus.
- Use Project Templates: For recurring projects like lyric videos, create a template. A template can have your branding, preferred text styles, and background elements already in place, saving you setup time on every new video.
- Batch Your Tasks: Group similar tasks together. For instance, sync the lyrics for all your videos first, then go back and customize the visual elements for all of them. This "assembly line" approach minimizes mental context switching and increases focus.
Adopting this mindset early is one of the most impactful video editing tips for beginners. The time you invest in learning these efficiencies will pay dividends in productivity. As you get comfortable, explore options within the best video editing software for beginners that allow you to customize shortcuts to match your personal workflow.
10. Publish Strategic Metadata and Optimize Videos for Discoverability
Creating a visually stunning lyric or karaoke video is only half the equation; if no one can find it, your hard work goes unseen. Beginners often overlook metadata, yet it is the single most important factor for discoverability on platforms like YouTube. Strategic metadata, including your title, description, and tags, acts as a signpost for platform algorithms, helping them understand your content and recommend it to the right audience. Proper optimization ensures your videos appear in search results, suggested video sidebars, and home feeds, directly fueling channel growth.
This process is what separates stagnant channels from those that grow consistently. For example, a karaoke channel that titles a video "New Song" will get lost, while one titled "Taylor Swift - Cruel Summer (Karaoke Version with Lyrics)" will attract targeted search traffic. Similarly, a musician who includes the song title, artist name, and "official lyric video" in the description helps YouTube categorize the content correctly, boosting its visibility. Even social media creators using trending songs can maximize reach by including the song title and artist in their video's metadata.
How to Get the Best Results
To make your videos easily discoverable and increase your click-through rate, apply these essential metadata practices:
- Craft Keyword-Rich Titles: Your title is the most critical piece of metadata. Always include the artist's name, the song title, and a clarifying term like "Karaoke," "Lyric Video," or "Acoustic Cover."
- Write Compelling Descriptions: The first 150-200 characters of your description are crucial as they appear in search results. Use this space to repeat your main keywords naturally and entice viewers to click. Use the rest of the description to add credits, link to social media, and provide more context.
- Use Relevant Hashtags: Add 5-10 targeted hashtags in your video's description or dedicated tag section. Combine broad tags (#Karaoke, #Lyrics) with niche ones specific to the artist or genre (#PopKaraoke, #IndieMusic).
- Design High-Impact Thumbnails: A great thumbnail can dramatically improve your click-through rate. Use high-contrast colors, clear and readable text, and an expressive face when possible. A consistent thumbnail style also builds brand recognition.
- Analyze Your Competitors: Look at the top-performing videos for the same song or artist. Study their titles, descriptions, and tag strategies to understand what works and adapt successful patterns for your own content.
Mastering metadata is one of the most powerful video editing tips for beginners because it amplifies the reach of every single video you produce.
Beginner Video Editing: 10-Tip Comparison
| Feature | Implementation Complexity 🔄 | Resource Requirements ⚡ | Expected Outcomes 📊⭐ | Ideal Use Cases 💡 | Key Advantages ⭐ |
|---|---|---|---|---|---|
| Master Automatic Lyrics Syncing to Save Hours of Manual Work | Low — AI-driven with occasional manual tweaks | Moderate — high-quality audio/lyrics and internet/compute | Large time savings; accurate, consistent alignment ⭐⭐⭐⭐ | Karaoke channels, lyric videos, short-form viral clips | Saves hours vs. manual syncing; minimal skill required |
| Choose the Right Color Scheme and Typography for Brand Consistency | Medium — requires design decisions and a style guide | Low — fonts, color palettes, simple assets | Stronger brand identity and improved readability ⭐⭐⭐ | Brand-focused creators, musicians, ongoing series | Professional, cohesive look; better viewer retention |
| Optimize Video Resolution and Export Settings for Different Platforms | Medium — multiple presets and platform rules to follow | Moderate — storage, longer exports for high-res files | Optimal playback across platforms; fewer upload issues ⭐⭐⭐⭐ | Multi-platform publishers (YouTube, TikTok, IG) | Maintains quality while managing file size and compatibility |
| Use Transitions and Effects Strategically to Enhance, Not Distract | Low–Medium — selective application and timing required | Low — effect presets; may slightly increase file size | Polished visuals when restrained; avoids distraction ⭐⭐⭐ | Videos needing subtle polish, verse/section changes | Guides attention, improves pacing without clutter |
| Master Background Selection and Customization for Visual Appeal | Low — choose/combine backgrounds thoughtfully | Low–Moderate — image/video assets; possible licensing | Enhanced mood, cohesion, and text readability ⭐⭐⭐ | Genre-matched lyric videos, branded content | Sets tone, improves contrast and perceived quality |
| Synchronize Lyrics Precisely with Musical Beats and Phrasing | High — detailed manual timing and musical judgement | Moderate — time, waveform/beat tools, repeated passes | Highest sync accuracy; professional singability ⭐⭐⭐⭐ | Professional karaoke channels, beat‑synced viral clips | Superior timing, tighter viewer engagement and usability |
| Organize Project Files and Maintain a Consistent Naming Convention | Low — initial setup and discipline required | Low — storage and basic organization tools | Faster retrieval, fewer errors, scalable workflow ⭐⭐⭐ | High-volume creators, collaborative teams | Prevents loss/overwrites; streamlines collaboration |
| Preview Content in Real-Time to Catch Issues Before Publishing | Low — built-in preview and device checks | Moderate — playback performance; device testing time | Fewer publish errors; higher final quality ⭐⭐⭐⭐ | Final QA step before export and publishing | Catches timing/color/readability issues early; reduces rework |
| Use Keyboard Shortcuts and Workflow Optimization to Increase Editing Speed | Medium — learning curve and customization time | Low — time investment, templates, shortcut config | Significant speed gains (30–50%) with practice ⭐⭐⭐ | Creators scaling production or facing tight turnaround | Major time savings; consistency through templates |
| Publish Strategic Metadata and Optimize Videos for Discoverability | Medium — requires SEO and platform knowledge | Low–Moderate — time for keywords, thumbnails, templates | Increased organic discovery, CTR and channel growth ⭐⭐⭐⭐ | Growth-focused channels, creators prioritizing reach | Boosts search rankings and recommendations; improves CTR |
Start Creating Your Best Videos Today
You've just navigated a comprehensive roadmap of essential video editing tips for beginners, designed to take you from a novice editor to a confident video creator. We've moved beyond the generic advice, focusing instead on the strategic pillars that underpin professional-quality content. The journey we've taken covers the full spectrum of video production, from initial organization to final publication and discovery.
By now, you understand that effective video editing is not just about cutting clips together. It's a blend of technical skill, creative vision, and strategic workflow management. The tips provided in this guide are interconnected, each one reinforcing the others to build a powerful, efficient editing process. Mastering these concepts will transform how you approach every project.
From Theory to Tangible Results
Let's distill the most crucial takeaways from our list. The core message is to work smarter, not just harder. This philosophy is the golden thread connecting every tip we've discussed:
- Embrace Automation and Efficiency: The future of editing involves leveraging smart tools. As we saw with automatic lyrics syncing and the use of keyboard shortcuts, your most valuable asset is time. Automating repetitive tasks frees you up to focus on the creative aspects of your story.
- Build a Cohesive Brand Identity: Your videos are a reflection of your brand. By consciously choosing your color schemes, typography, and backgrounds, you create a consistent and memorable viewing experience. This is what separates amateur content from professional-looking productions that build a loyal audience.
- Prioritize Technical Excellence: The small details make a big difference. Optimizing export settings for each platform ensures your hard work looks its best everywhere. Likewise, precise audio and lyric synchronization isn't just a technical task; it's fundamental to viewer engagement and immersion, especially in music-focused content.
Key Insight: The difference between a good video and a great video often lies in the details you master before you even start the creative editing process, such as file organization and workflow optimization.
Your Actionable Path Forward
Feeling overwhelmed by the sheer number of video editing tips for beginners? Don't be. The goal isn't to implement all ten strategies overnight. The path to mastery is incremental. Here is your practical, step-by-step plan to start applying what you've learned today:
- Choose Your "One Thing": For your very next video project, pick just one tip from this list to focus on. Perhaps it's creating a strict file naming convention from the outset. Or maybe it's dedicating time to learn five new keyboard shortcuts.
- Practice Deliberately: Don't just do the tip; actively think about how it improves your process. If you're working on strategic transitions, ask yourself, "Does this effect serve the story, or is it a distraction?" This mindful practice builds strong editing instincts.
- Layer on New Skills: Once that first tip becomes second nature, add another to your next project. Layering skills incrementally prevents burnout and ensures each new technique is properly absorbed into your workflow.
This journey is a marathon, not a sprint. The tips and strategies outlined are not just quick fixes; they are foundational principles that will serve you throughout your entire content creation career. From organizing your project files to optimizing your metadata for search, each step you master becomes a permanent part of your professional toolkit. By applying these video editing tips for beginners consistently, you are not just making better videos; you are building a sustainable system for success and growth. Stop waiting for the perfect moment or the perfect skill set. Start creating today, apply these lessons, and watch as your abilities and your audience evolve together.
Ready to put these principles into action without the steep learning curve? MyKaraoke Video is designed to handle the heavy lifting, from AI-powered lyric syncing to professional-grade templates, so you can focus on creativity. Start creating stunning karaoke and lyric videos in minutes at MyKaraoke Video.